How to share VPN connection over WiFi using your Mac
KeepSolid VPN Unlimited app is available for all major platforms like macOS, Windows, Linux, iOS, and Android. But what if your devices do not support VPN connections and you want those covered as well? No worries! You can either configure your router (check out the relevant guides in the Router section of our Manuals), or use the Network Sharing option on your Windows or macOS device. This manual will guide you on how to share VPN connection on your Mac. Let’s get started!
The whole process can be split into two stages. First, you need to configure connection to a VPN server via L2TP/IPSec protocol. Then, enable Internet Sharing itself.
I. How to configure L2TP/IPSec connection on macOS
I. How to configure L2TP/IPSec connection on macOS
At first please get the necessary configuration files in your User Office. Our guide on how to manually create VPN configurations will help you to figure that out. You need to select L2TP/IPSec option in Protocols section.
After that, follow the below instruction:
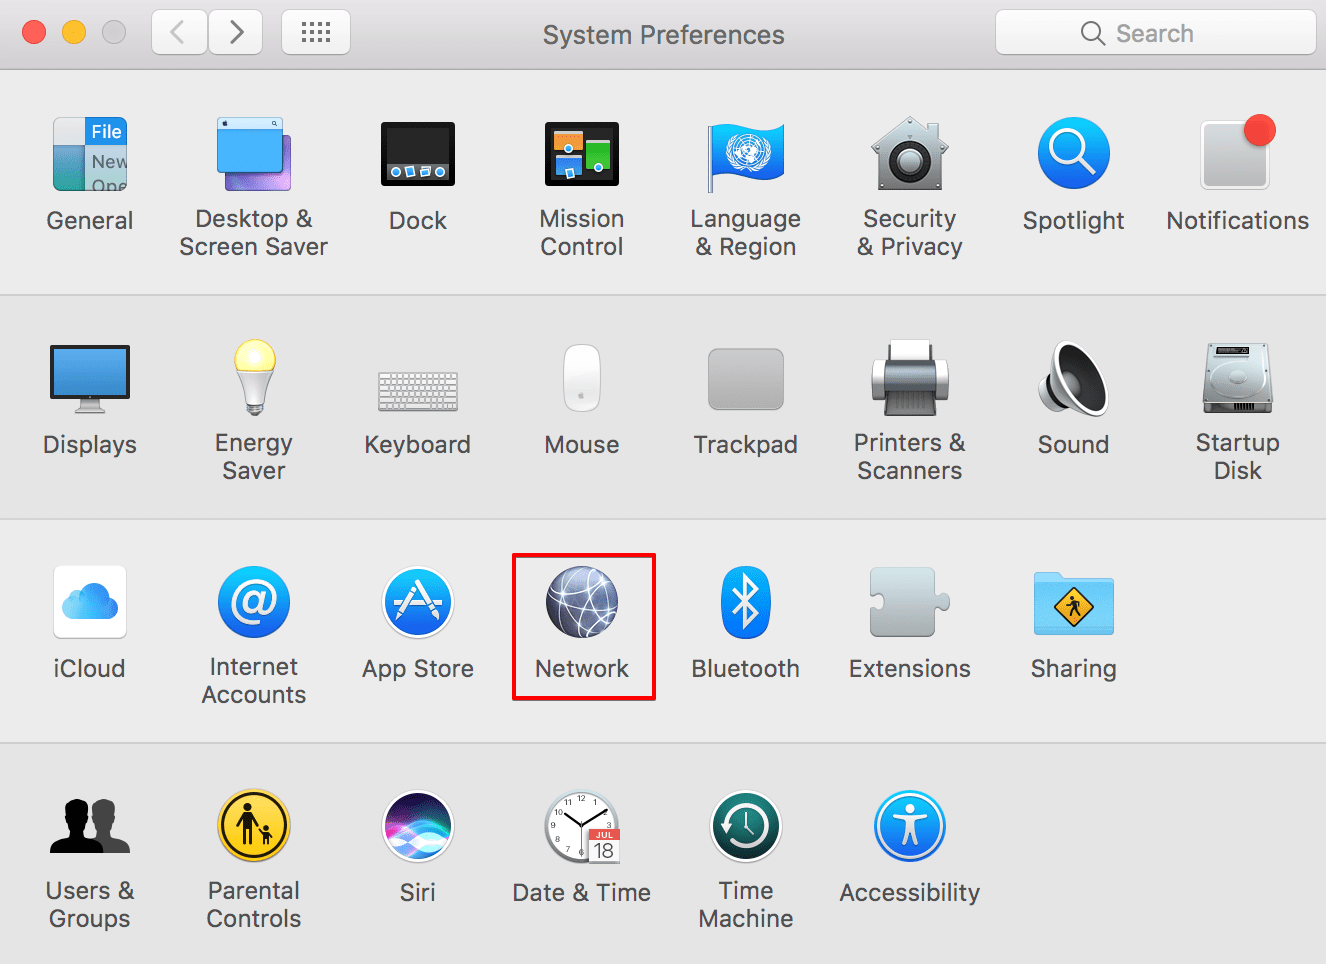
1. Go to System Preferences > Network.
2. Click ![]() to create a new service.
to create a new service.

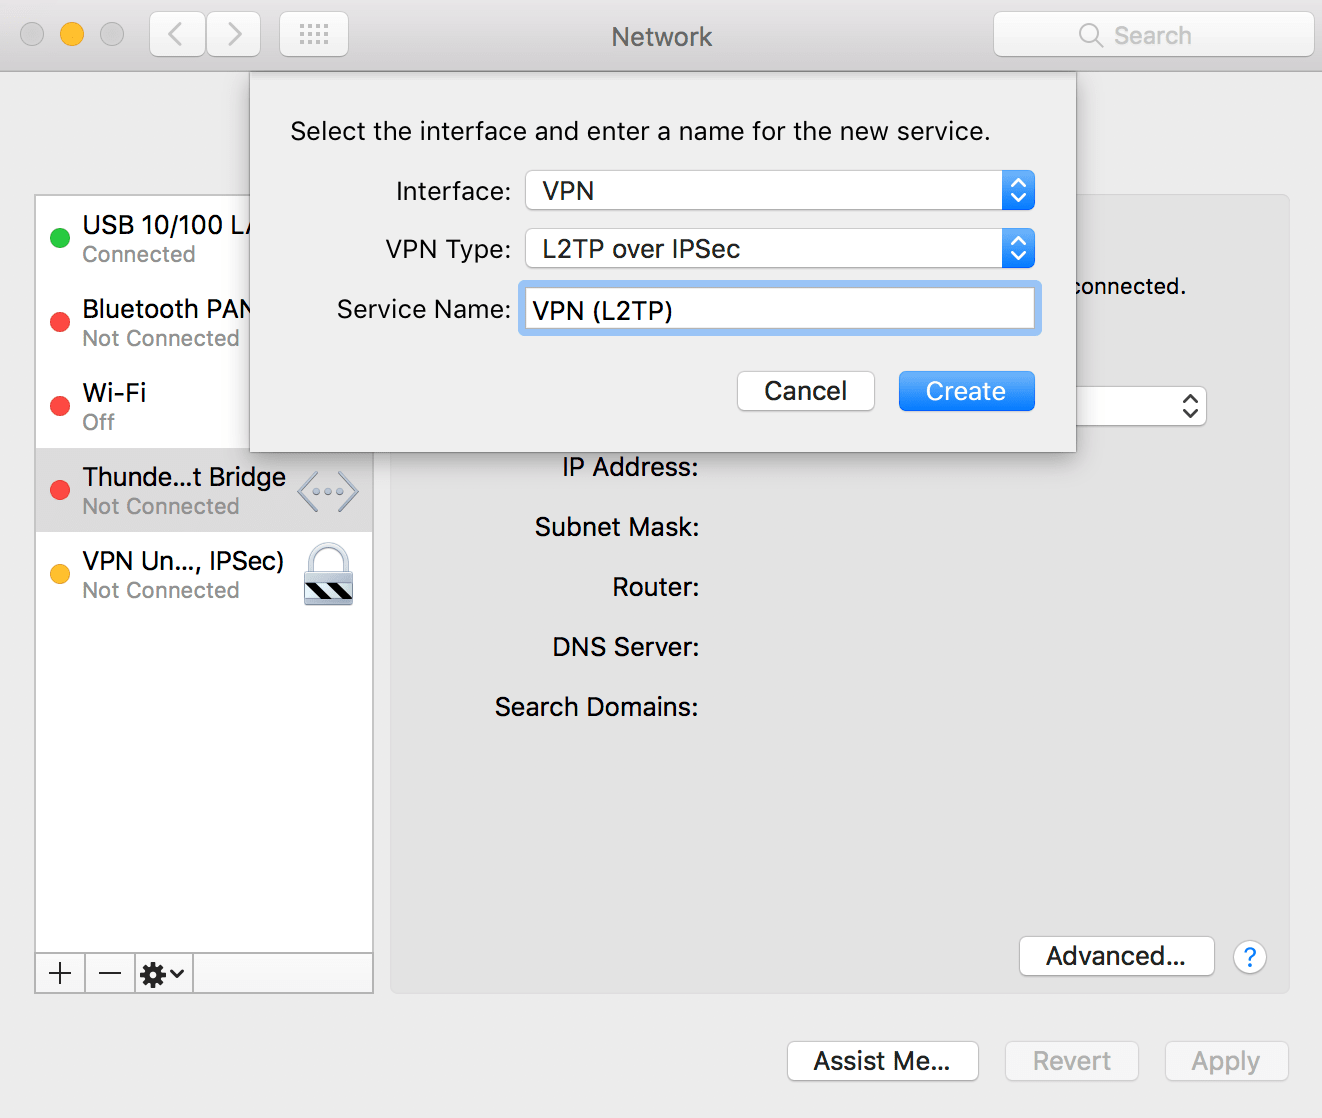
3. Set the following data:
-
Select VPN for Interface.
-
Select L2TP over IPSec for VPN Type.
-
Enter the desired Service Name, for instance, VPN Unlimited (IPSec).
When you finish, click Create.
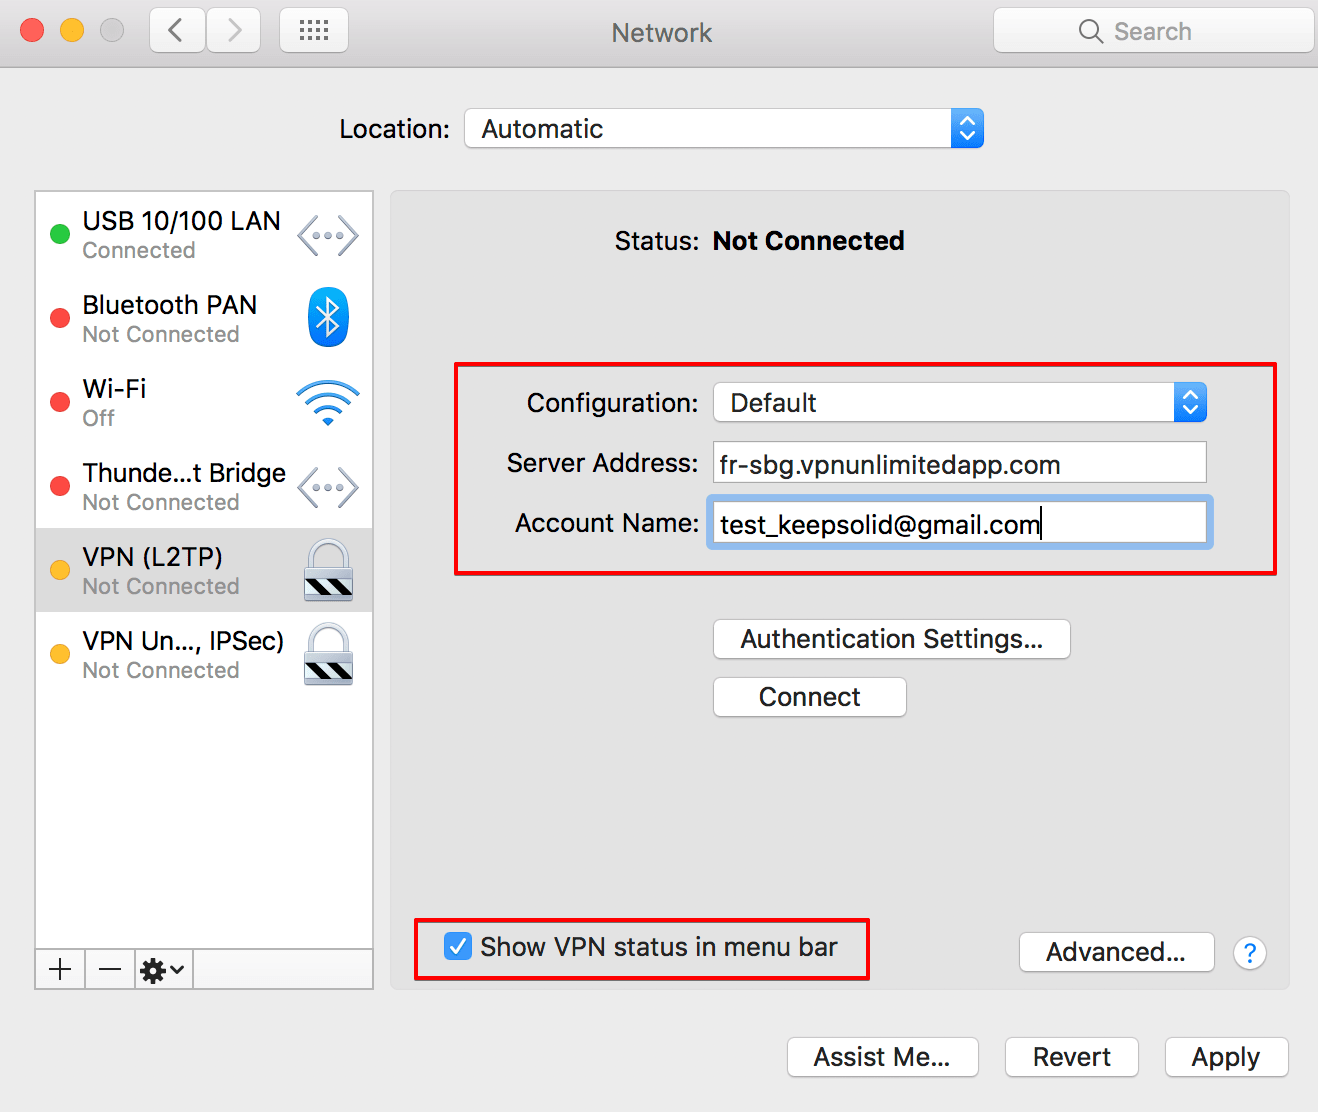
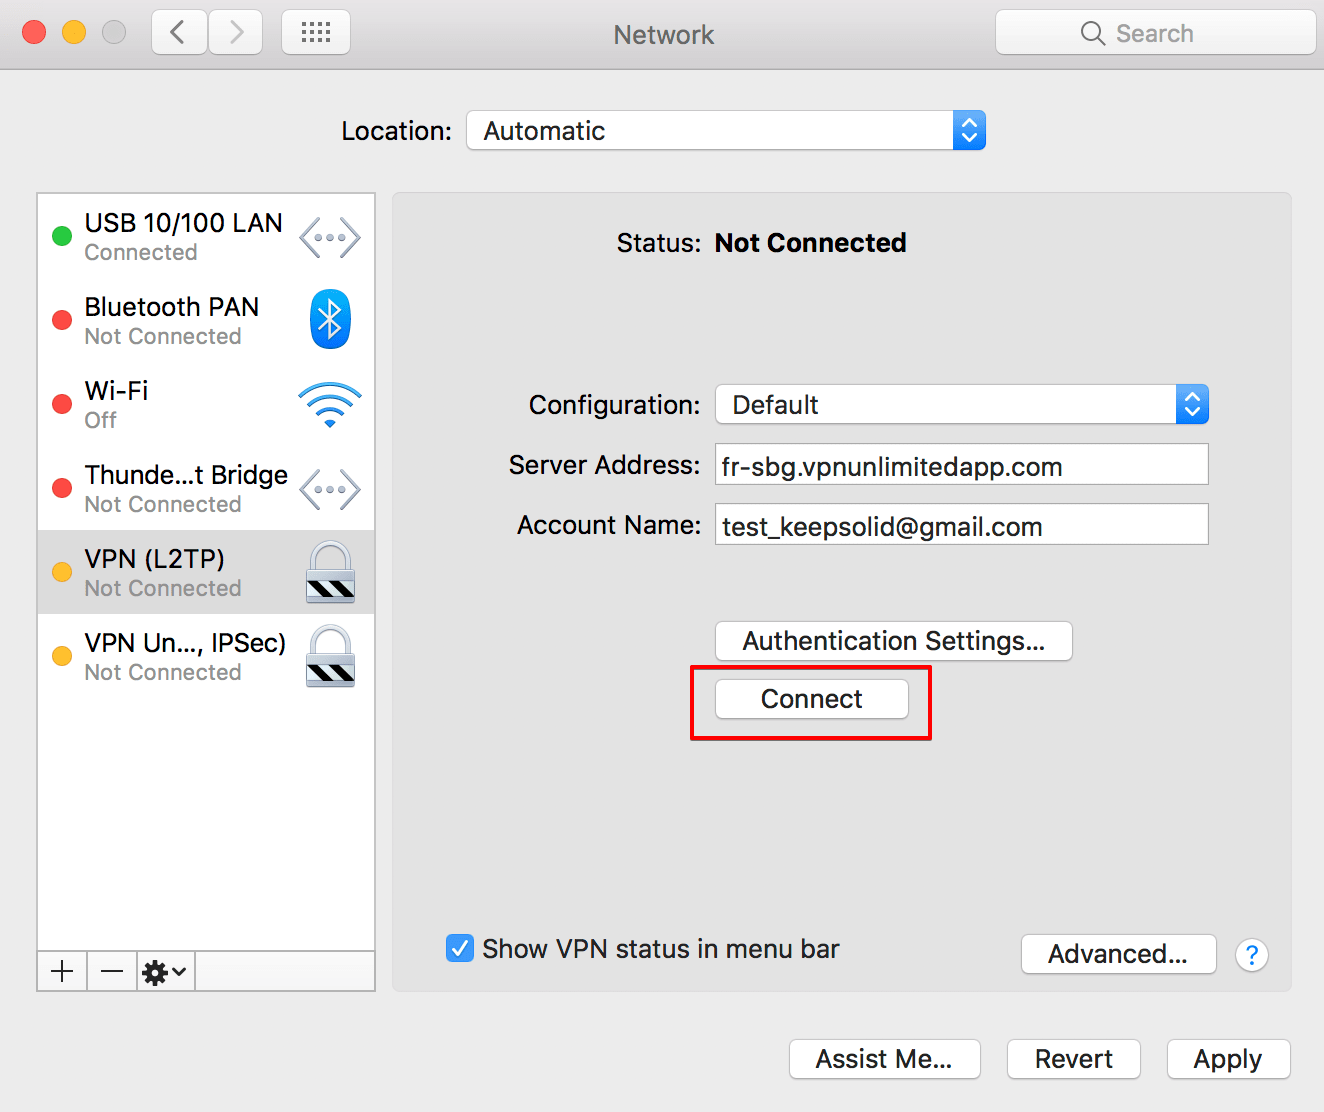
4. Input the following data:
-
Configuration: Default.
-
Server Address: enter the selected server domain name.
-
Account Name: enter your login from the generated VPN configurations.
-
Set a checkbox for Show VPN status in menu bar.
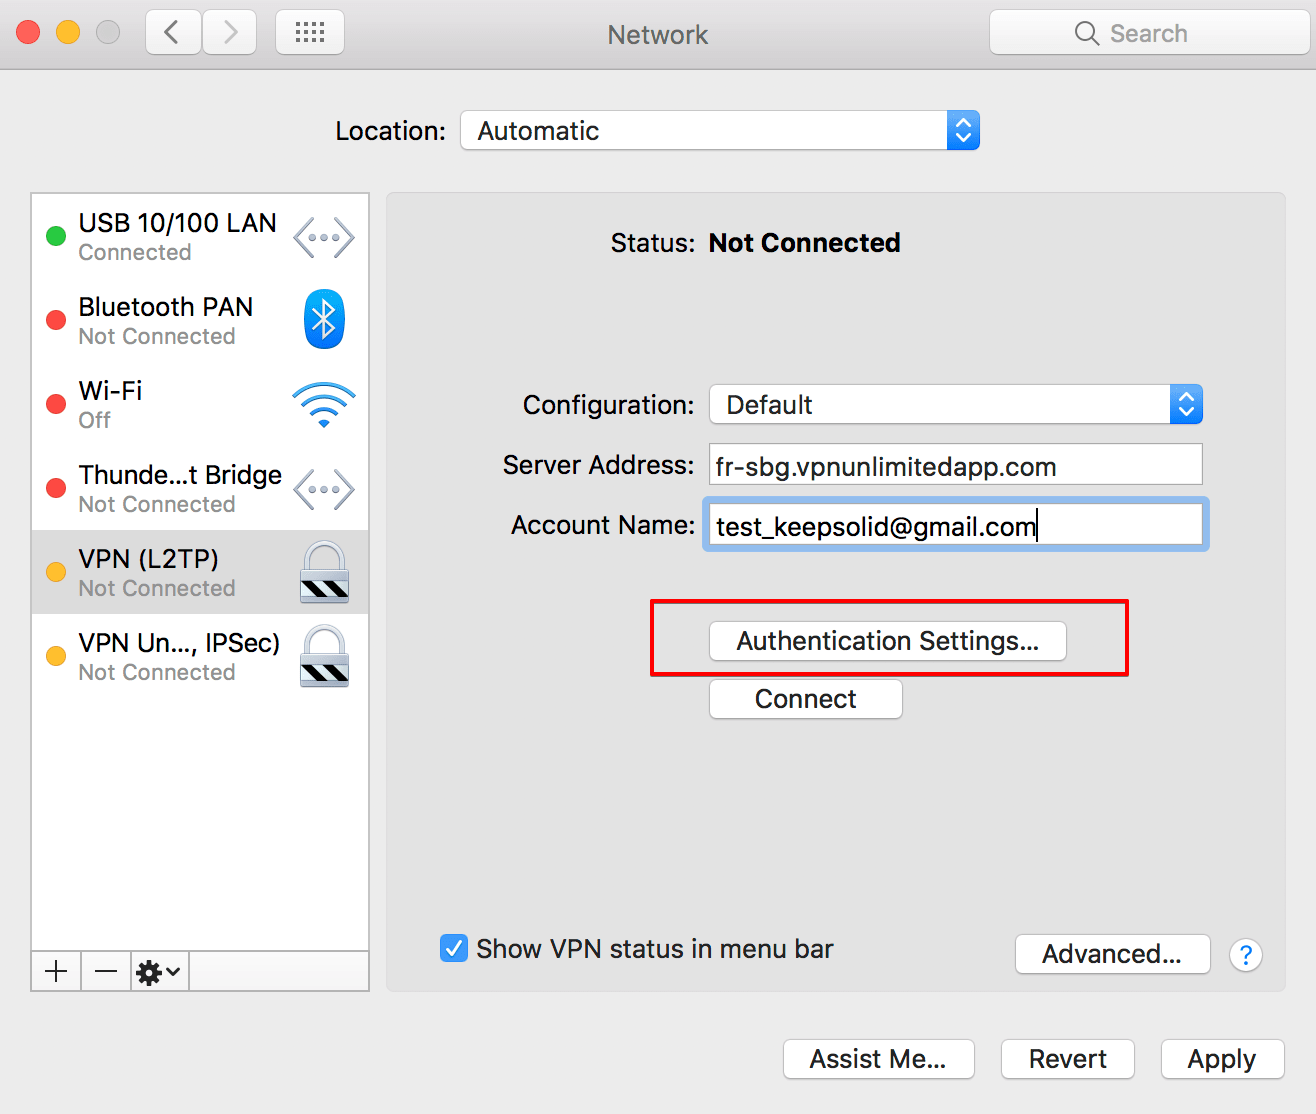
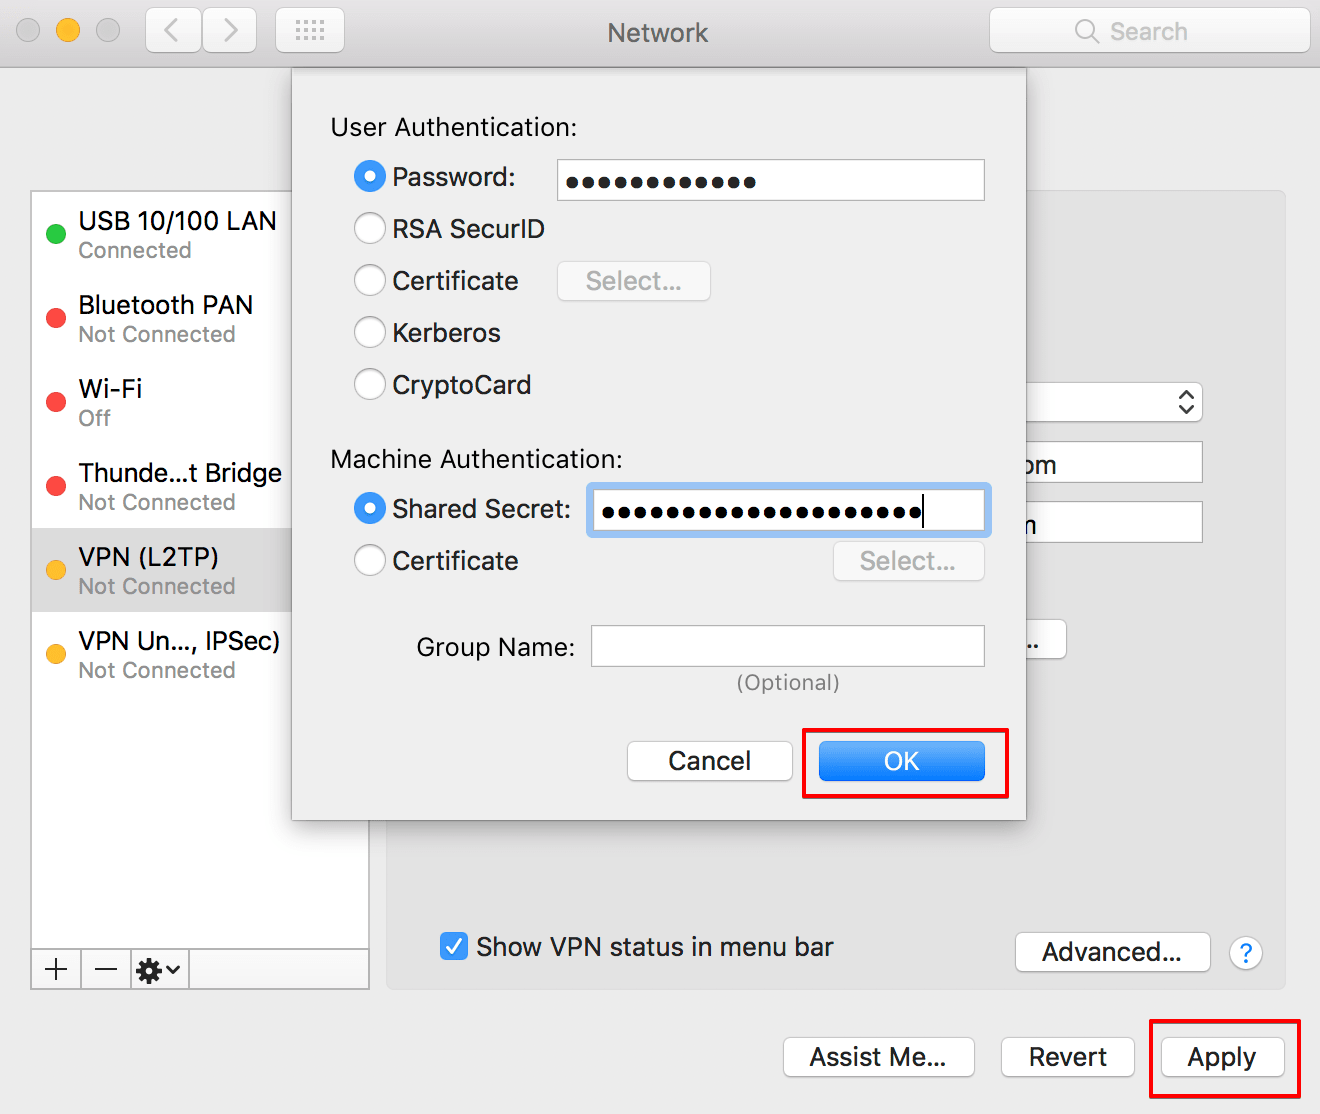
5. On the same screen, click Authentication Settings and input the following data:
-
Password: use the password you’ve generated in the User Office.
-
Shared Secret: you can find the Shared Secret in psk section of the generated VPN configuration.
When you finish, click OK and then Apply.
6. Next, click Advanced… Check the box for Send all traffic over VPN connection, then click OK.


7. Click Connect and the VPN connection will be established in few seconds.
That's about it. Now you have a running VPN connection through the IPSec protocol and can proceed to enabling Internet Sharing.
Important! Please note that you will need to configure your device using the generated settings by yourself at your own risk.
II. How to enable Internet Sharing
Once you’ve connected to a VPN server, you need to enable Internet Sharing on your Mac.
Note: Your Mac needs to be connected to the internet via Ethernet cable in order to share the VPN connection via WiFi.
All you need is to follow these easy steps:
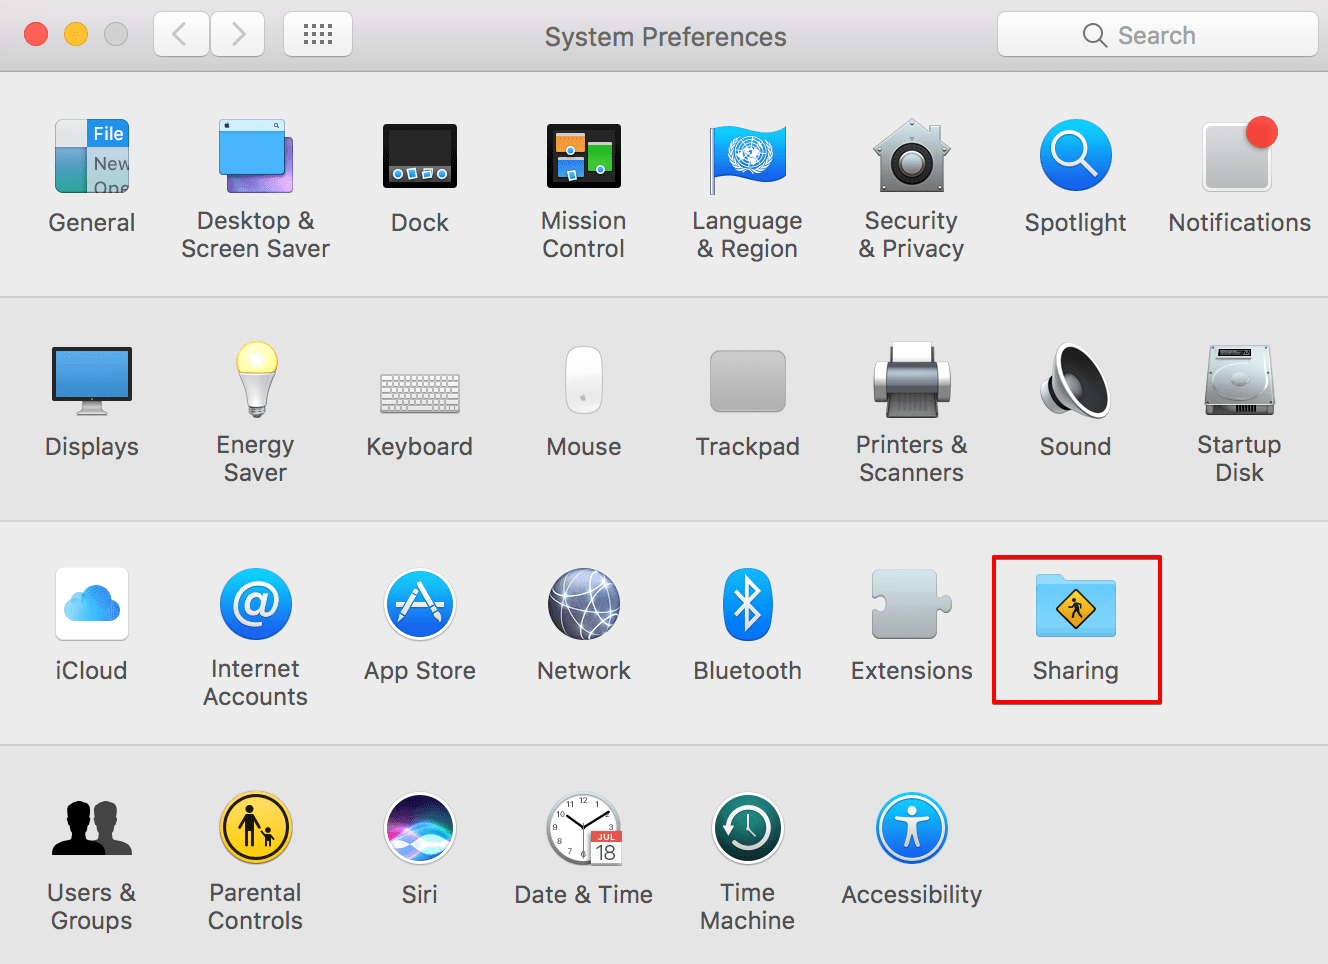
1. Go to System Preferences > Sharing.
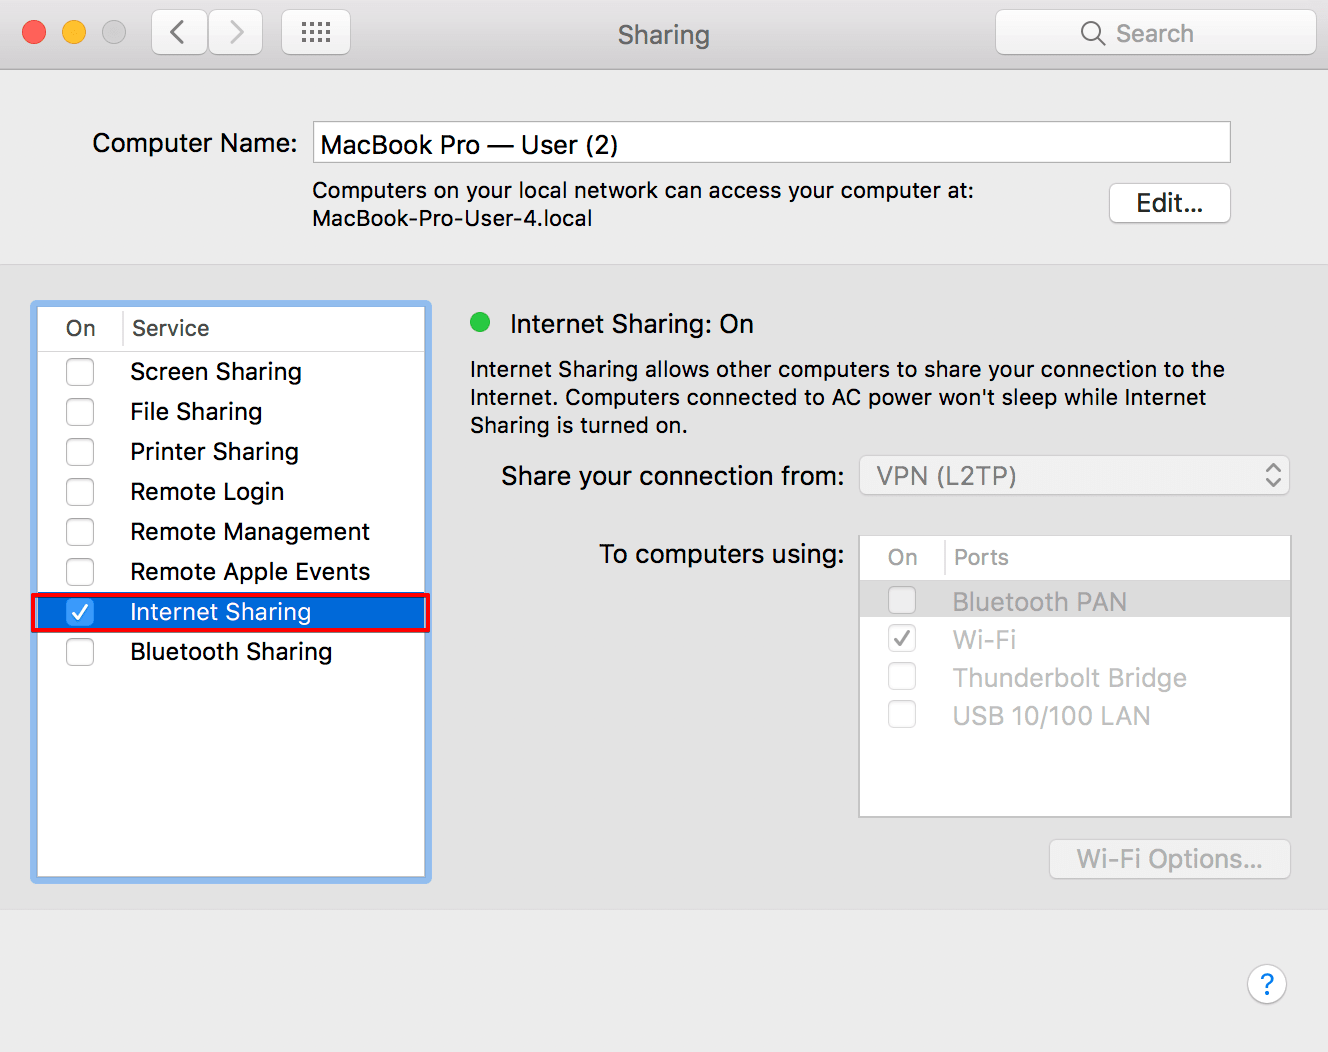
2. In the Sharing menu, go to Internet Sharing (do not enable it yet):
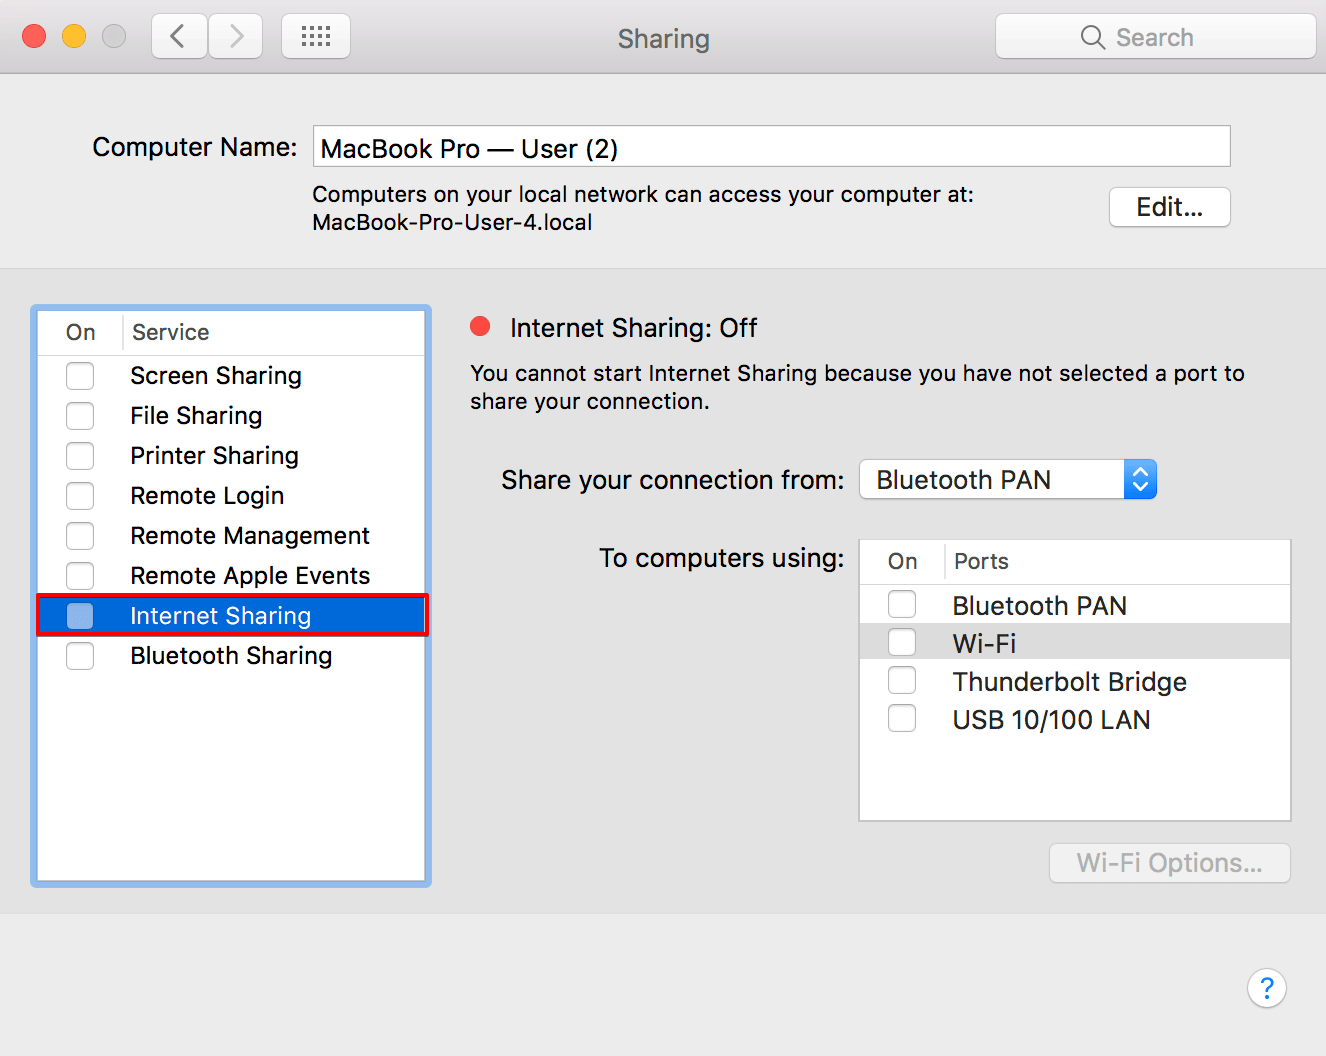
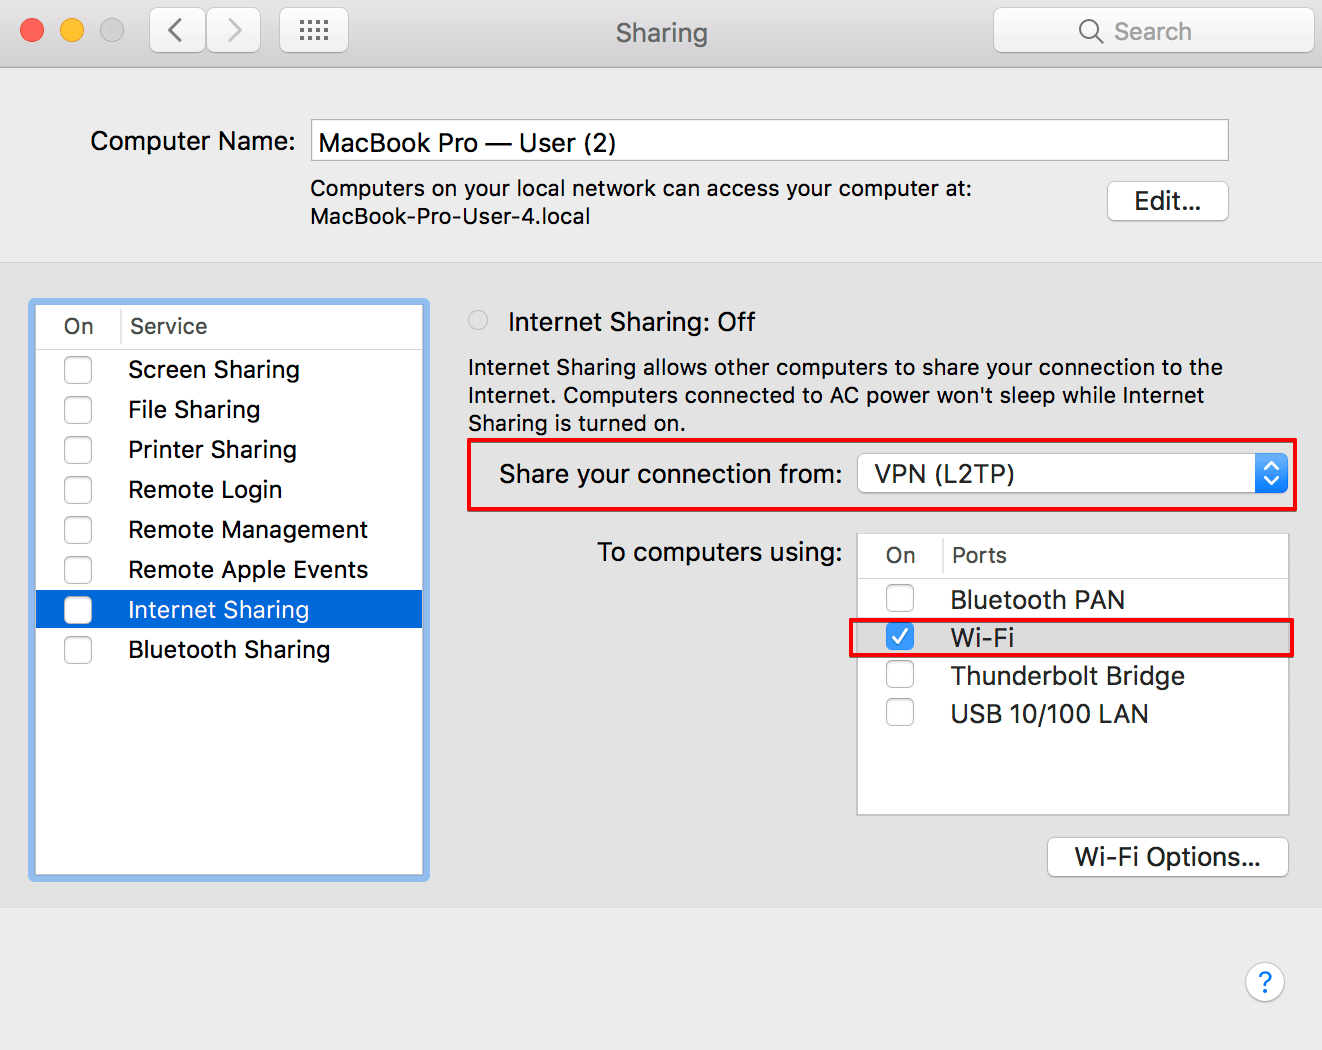
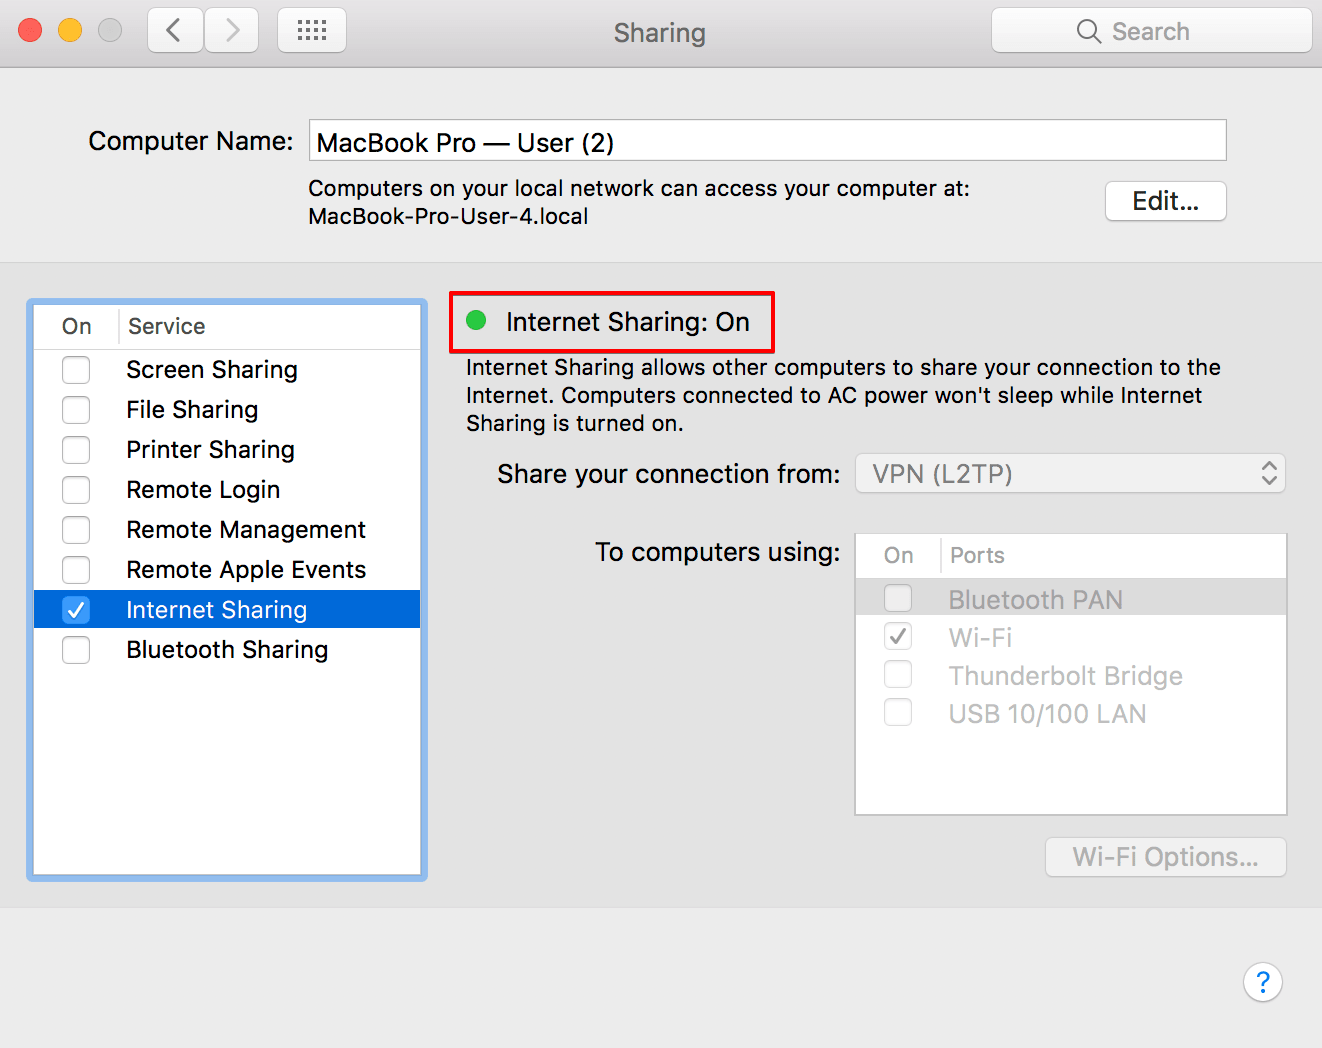
3. In the Internet Sharing section, you will see the following options:
-
Share your connection from: in the drop-down menu choose the VPN connection, that you’ve created.
-
To computers using: check the box for Wi-Fi.
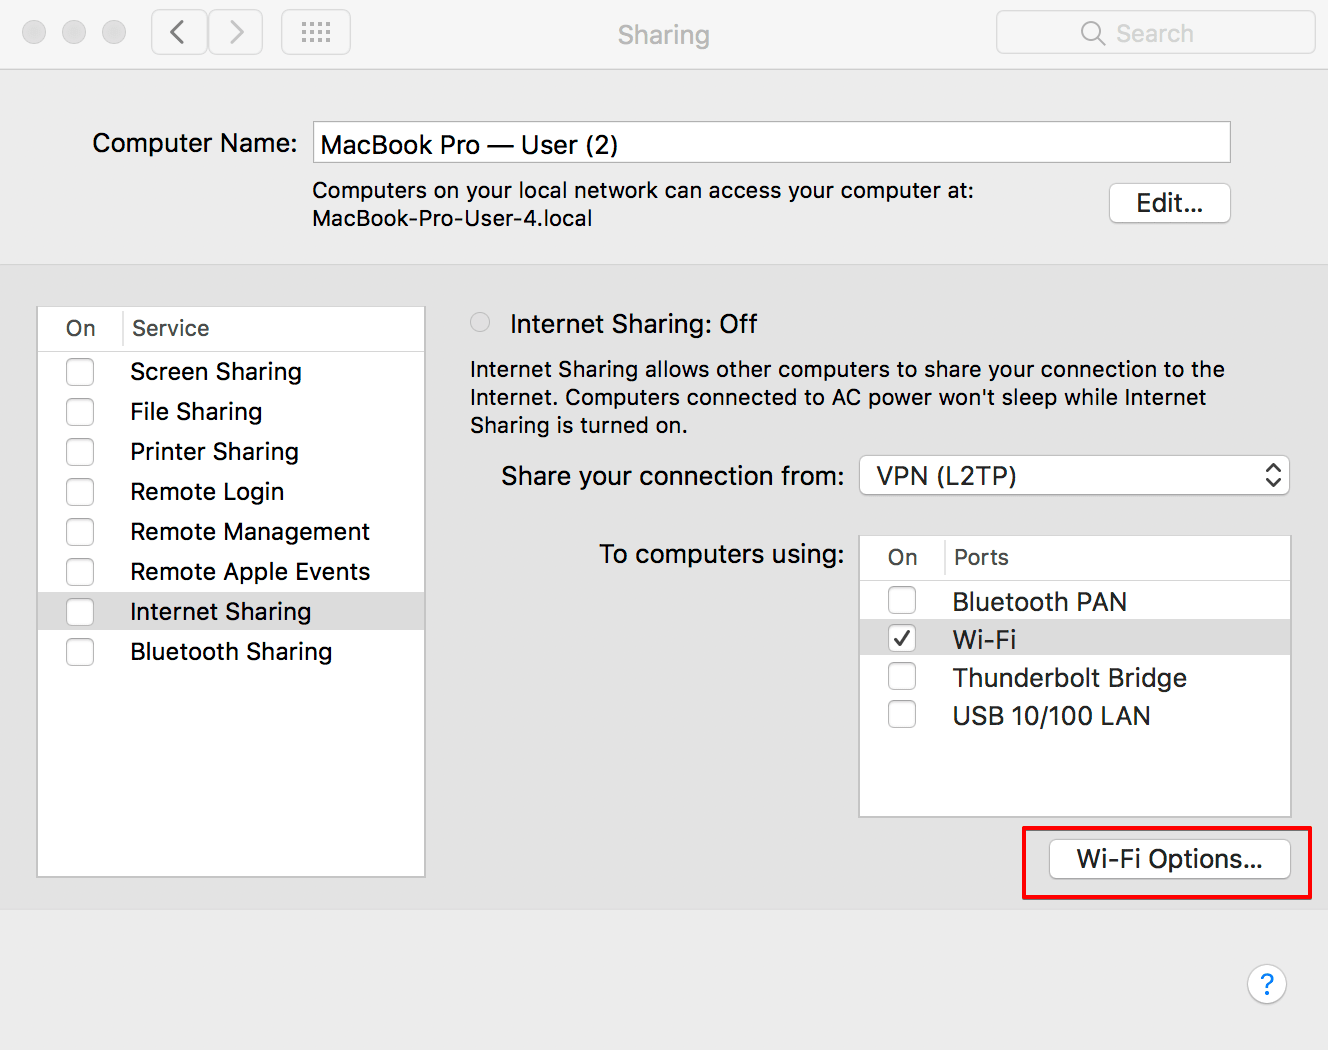
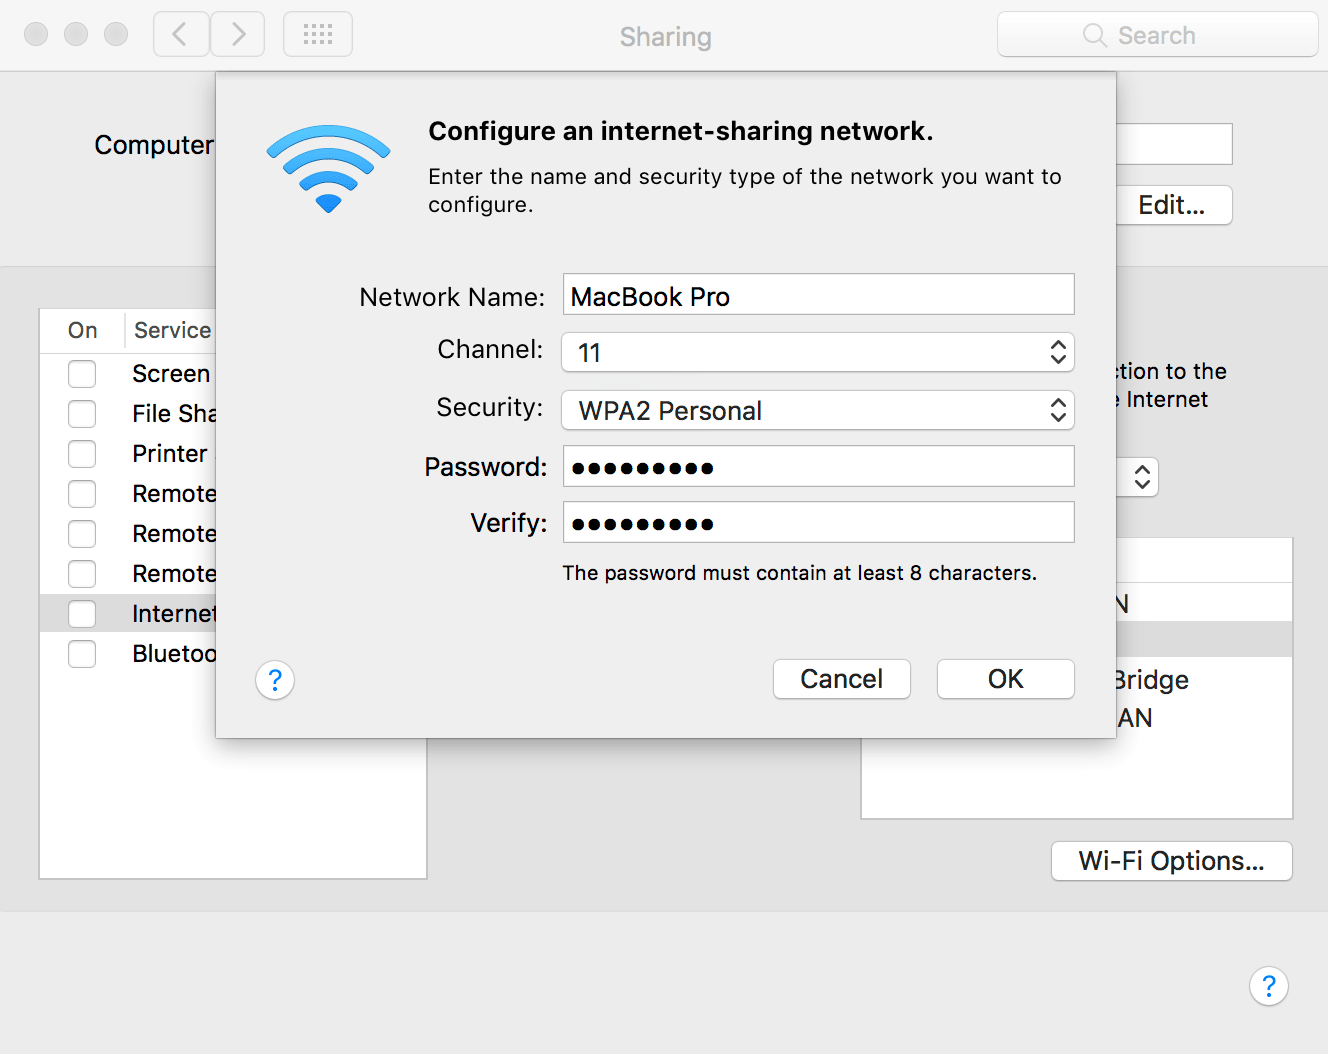
4. Next, go to Wi-Fi Options…. Here you can set up the password for the WiFi network.
Network Name: choose a network name
Channel: leave as default
Security: WPA2 Personal
Password: create a password
Verify: re-enter your password
Then click OK.
To connect other devices to your VPN network, you will need to enter the password you’ve just created.
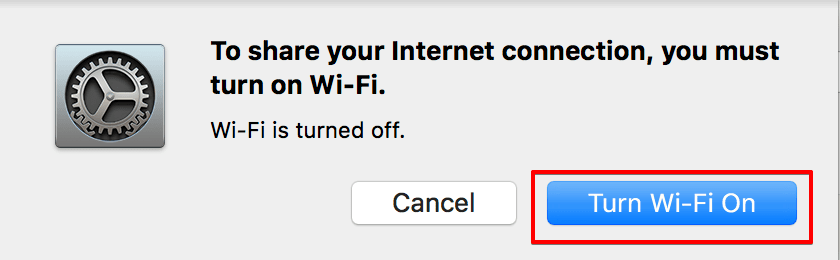
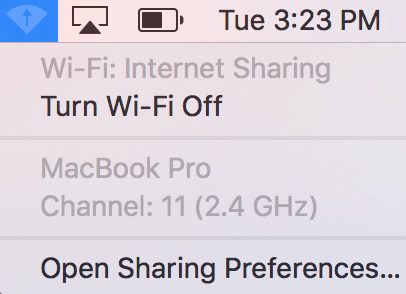
5. Now, you can enable Internet Sharing. If WiFi is disabled, you will be asked to enable it before proceeding with Internet Sharing. Click Turn WiFi On on the pop-up screen:
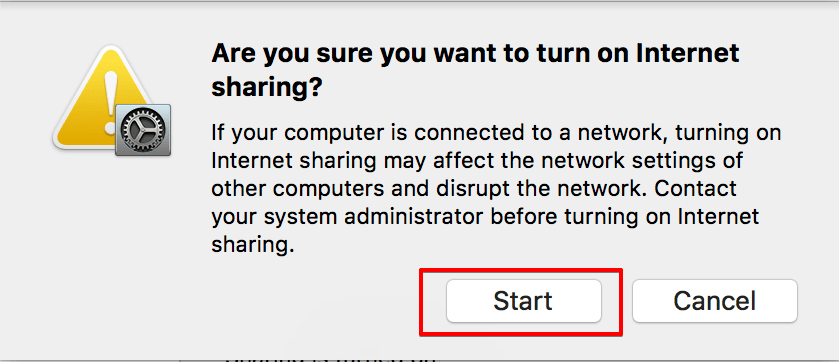
Also, you will be asked to confirm your intention to enable Internet Sharing, click Start.
When Internet Sharing is activated, you will see the status Internet Sharing: On, and a green light next to it.
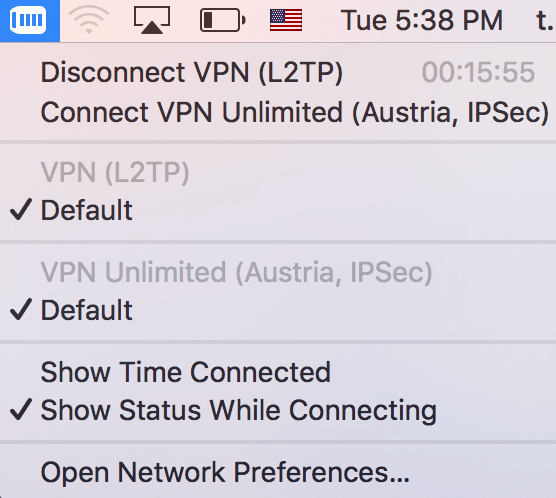
In your menu bar, you now have the following icons:
-
VPN connection status:
-
Internet Sharing status:
Congratulations! You can now scan for WiFi networks on your device and connect to the hotspot you have just created.
To make sure you have succeeded and the internet traffic on your device goes through the encrypted VPN tunnel, use an IP location service on the device connected to the shared WiFi. The detected country should correspond to the one of a VPN server you connected to.
III. How to disable Internet Sharing
To disable Internet Sharing, go to System Preferences > Sharing. Then, uncheck the box next to Internet Sharing. That’s it.
Have any questions, comments, or suggestions regarding our service? Please contact our customer support team at support@keepsolid.com.