This tutorial introduces you a step-by-step guide how to use the VPN Unlimited app
on your iOS device
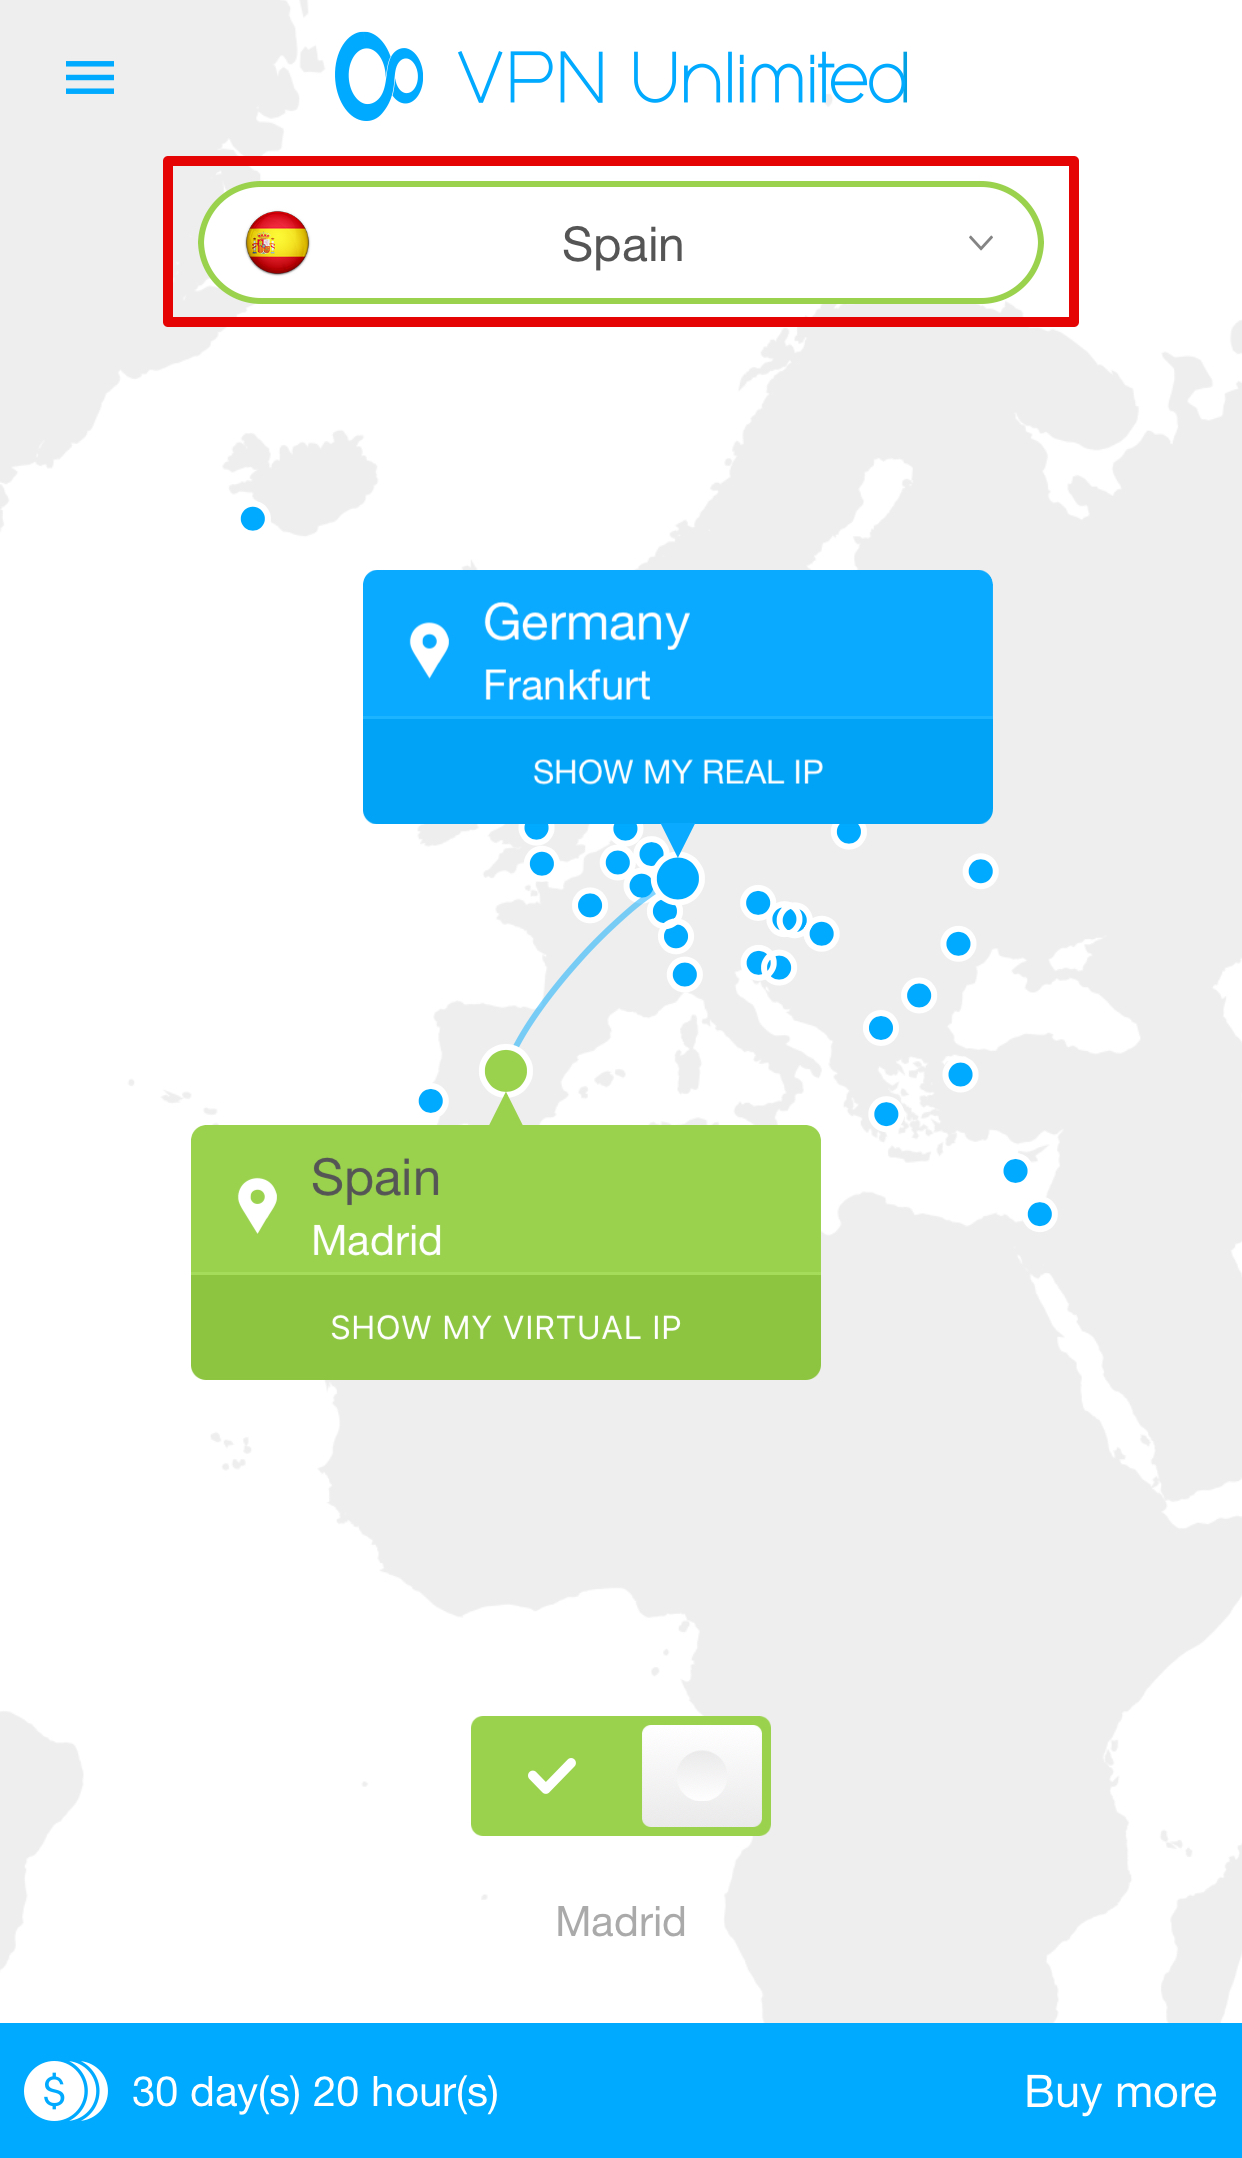
We shall start off with the main screen. At the top of it you can view the server which you are connected to. You can tap on it and choose another one.
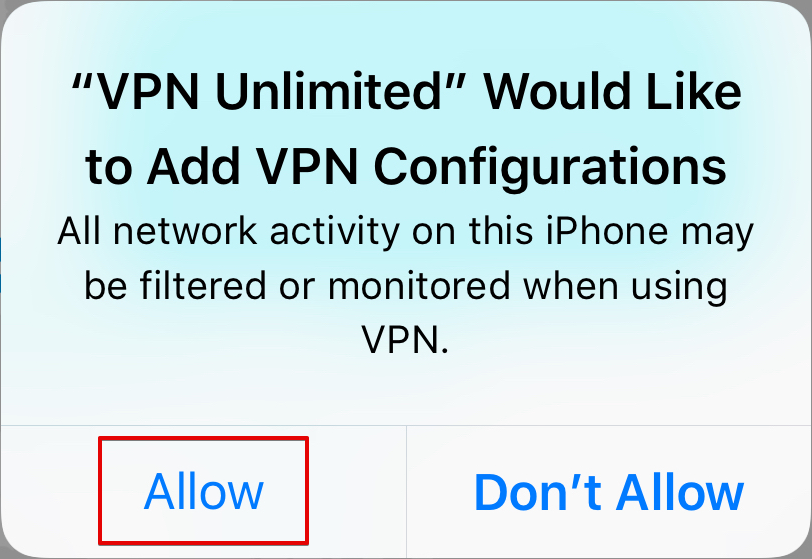
Connecting to a VPN server for the first time, you will be requested to allow adding VPN configurations and downloading a VPN profile. In order to proceed, please select Allow for the security requests and install the profile.
In the middle of the screen, there is a world map where you can view both your real and virtual locations.
By tapping “SHOW MY REAL IP” you can view your internet connection type, actual IP address, country and city. To view the data about your virtual connection, please tap “SHOW MY VIRTUAL IP”.
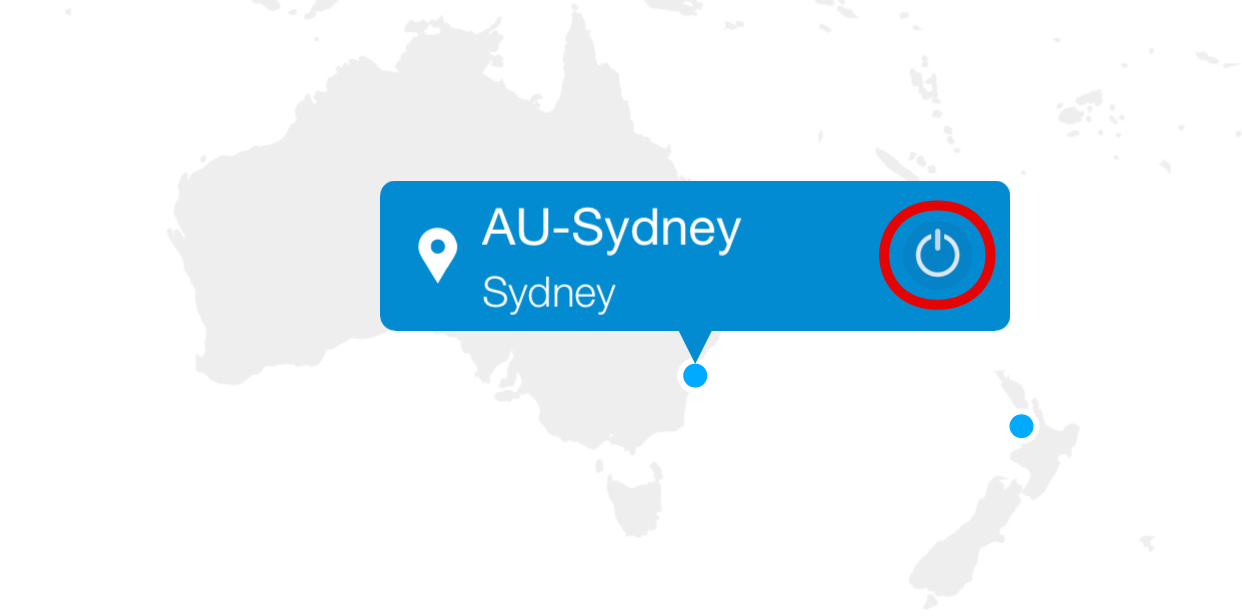
Note that you also can connect to the server just by selecting it on the map, and tapping on the power button.
At the bottom of the main screen you can view your remaining subscription period, and prolong it.
The ![]() button in the upper left corner of the main screen opens a side menu, which contains your account details, such as your account name.
button in the upper left corner of the main screen opens a side menu, which contains your account details, such as your account name.
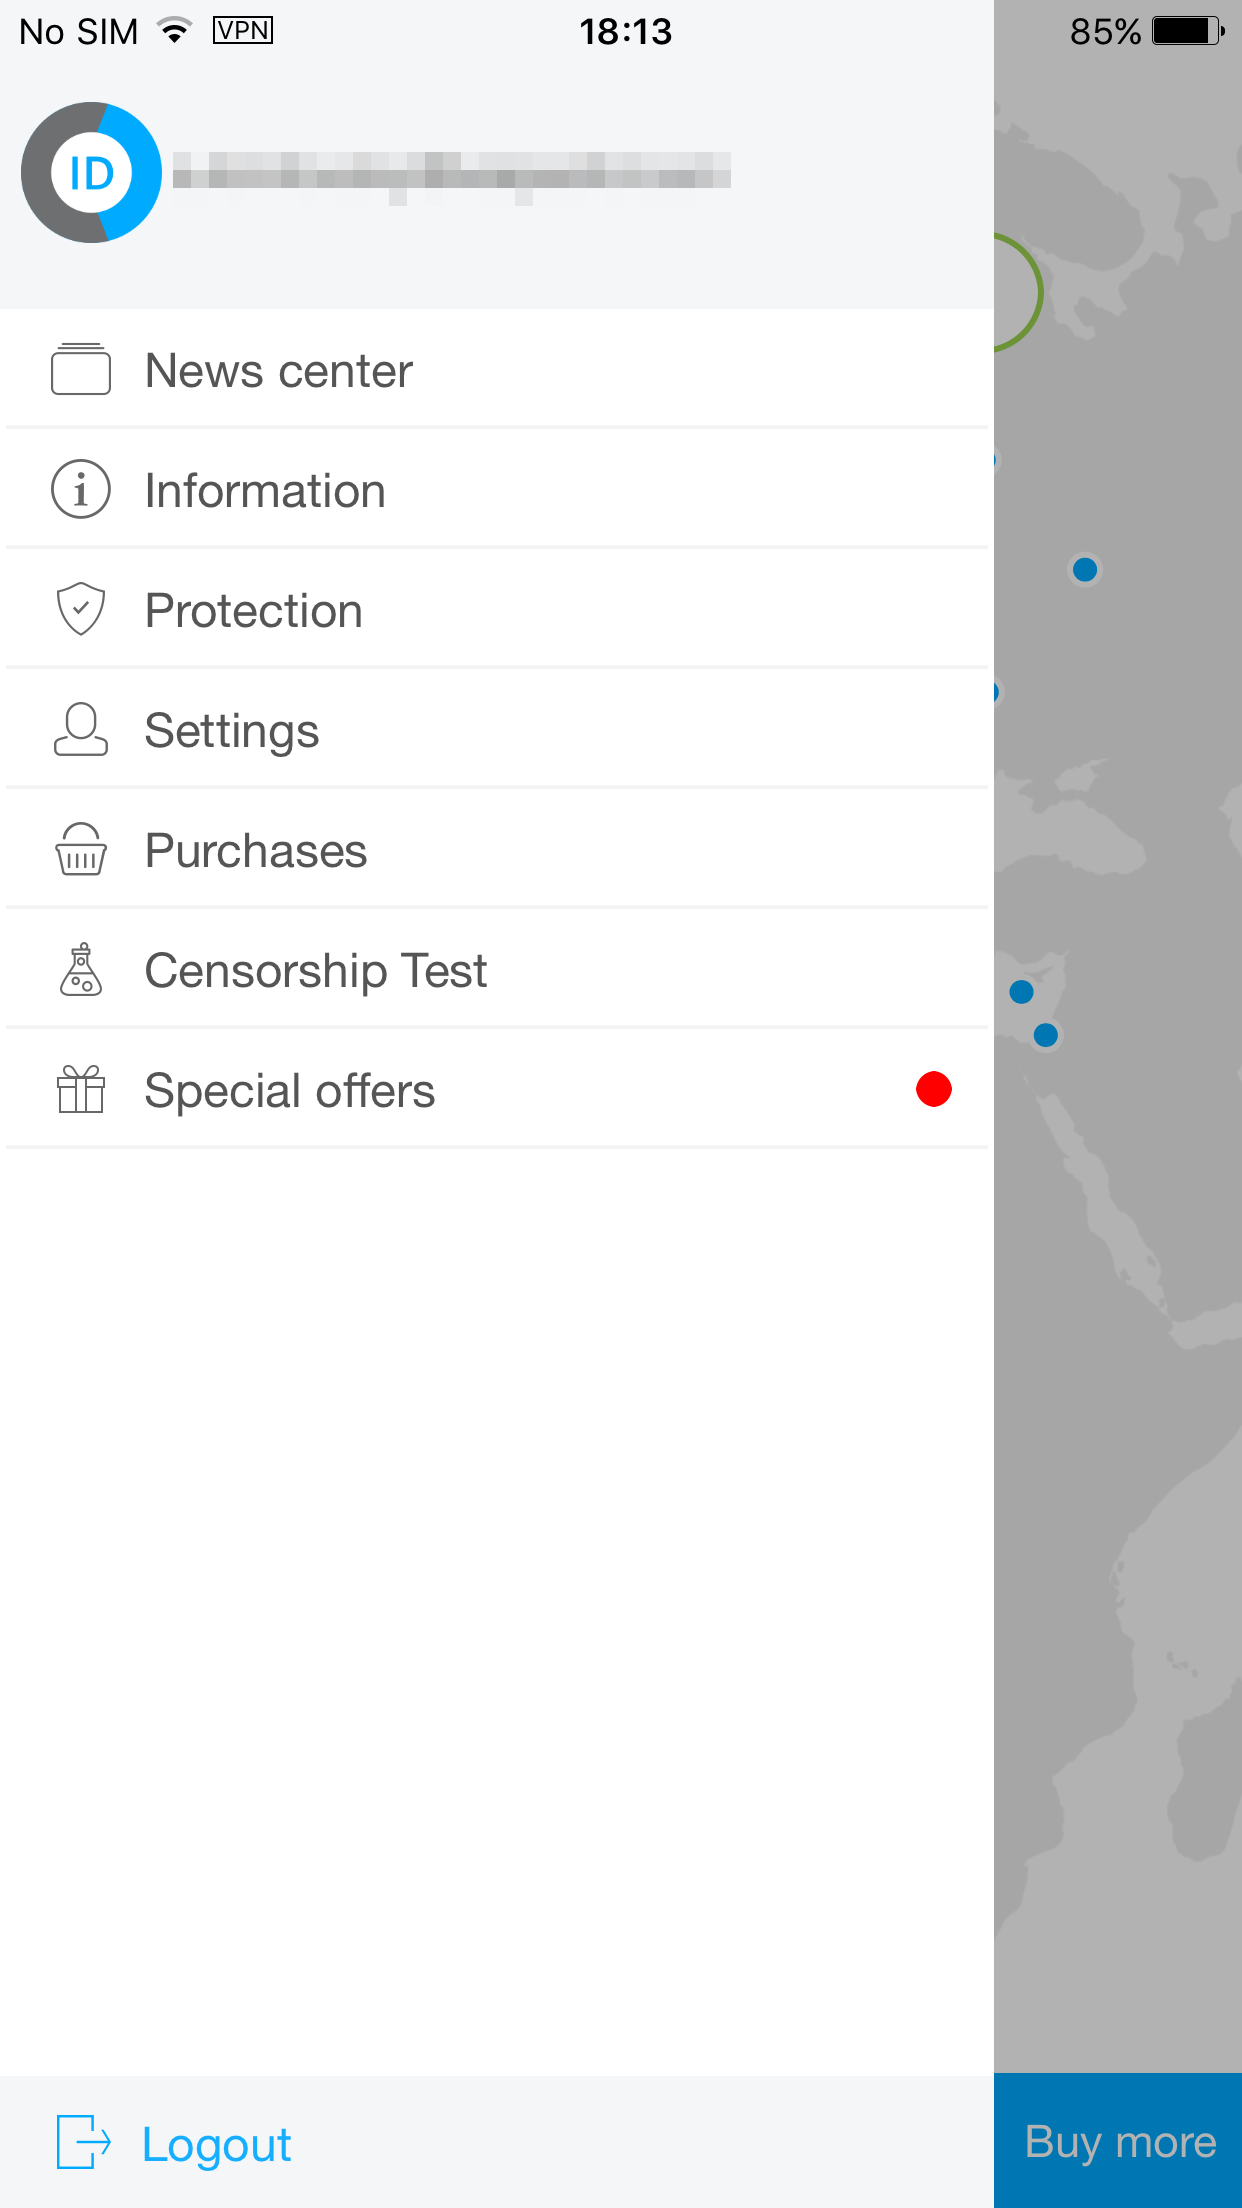
Also, here you will find more functional tabs and buttons, like:
-
“News center”. Through the News Center you can rate our app, view all the apps developed by our team, and share on Facebook/Twitter/Google+ the information about VPN Unlimited.

-
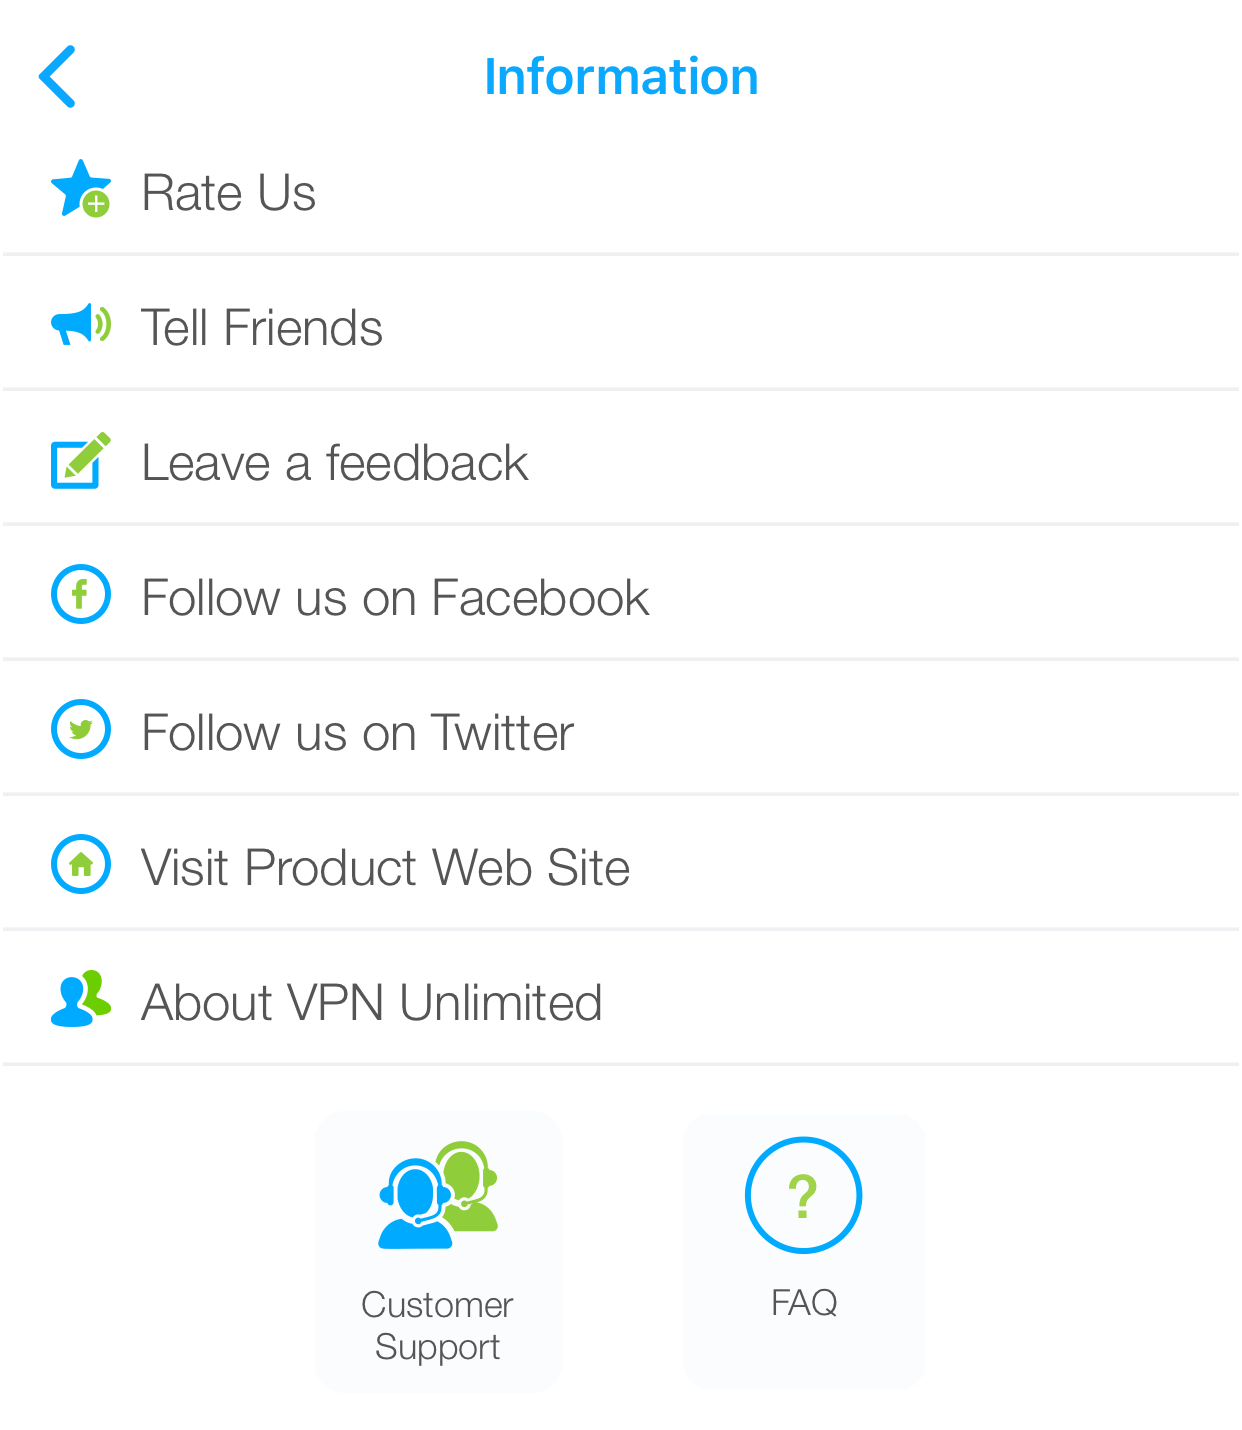
“Information”. The heading of this tab speaks for itself. Besides the links to our knowledge base and support team, there are a number of socializing features as well. Let’s consider them in depth:
-
“Rate us”: You can tap “Love it!” and then write a review on the App Store. If you tap “Have an issue”, you will be immediately suggested to write a message to our support team.
-
“Tell friends”: Type your friends’ email addresses and send them links to download VPN Unlimited for any available platform
-
“Leave a feedback”: Tell us what you think about the app! We greatly appreciate your comments and suggestions!
-
“Follow us on Facebook”: Stay tuned with our latest news and exciting initiatives
-
“Follow us on Twitter”: Stay tuned with our Twitter page
-
“Visit product website”: Go to the VPN Unlimited website. Here you can find all the information you may need concerning VPN Unlimited
-
“Contact Support”: Need help? Complete a support ticket and we will respond as soon as possible
-
“FAQ”: Here you can view the answers for the most frequently asked questions
-
“About VPN Unlimited”: This pop-up message contains information about the app version, the link for the app website, and the full list of our team
-
-
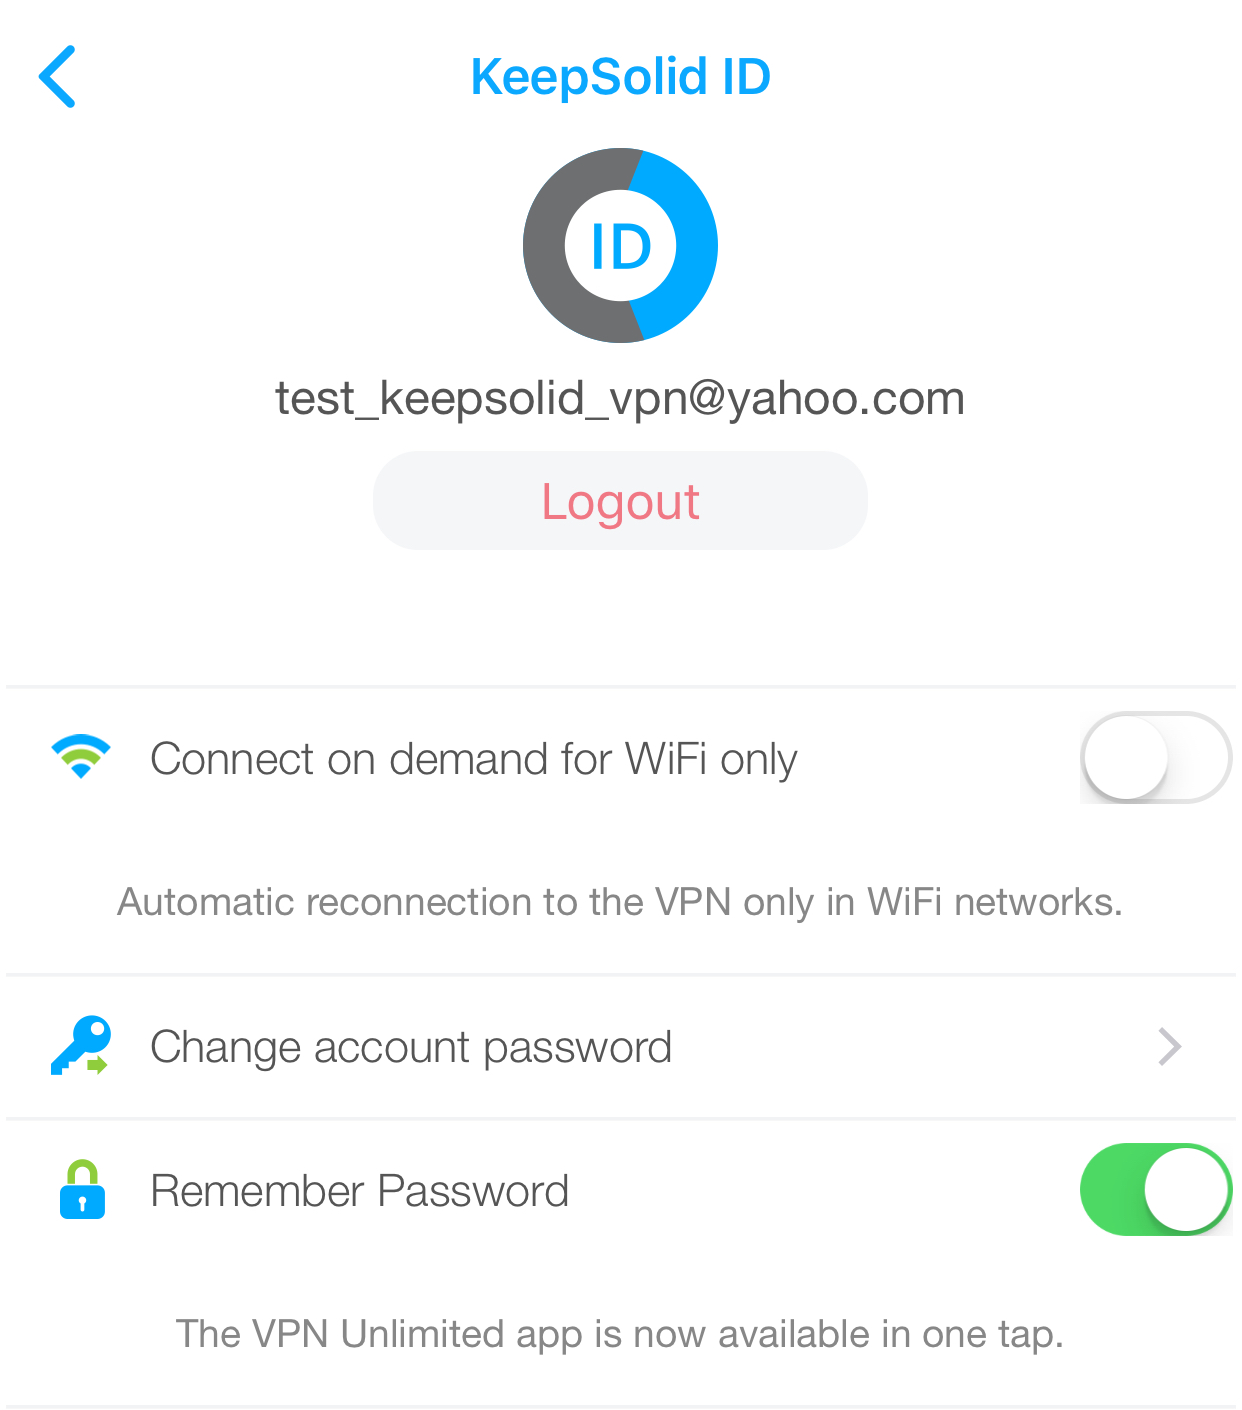
“Settings”
-
At the top of this tab you can view your account name and logout from your account.
-
"Connect on demand for WiFi only": Switch this ON to allow the auto-reconnection to the VPN service only within WiFi networks.
-
“Change account password”: Just enter your current password, then type a new password, confirm it and click “Change Password”.
-
“Remember Password”: Enable this option to enter the app instantly. Otherwise, you will have to type your password every time starting the app. Note, if your device supports Touch ID, enable this option to get an additional layer of security for your identity
-
-
-
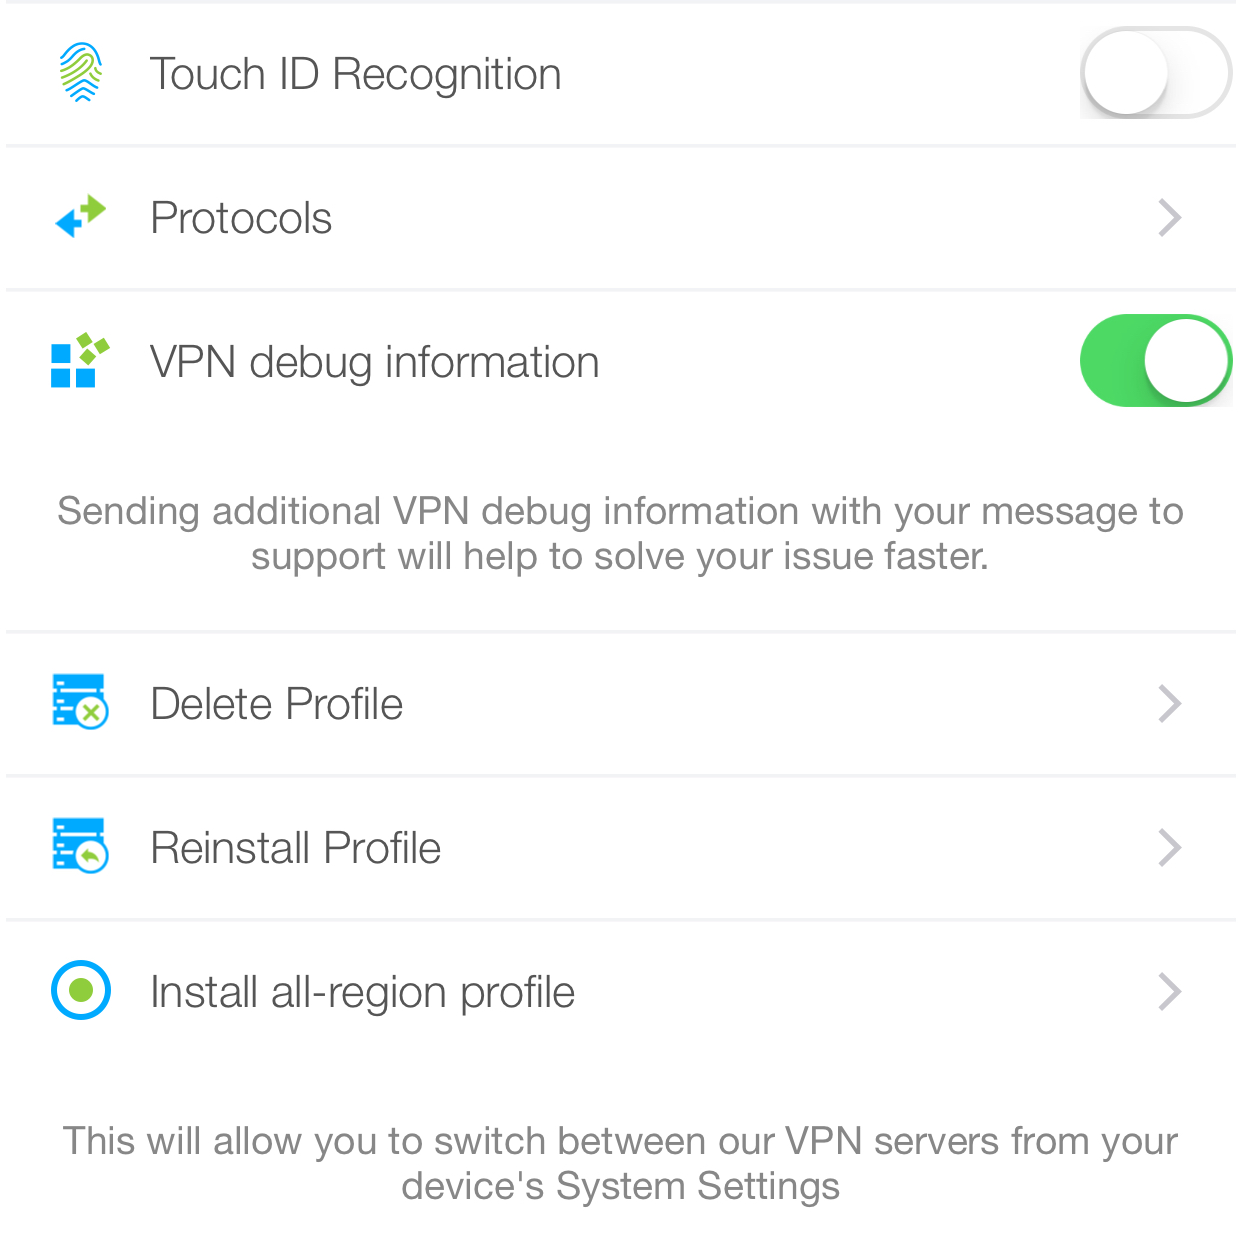
“Touch ID Recognition” Turn in ON to access the app with your fingerprint and enjoy a higher protection of your privacy
-
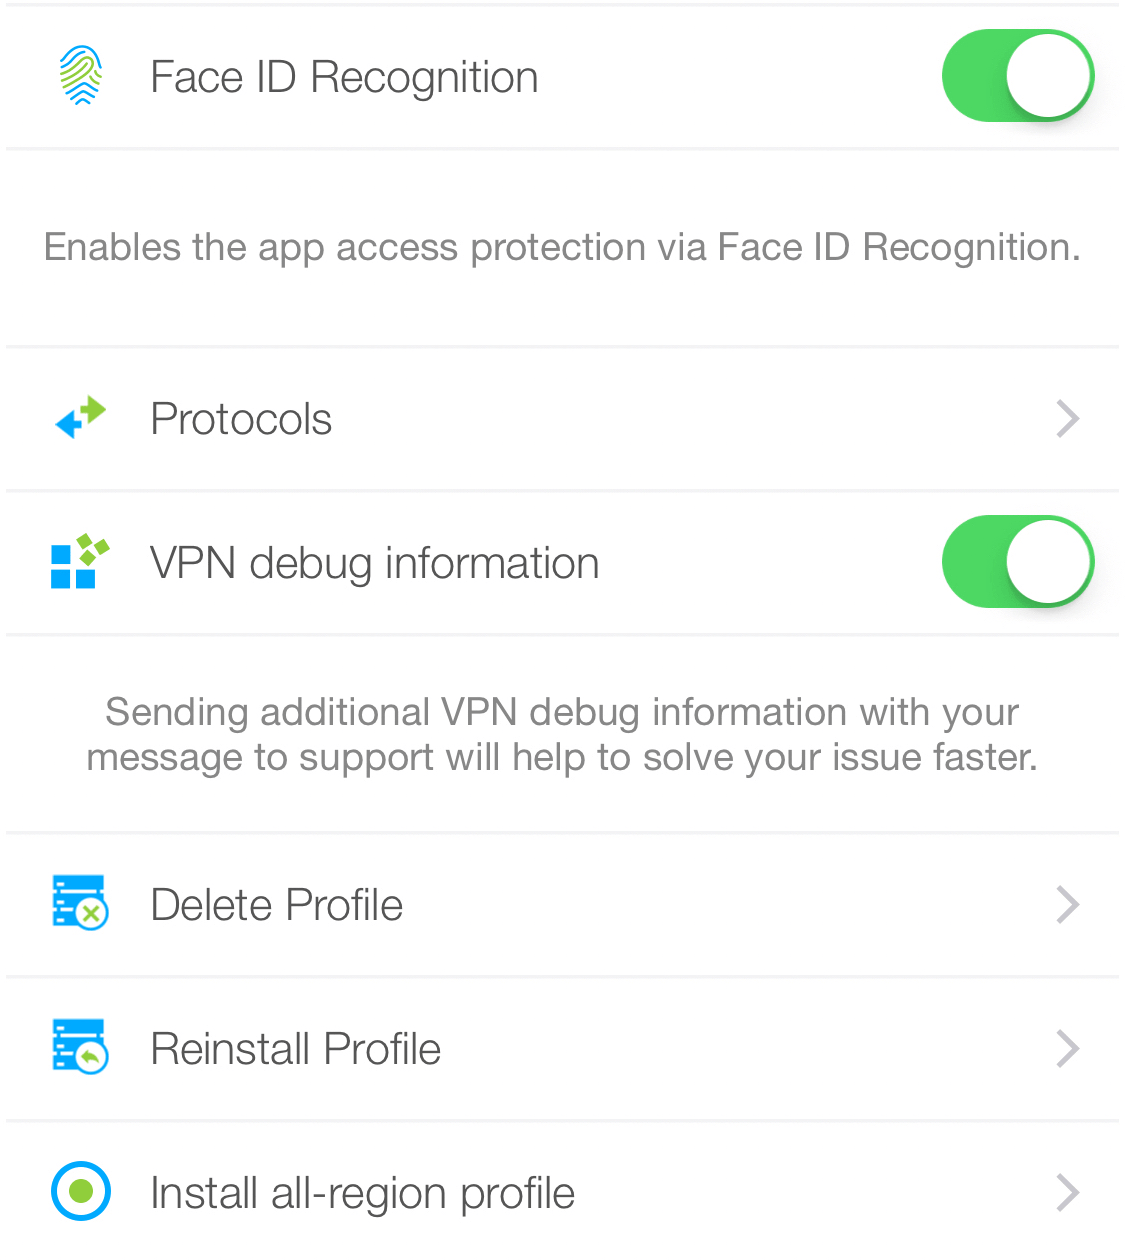
“Face ID Recognition”: (for iPhone X users): Enable this option to access the app with your face scan and get an enhanced protection of your privacy
-
“Protocols”: Manually choose a protocol to connect to our VPN servers. Tap
 to view the detailed information on the available protocols.
 -
“VPN debug information”: This option greatly helps our support team to solve your issue faster, thus we recommend to switch it ON
-
“Delete Profile”: Remove your profile. Note that you need an installed profile to run the application
-
“Reinstall Profile”: Remove and install your profile over again
-
“Install all-region profile”: Switch between our VPN servers from your device’s System Settings.
(Settings > General > VPN > Select server)
-
-
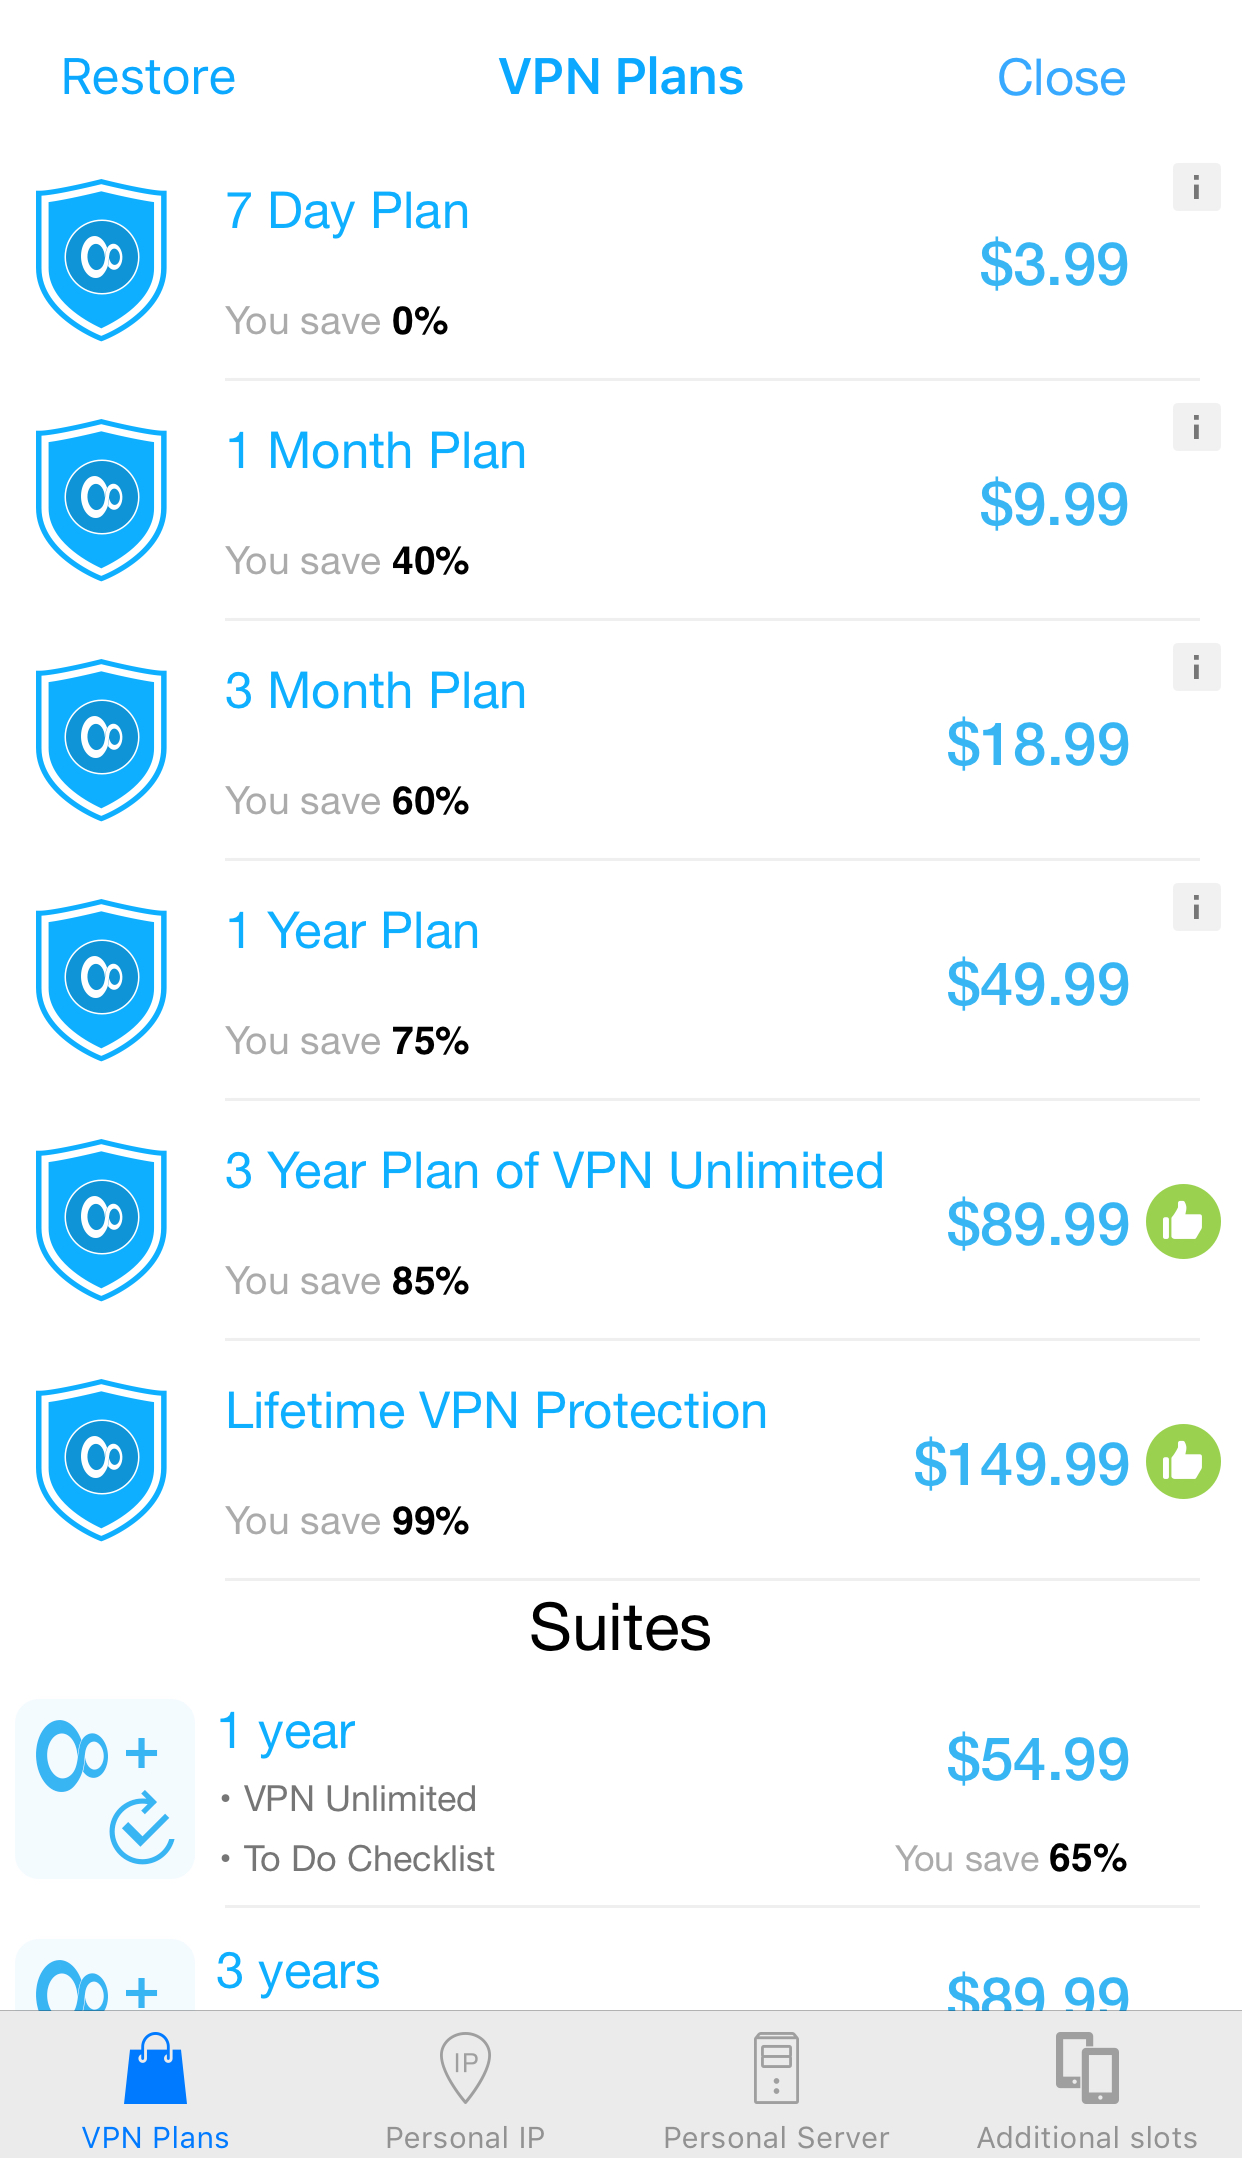
“Purchases”. Here you can view the list of available options for purchase:
-
Subscription plans
-
Personal IP addresses
-
Personal VPN servers
-
Additional slots for your devices
Switch between these tabs at the bottom of the screen, and easily get what you want.
-
-
“Notifications”. Stay tuned with our latest deals and discounts.

At the bottom of the side menu you can logout from your account by tapping the appropriate button.