How to install VPN Unlimited Application
on macOS 10.10 and later
(App Store Version)
This guide contains a step-by-step instruction to help you get started with the VPN Unlimited application, and easily manage it.
1. Installation of the application
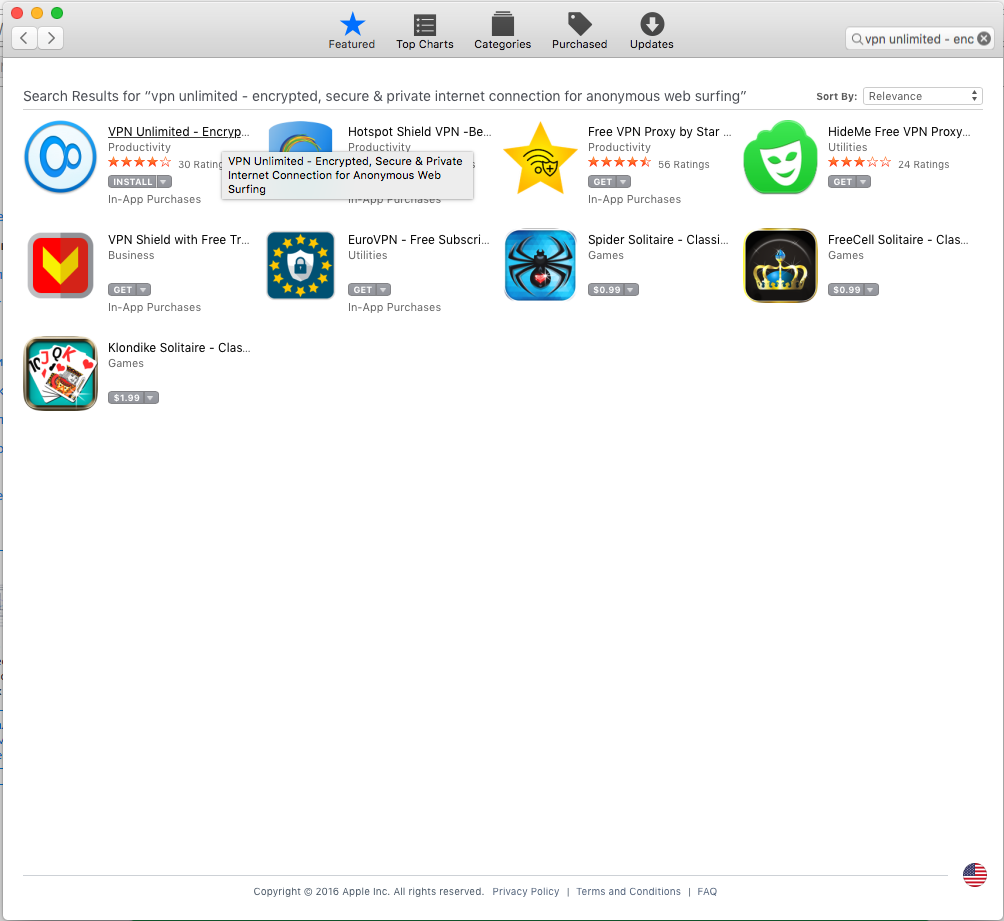
To download the application, please follow this link or open the App Store and type VPN Unlimited in the Search field.
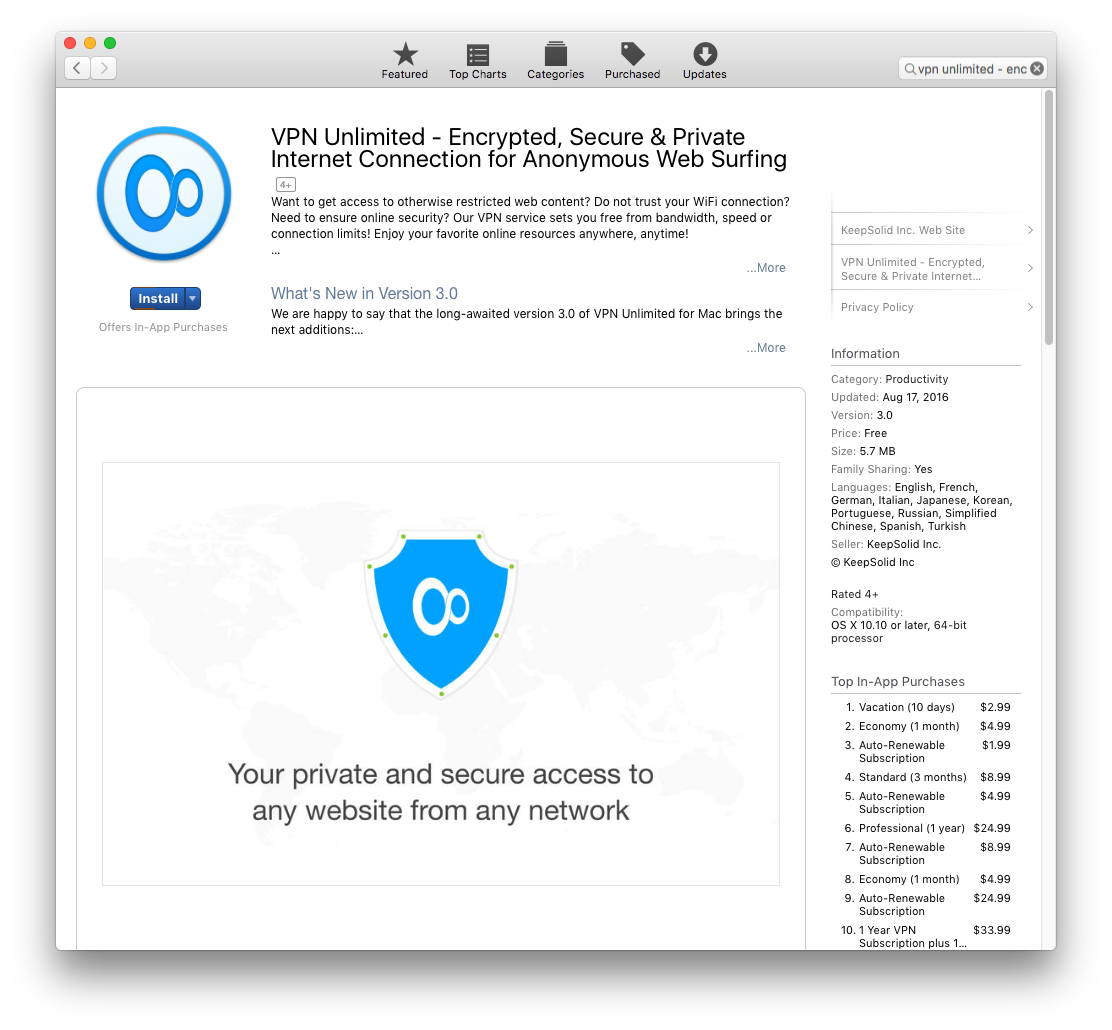
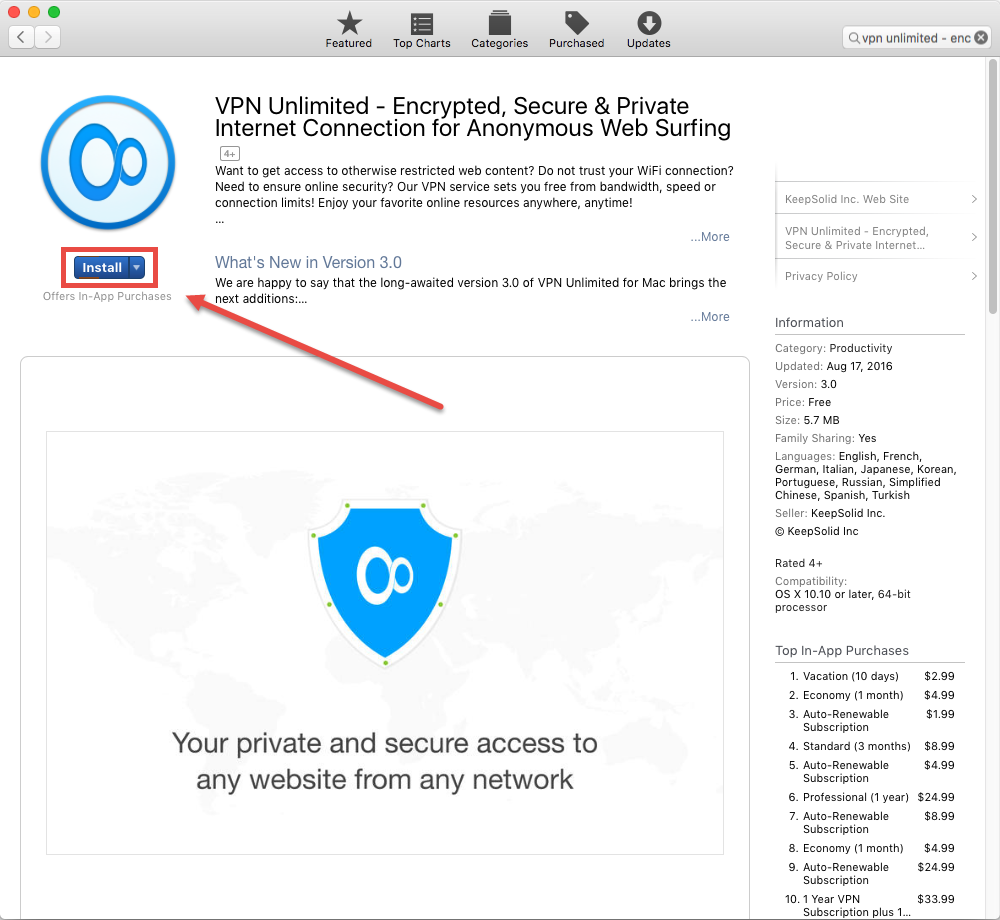
Open the VPN Unlimited app page and click Get/Install.
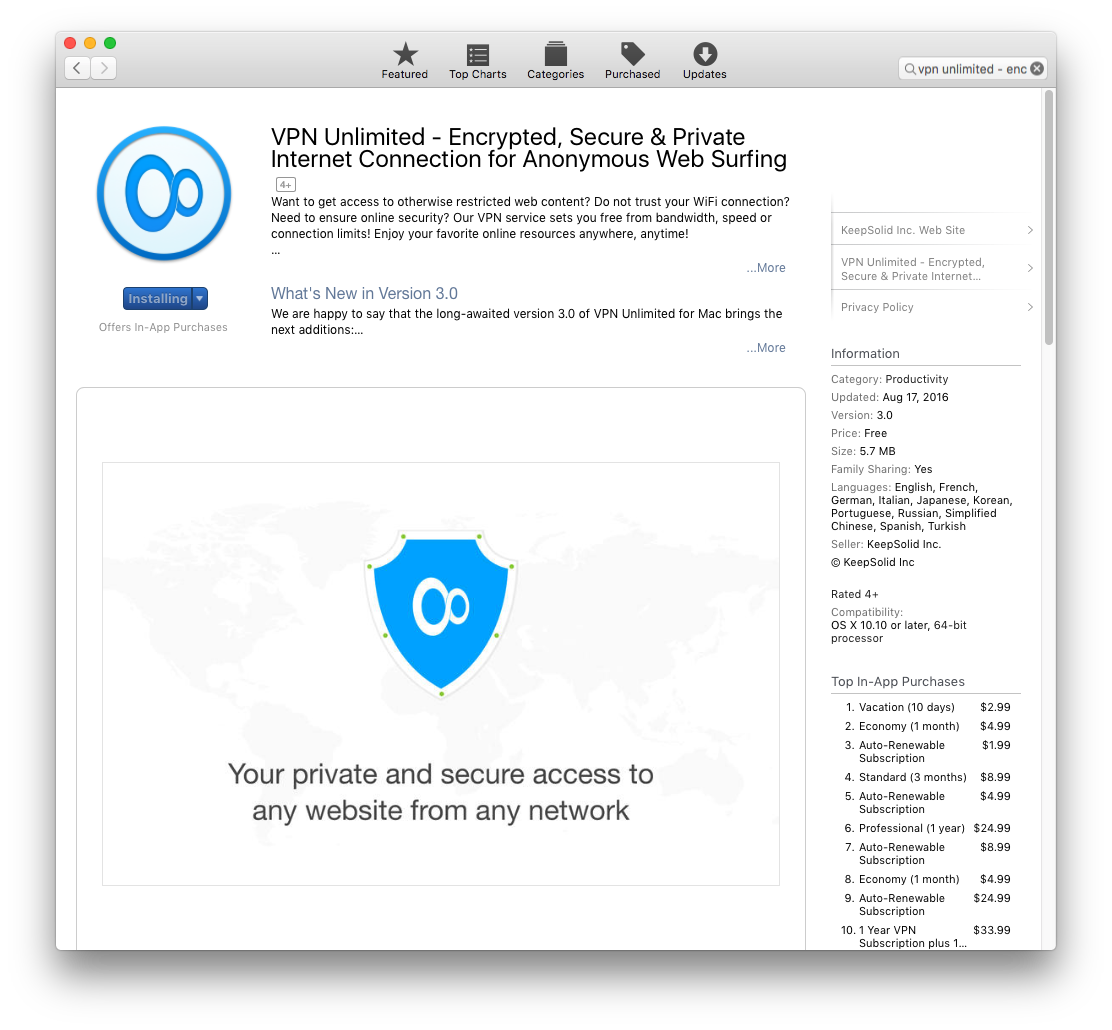
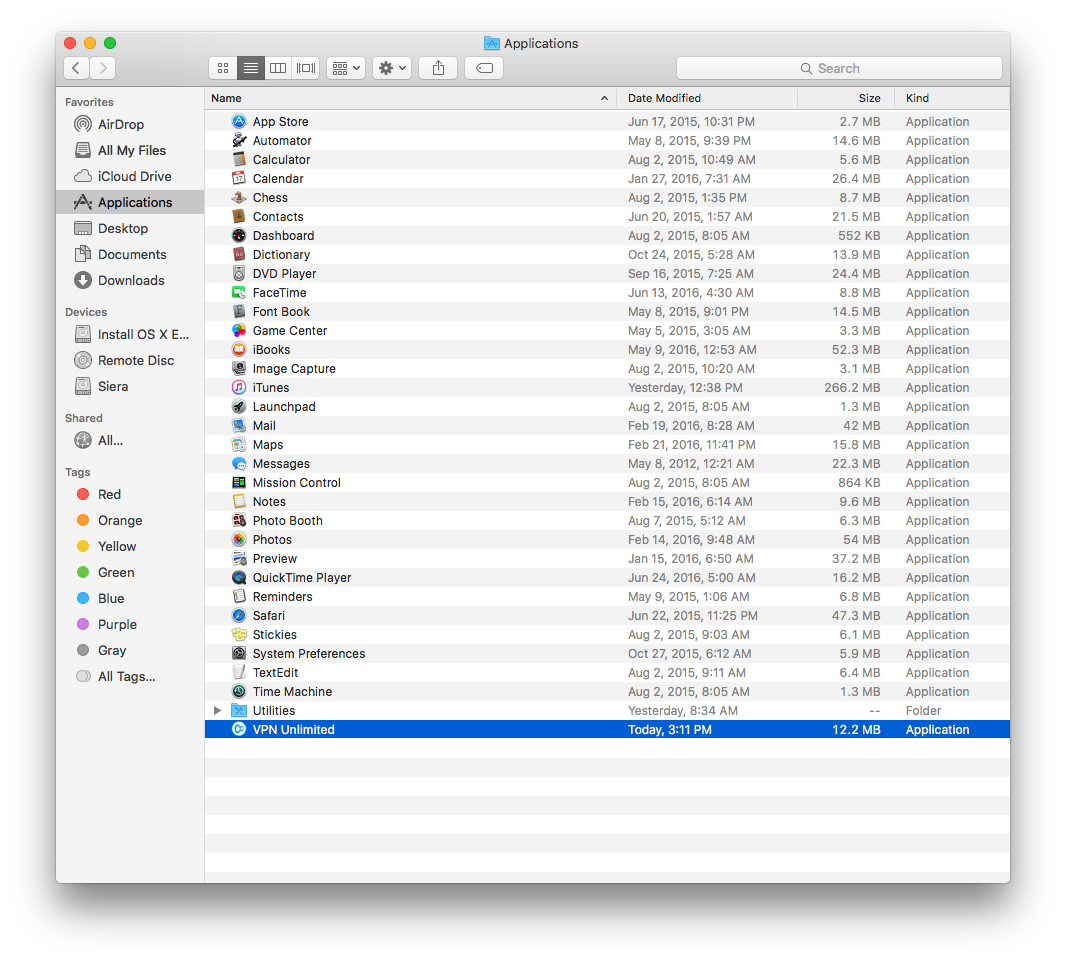
After the successful installation, the VPN Unlimited icon will appear in Applications.
Now, the installation process is completed.
2. First launch
Connecting to a VPN server for the first time, you will be requested to allow adding VPN configurations and downloading a VPN profile. You will see our information screen describing the process. Just click Connect and set the checkbox for Do not show this message again to skip it in the future.
First, you need to allow the creation of VPN configurations in your system.
This is a standard system message when installing VPN configurations. No worries, all your data will be encrypted and protected by a VPN tunnel. As we do not store user logs, please stay assured your private data will remain private.
Click Allow to proceed.
After that, the VPN Unlimited configuration will be added to the list of your network connections.
Next, you need to allow neagent to access your KeyChain. Enter your macOS account password and select Always Allow, so that this notification will never appear again (unless you change the password or reinstall the app).
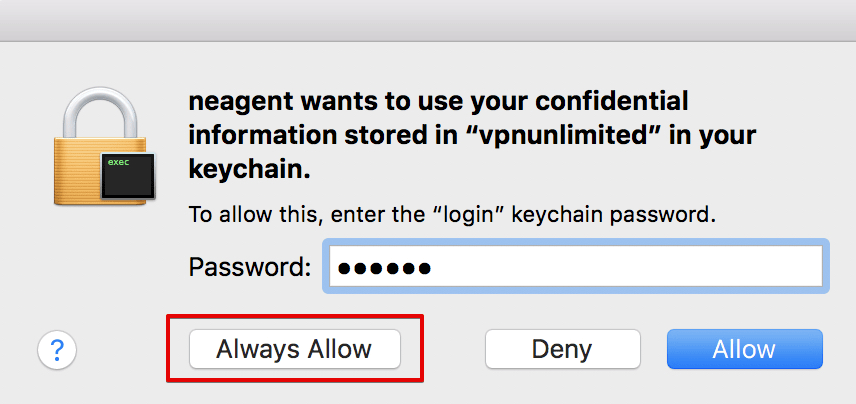
Note: Neagent is a service responsible for establishing secure VPN connections. It requests access to the KeyChain in order to receive authorization data required for the VPN connection to be established.
3. Connect on demand
This feature does not allow you to surf the internet if there are any disruptions in a VPN connection. This way, Connect on demand protects your real IP and location from accidental exposure in the result of dropped connection with a VPN server or other similar issues.
To enable or disable Connect on demand, go to System Preferences > Network, select VPN Unlimited profile, and set or remove the checkbox.
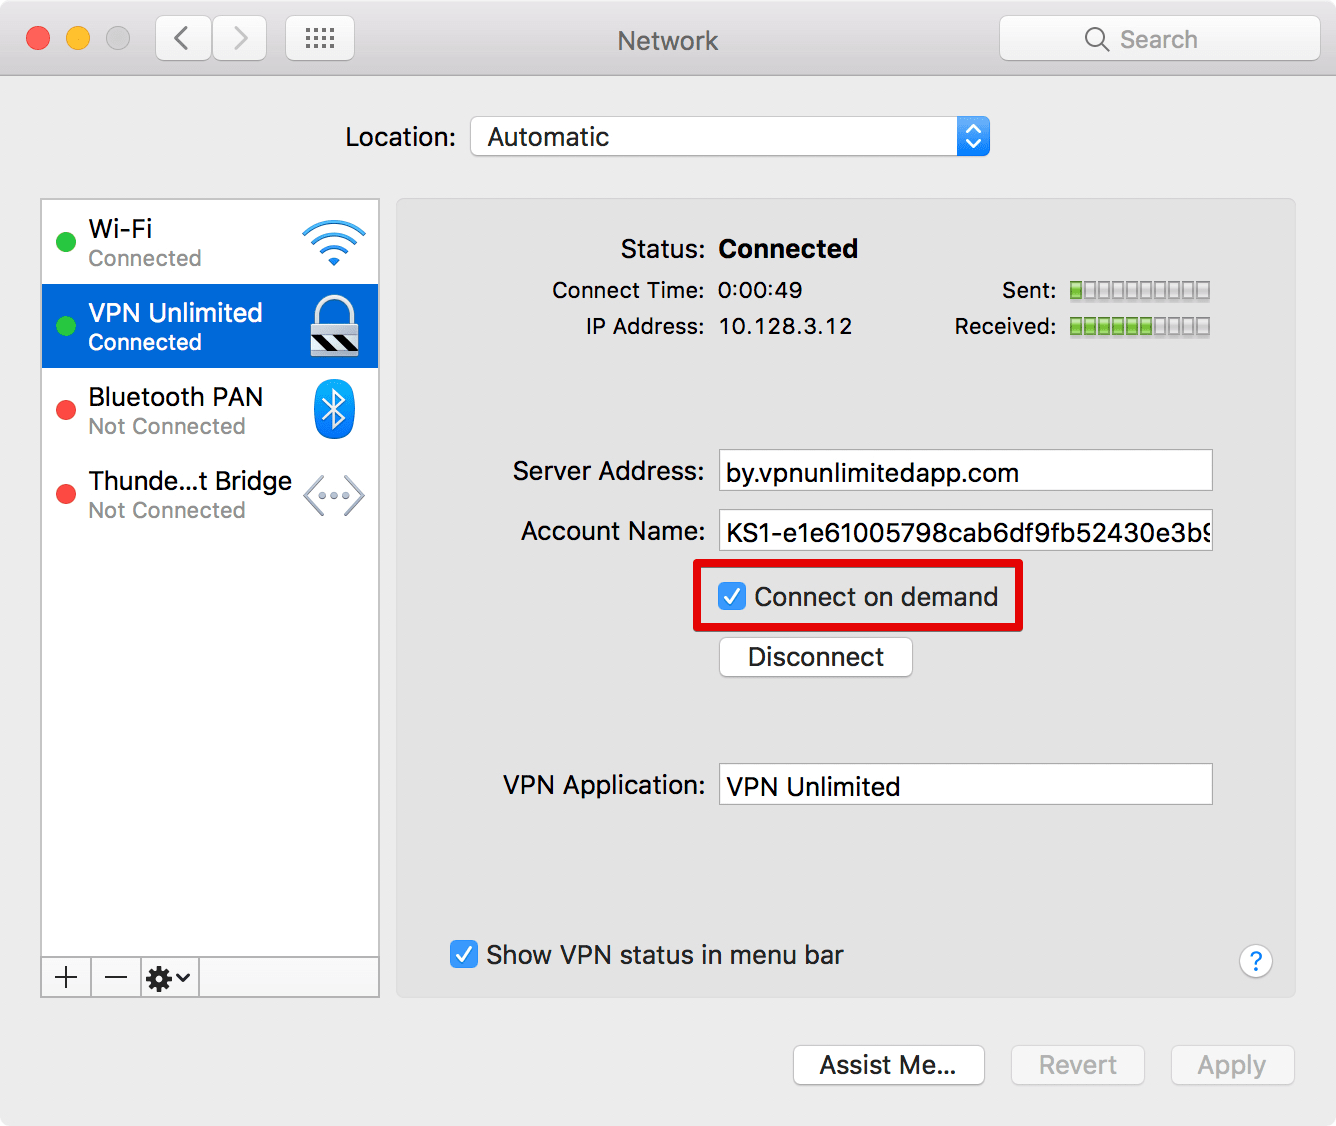
Click Apply to save changes.
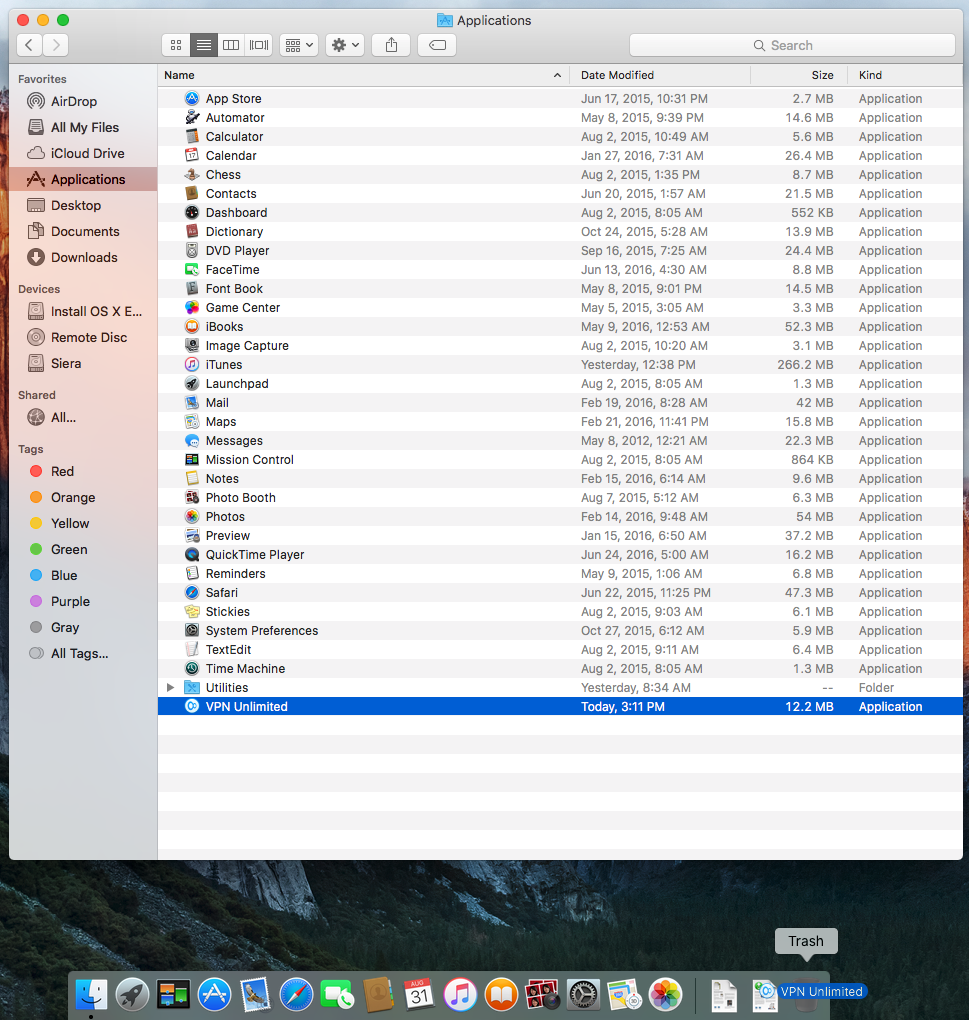
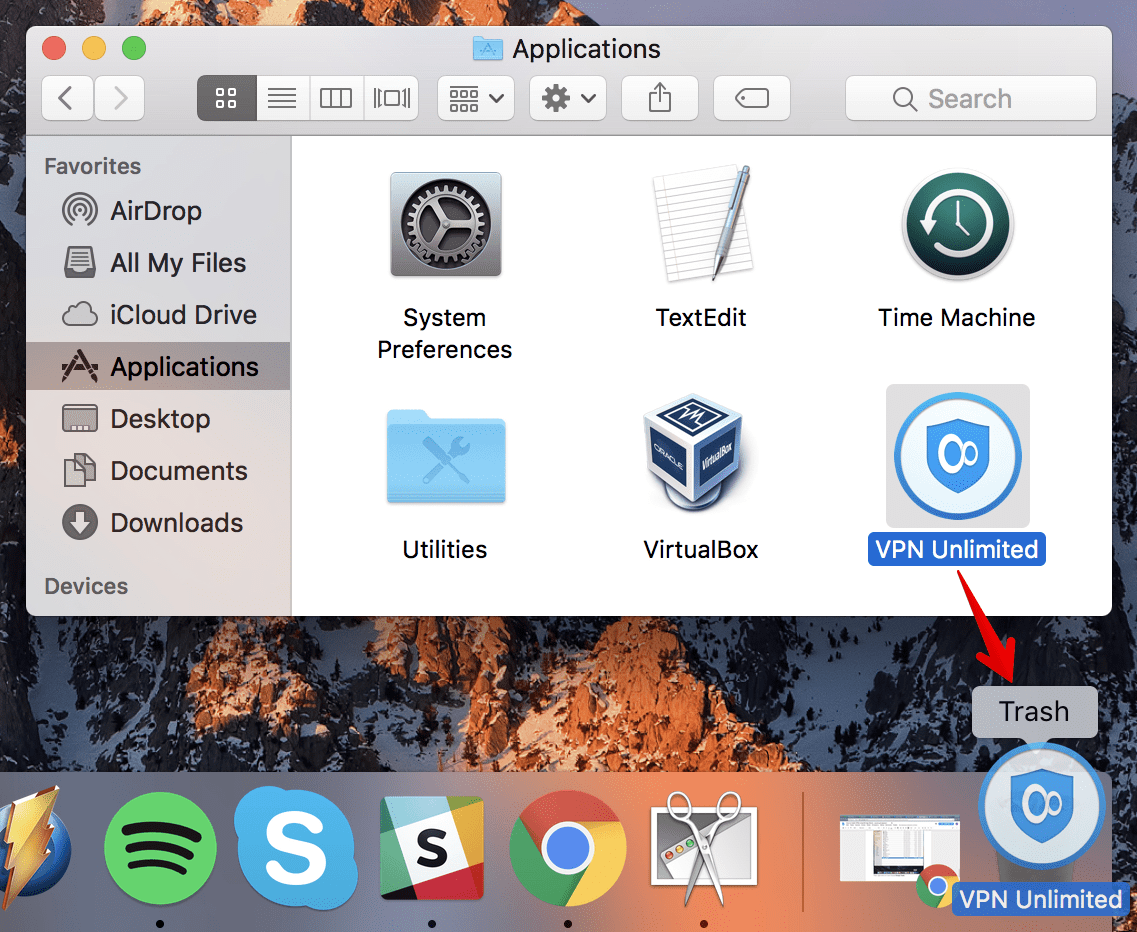
4. Removal of the application
To remove the VPN Unlimited application, please go to the Applications folder, select the VPN Unlimited icon, and drag-and-drop it to Trash.
Then, go to System Preferences > Network and click “—” to delete the VPN Unlimited configuration.
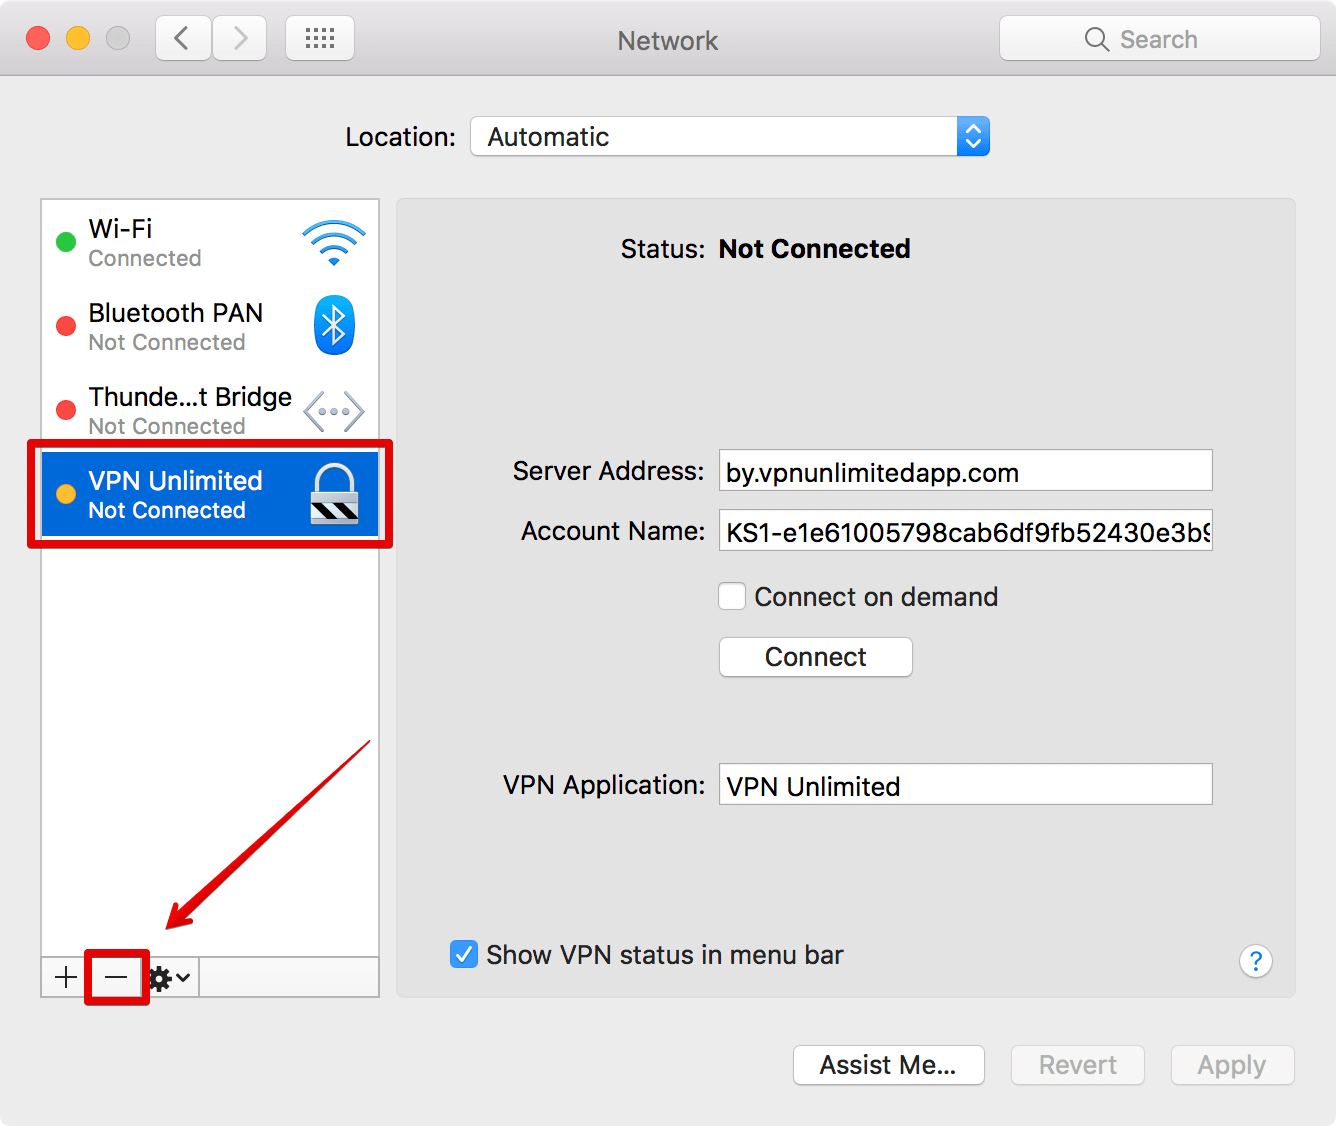
After the configuration removal, click Apply to save changes.