Mikrotik RouterOS on Mikrotik routers
and Mikrotik x86 configuration guide for VPN Unlimited users
This detailed guide covers PPTP configuration on Mikrotik routers.
The process is shown via Mikrotik Winbox tool running on macOS X. Winbox natively runs on all the Windows platforms, exists in the pre-build version for macOS, and can be easily used on Linux via Wine.
First of all, you need to get the configuration files which can be created on your own in the our tutorial. Then you can proceed configuring your Mikrotik router to work with our service.
1. Open Winbox Utility on your computer.
You should see the following interface:
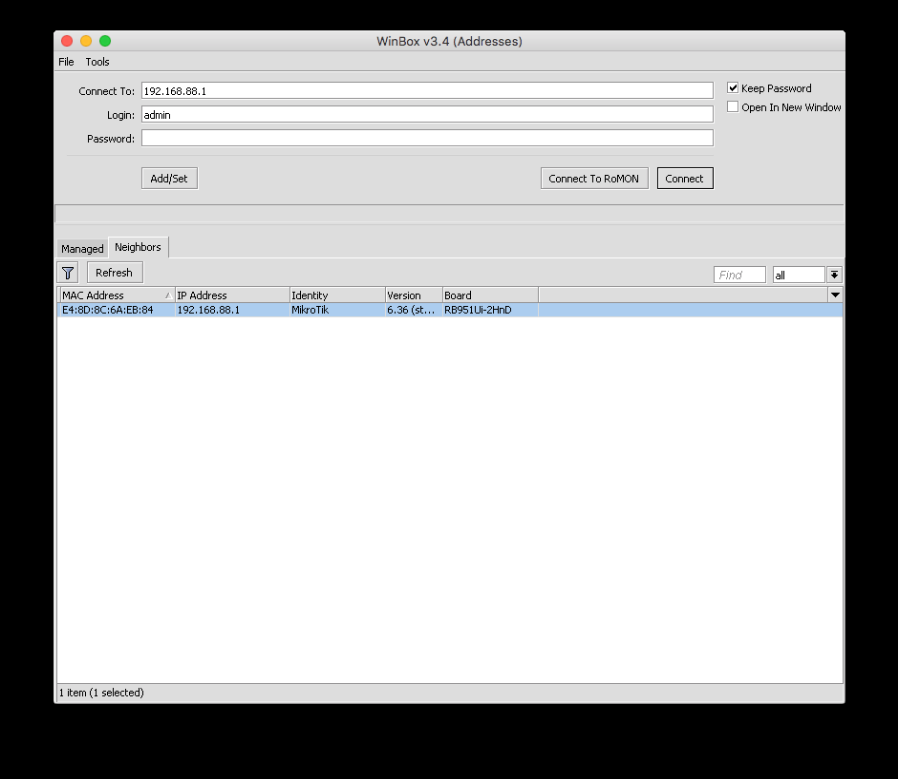
2. The software should be able to locate your router in the Neighbours section. After it is located, select it and click Connect, using your credentials for login/password in case you made any changes to the defaults.
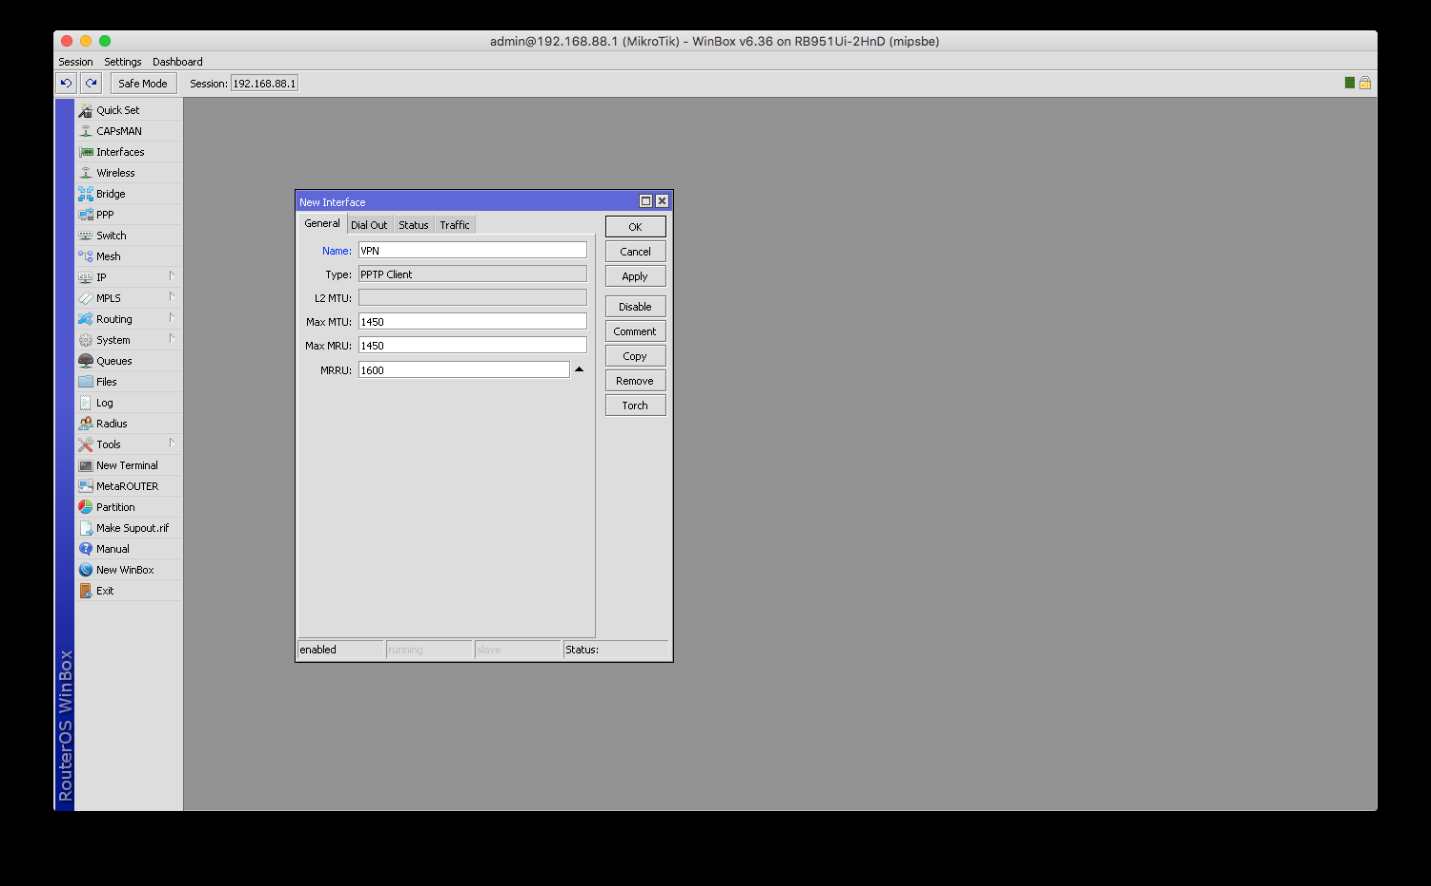
Then, please open the interfaces tab in the menu.

3. Press Plus in the top left corner of the window, and select either PPTP Client option. In the general section you can name your connection for a later convenient usage (please, avoid special characters and spaces).
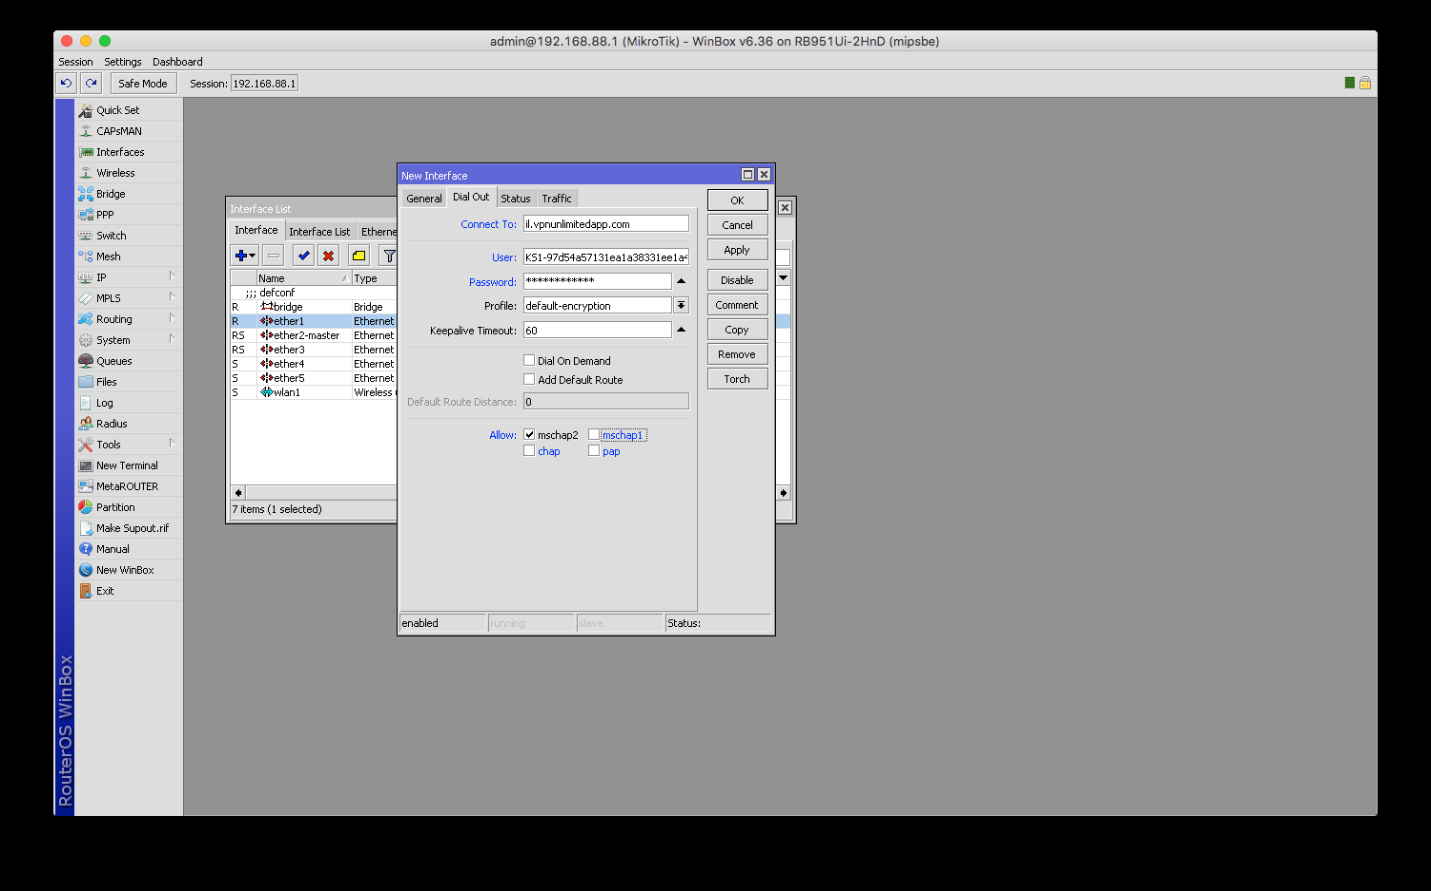
Input the following data in the Dial Out section:
Connect To: enter a server DNS name from the configuration set.
User: enter a login from the configuration set.
Password: enter a password from the configuration set.
Allow: set the checkbox for mschap2 only. This is a critical step.
Then, please click Apply.
Important! Only login and password from the configuration set can be applied here. The system will not work with your account credentials.
The connection status at the bottom right should change to connecting, and then to running. You will also see a little R next to the interface name.
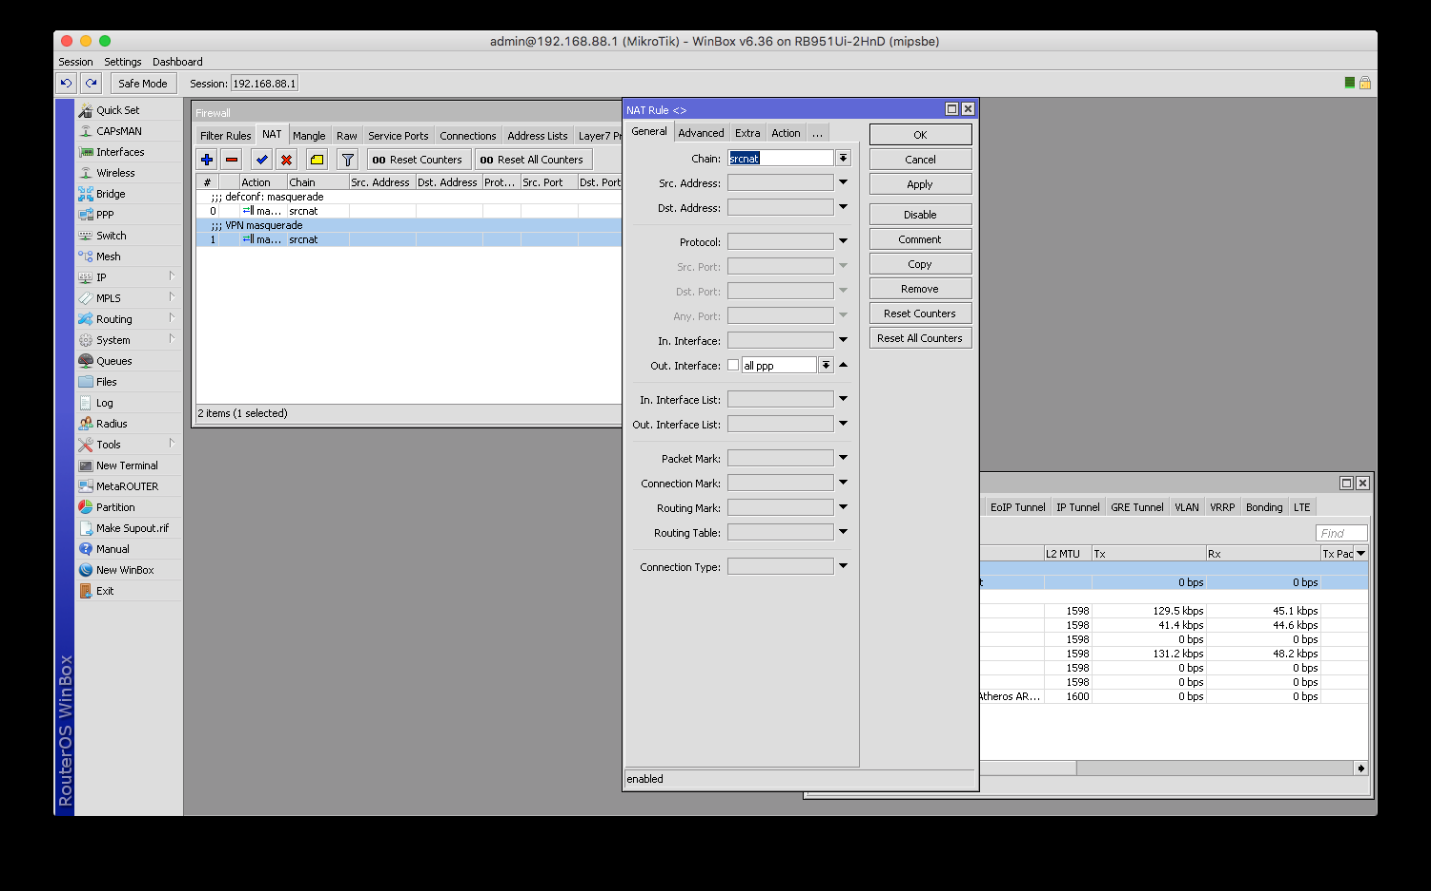
5. Please open the IP > Firewall section in the menu. Then please go to the NAT section. There you will see the masquerade rule that is necessary for data operations. Create a new similar rule, or copy the existing one with the following changes: Out interface should be set to either all-ppp or VPN Unlimited connection you have created before.
This step is also critical. If your existing masquerade rule contains blank Out Interface, or you already have a rule for all ppp-type connections, you are already good to go on this one. Then, please click Apply.
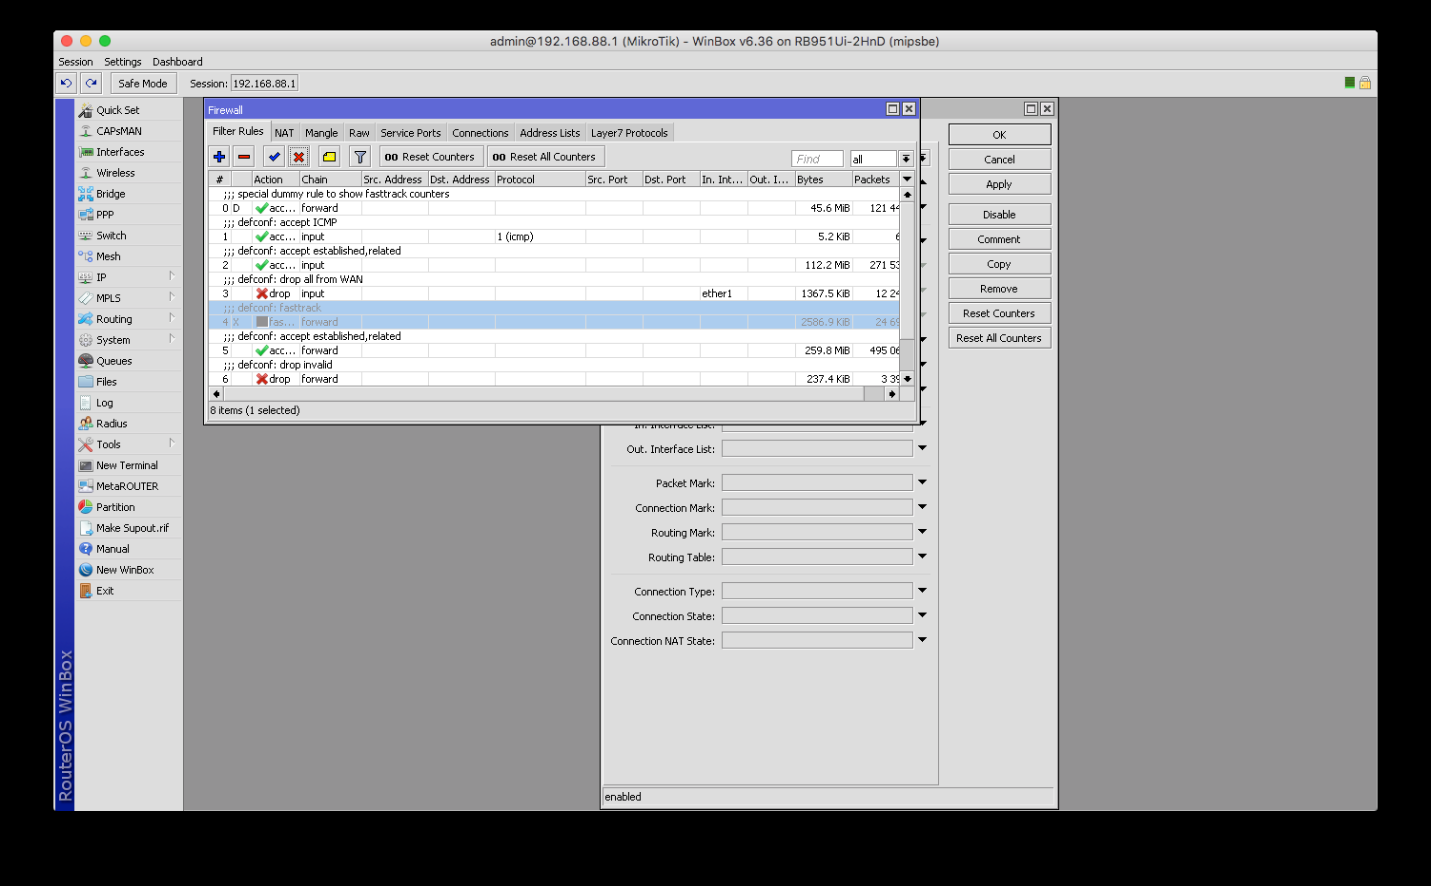
6.Then, please go to the Filter Rules section and either disable or remove the fast track rule. Then, please click Apply.
7. Please go to the Mangle tab in the Firewall window and create a new rule. The Chain section should be set to Prerouting. The second field of the source address (Src. Address) should contain either a single IP of your network (as shown below) or a range of ones you want to connect to VPN. When you want to make all your hosts to use a single VPN connection, you should use the following form:
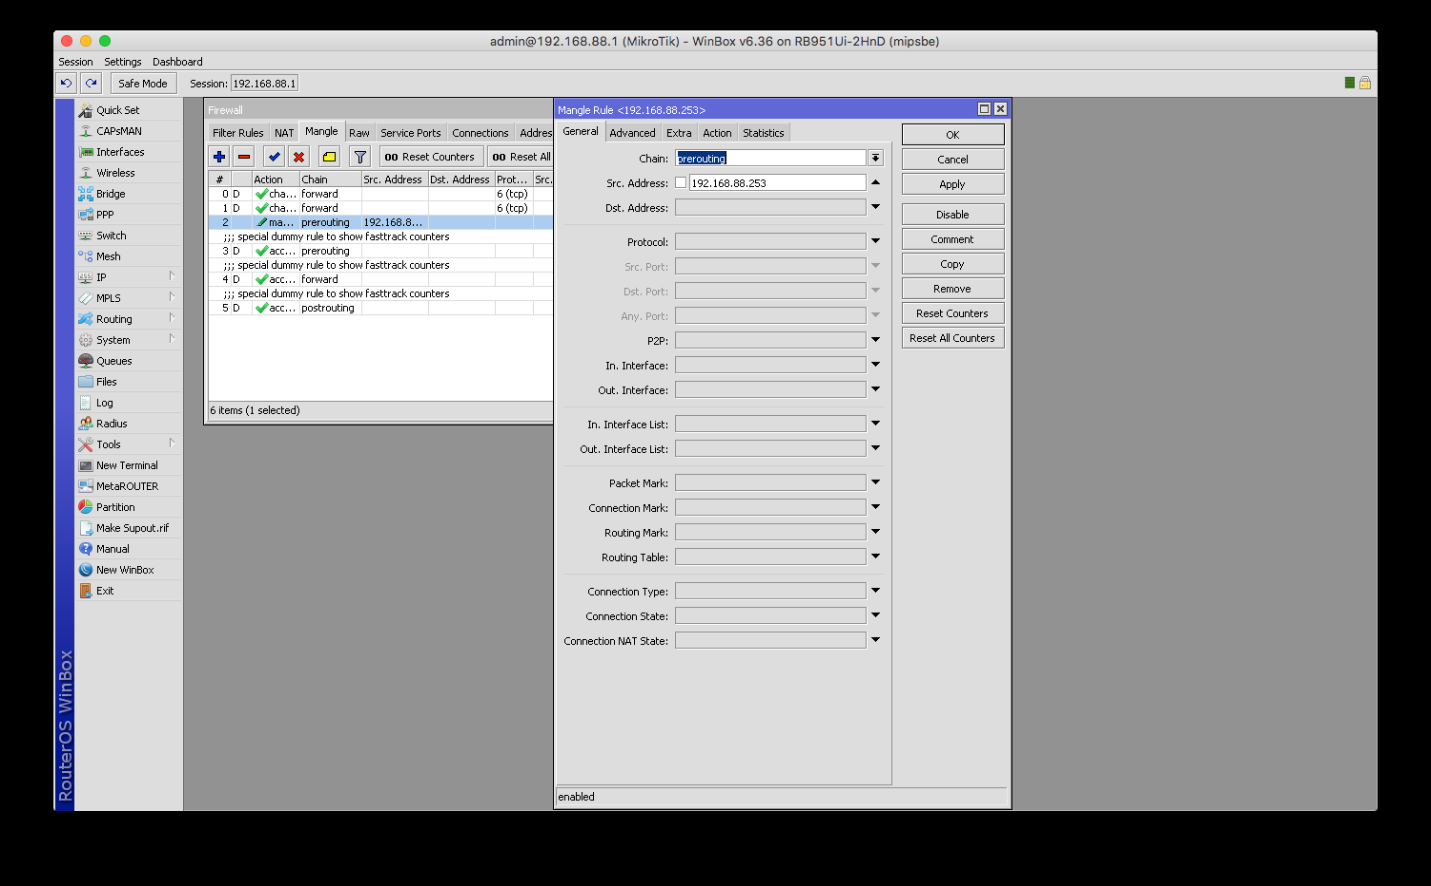
192.168.88.2-192.168.88.254, or the form that suits your network settings accordingly (192.168.1.2-192.168.1.254 or whatever you use). Then, please click Apply.
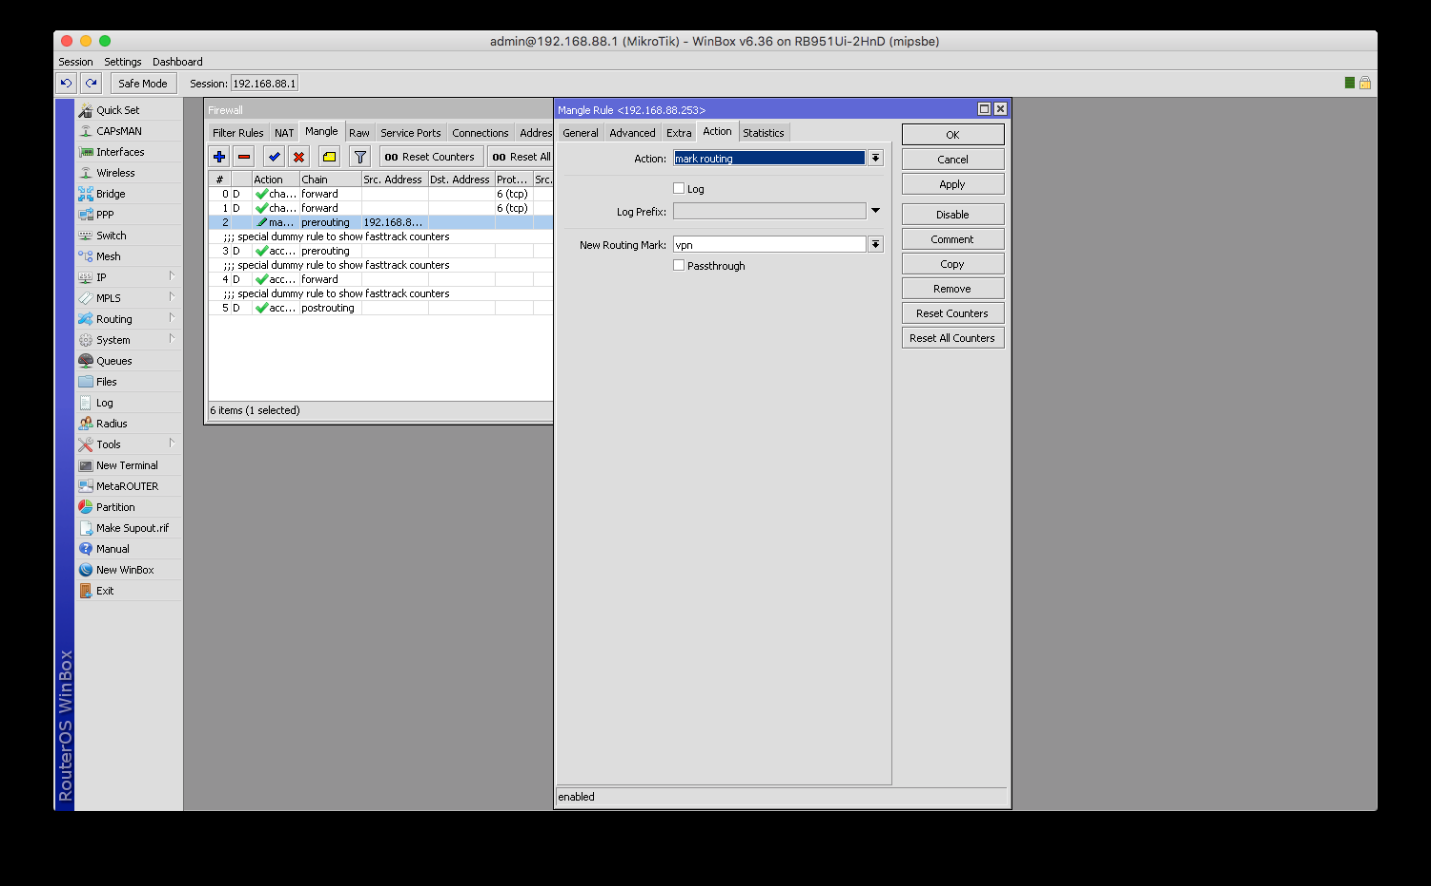
After you set a host or a range of VPN users - please click on the Action tab. In the Action field, choose Mark Routing and name New Routing Mark to something convenient of your preferences, like “vpn” in the example below. Then, please click Apply.
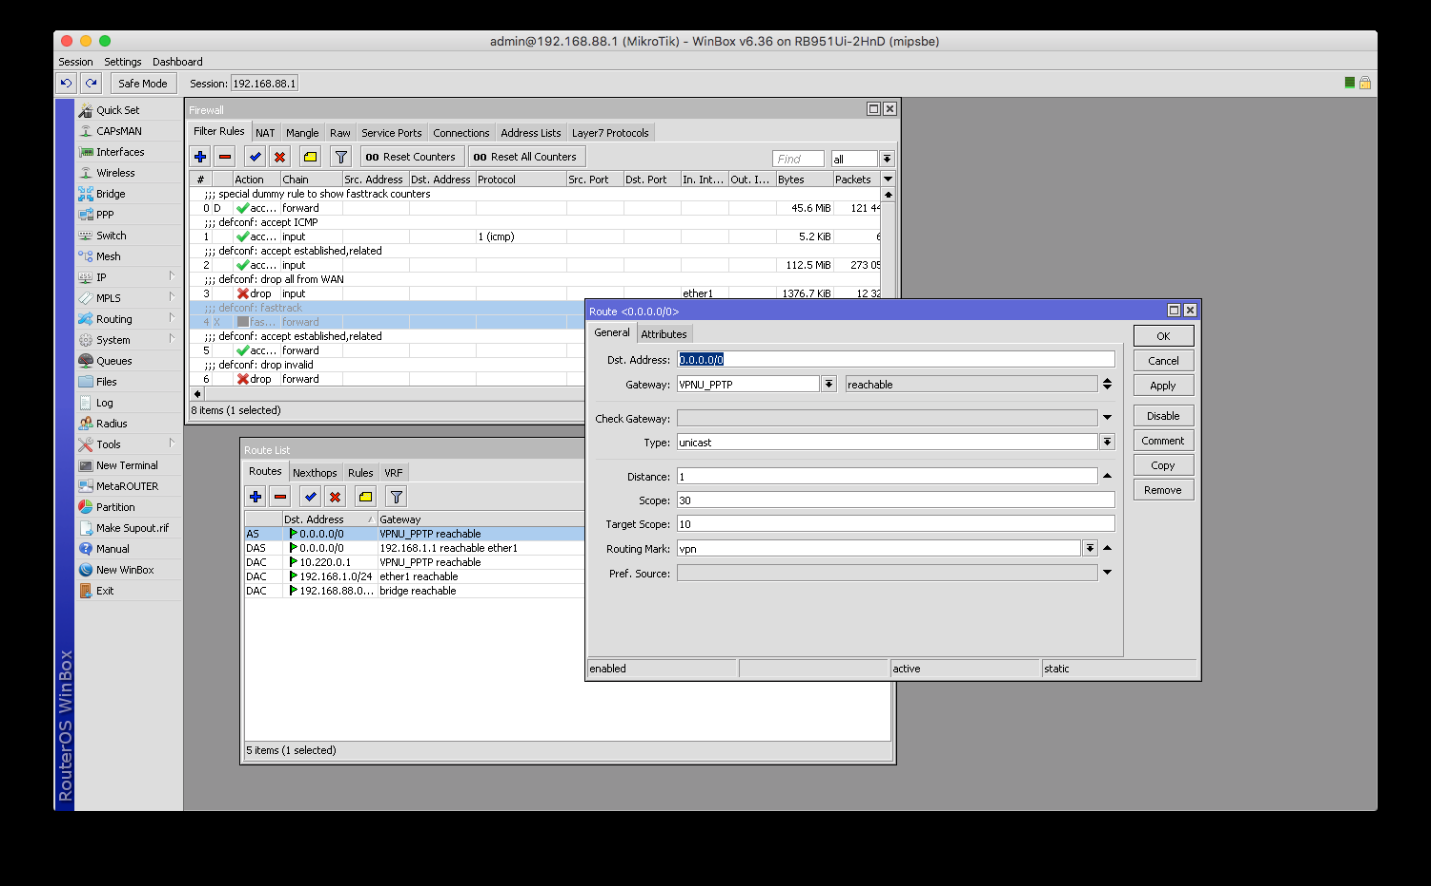
8. The next step is to navigate to the IP > Route submenu. Using the plus button as before, add the following route:
- Leave the destination address (Dst. Address) as 0.0.0.0/0 (that stands for anywhere)
- For the Gateway select your VPN connection name.
- For the Routing Mark select the routing mark from the previous step using the drop-down menu.
- Then, please click Apply.
Normally this should be enough for connecting the Mikrotik RouterOS device to our VPN system.
Notes and Tips:
1. Access software:
We are aware of the fact that most Mikrotik users tend to use OEM software to manage their device settings. The most typical software used is a Mikrotik’s own Winbox client. It has a user friendly window-based interface. The software is available for Windows users by default. It can be acquired from mt.lv website, or from the router itself (RB800 and other resource-rich boards in particular). However, it is possible to run this software on macOS and Linux as well. For macOS users the ready version is available. For Linux users - it is relatively simple to get the app running via the Wine software, through a basic Wine installation (it should be suffice for the task, tested with the 1.6 version and above).
Also, Winbox grants you clear and flexible control over network parameters.
2. Attention
In case you are using two ISP links on your Mikrotik device, which runs RouterOS v.6.35, and one of the ISP's is using Static IP while the other one connects via PPPoE, the routing marking may NOT work. This was confirmed on RB2011uias-2hnd-in, RB2011iLS-IN, RB433, RB750, hAP lite, hAP, RB951G.
When upgrading to the RouterOS version 6.36 and later, this issue will be fixed instantly.
3. Firewall notice
Firewall rules on Mikrotik have hierarchical work order. When you create a new rule it is added to the end of the list. After the creation of a new rule, you need to raise it up in the list accordingly. Otherwise, it might not work. If you have a rule denying all incoming UDP traffic, it has to be all the way down the list. Otherwise, rules to allow some specific UDP will not work. Any allowing rules have to be above any denying ones.
4. If you have strict firewall rules but you want to run L2TP, please allow udp 500 and 4500 udp, as well as gre protocol and protocol 50 ipsec-ah. PPTP can be troubleshooted with opened 1701, tcp 1723 ports.
5. Most Mikrotik routers have level 4 license of the RouterOS. That license allows you to have up to 100 VPN-like interfaces (PPTP, L2TP, PPPoE, PPP, IKE, OpenVPN, EolP, and so on). If you are eligible to receive few manual configuration sets from our service, you can configure few VPN tunnels for various destinations at the same time, and you will be able to easily switch them if needed.
You can also setup server sequence in case you want your VPN to switch server regions. This can be done via setting the Distance option in the route addition (the lowest number has the highest priority).
6. It is generally a good idea to force VPN only on specific users. For example, you want your Apple TV to use the Streaming server region in the US, and your business MacBook to connect to the German region for banking, and your brother's game computer to avoid VPN at all. You can do so by selecting IP-range as suggested in the guide. However, instead of using the entire network, you can specify a single host or few hosts among your network.
For these functions to work properly, you will have to force the router's DHCP server to provide static address to known clients. In order to do that, please go to IP>DHCP>Leases. When you locate the connected device in the list, you can use the Make static function on the client details info. After that the device will be granted the very same internal IP every time it connects. If you want to make your network look nice, you can edit the given IP address once you have made the DHCP lease a static one. No reboot required for these settings to be applied. Client disconnection from the router is required though. When your clients are static, it is easy to see their default gateway accordingly.
7. Attention #2 NAT issue
Sometimes when you create a VPN connection with our service, and you can ping-test the connection from the router, but not from your Phone, Computer or iPad, take a look at the Firewall NAT section.
The very necessary firewall rule for proper operation is NAT>Masquerade. On default configuration, it has an attribute of the Out Interface set to default WAN. Miss-configure of this option makes the internet usage behind a router impossible. Also, if the interface is set, then the rule works on the according interface only. The easy solution would be to remove the Interface attribute. This will make the router masquerade all packages it has access to. While it should work without any issues, we still suggest to copy the existing rule, and to change the Interface to VPN or all-ppp on a rule copy accordingly.
8. Note to step 6
Yes, keeping fast track rule should be possible for individuals with some decent networking experience. Though it would require using more complicated steps, unnecessary for most users, thus we have not included that in this manual.
9. DNS fix/solution
If you experience the inability to resolve DNS addresses after connecting, or you believe you have created a DNS leak yourself by having ISP-supplied DNS working after VPN is up, you should do the following:
- Go to IP > DHCP Server
- Navigate to the Networks tab
- Click on Local Network (or the one you are configuring), and in the next window set DNS for Google’s 8.8.8.8, 8.8.4.4, or one of your preferences.
- After that, please go to IP > DNS and uncheck the Allow Remote Requests option. Also, you can clear the existing DNS settings in that menu.
Alternate to that would be to visit the DNS section right away, and add the ones you need by leaving the Allow Remote Requests checkbox active. For that solution, it could be a good idea to disable Use Peer DNS in the ISP connection options (DHCP Client, PPPoE Client, or whatever is used for your internet connection)
10. L2TP connection is done the very same way; the only difference is that you will need to select L2TP Client in the first place when creating the interface.
11. Useful debug info can be found in the Log as it will contain connection errors.
12. Your router has an inbuilt DDNS functionality, accessible via the IP > Cloud submenu.
13. In the System > Users section you can set account(s) passwords and access level for the device management.
14. In case you have issues with your desired computer/device changing its internal IP very often, please check the IP > DHCP Server menu. There you can locate a dynamic lease for your device (its hostname and IP should allow you to choose it correctly). Clicking on the string and using the Make Static button will cause the device get the same internal IP address every time it is connected to your network.