OpenVPN Client Setup
for OpenWrt Chaos Calmer 15.05.1 on ASUS RT-N16 using LuCI Web Interface
This tutorial guide will take you through the detailed steps to set up an OpenVPN Client for OpenWrt Chaos Calmer 15.05.1, on the example of Asus RT-N16, using LuCI Web Interface.
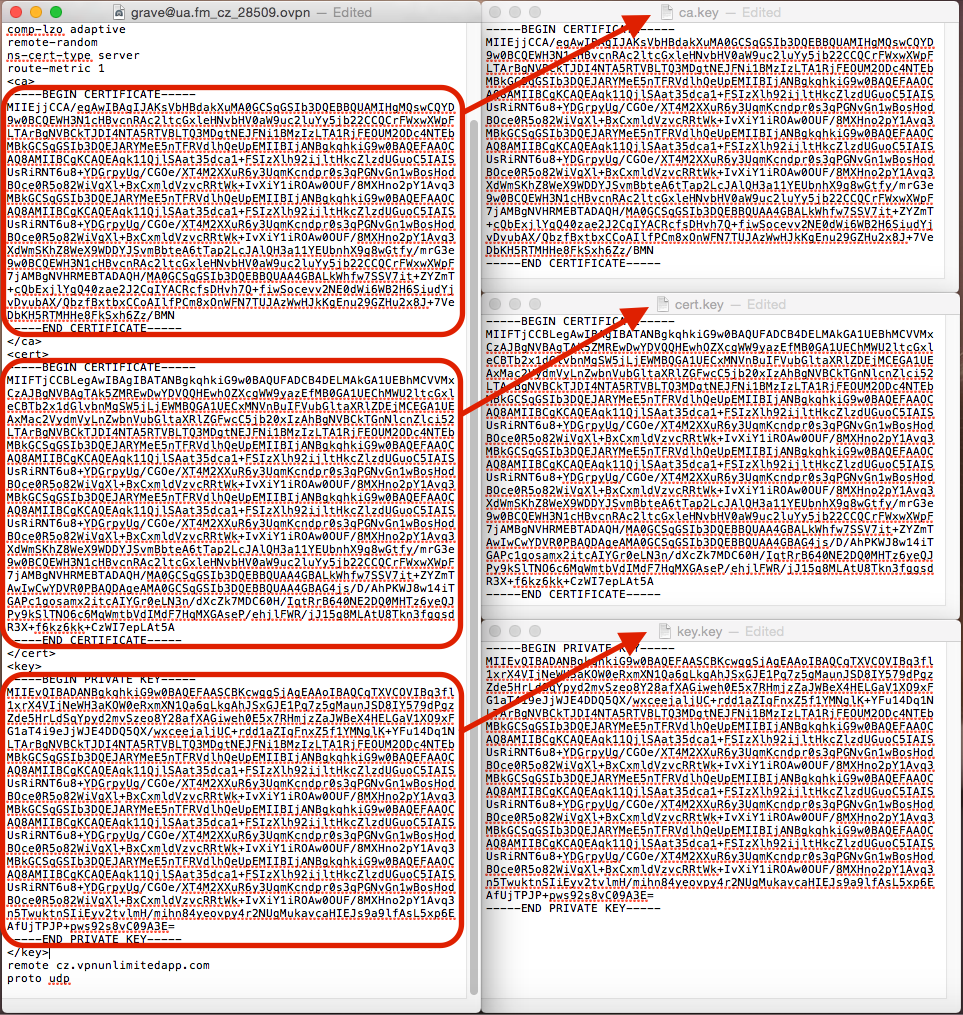
The very first step to take in configuring your router to work with our service is creating manual configuration files. In this regard, please follow a few simple steps described in our tutorial. Open the generated configuration file with any text editor. Here, create text files – ca.key, cert.key, key.key, and paste the appropriate data from the configuration file.
ca.key – paste strings between <ca> and </ca>, including -----BEGIN CERTIFICATE----- and -----END CERTIFICATE-----
cert.key – paste strings between <cert> and </cert>, including -----BEGIN CERTIFICATE----- and -----END CERTIFICATE-----
key.key – paste strings between <key>; and </key>, including -----BEGIN CERTIFICATE----- and -----END CERTIFICATE-----
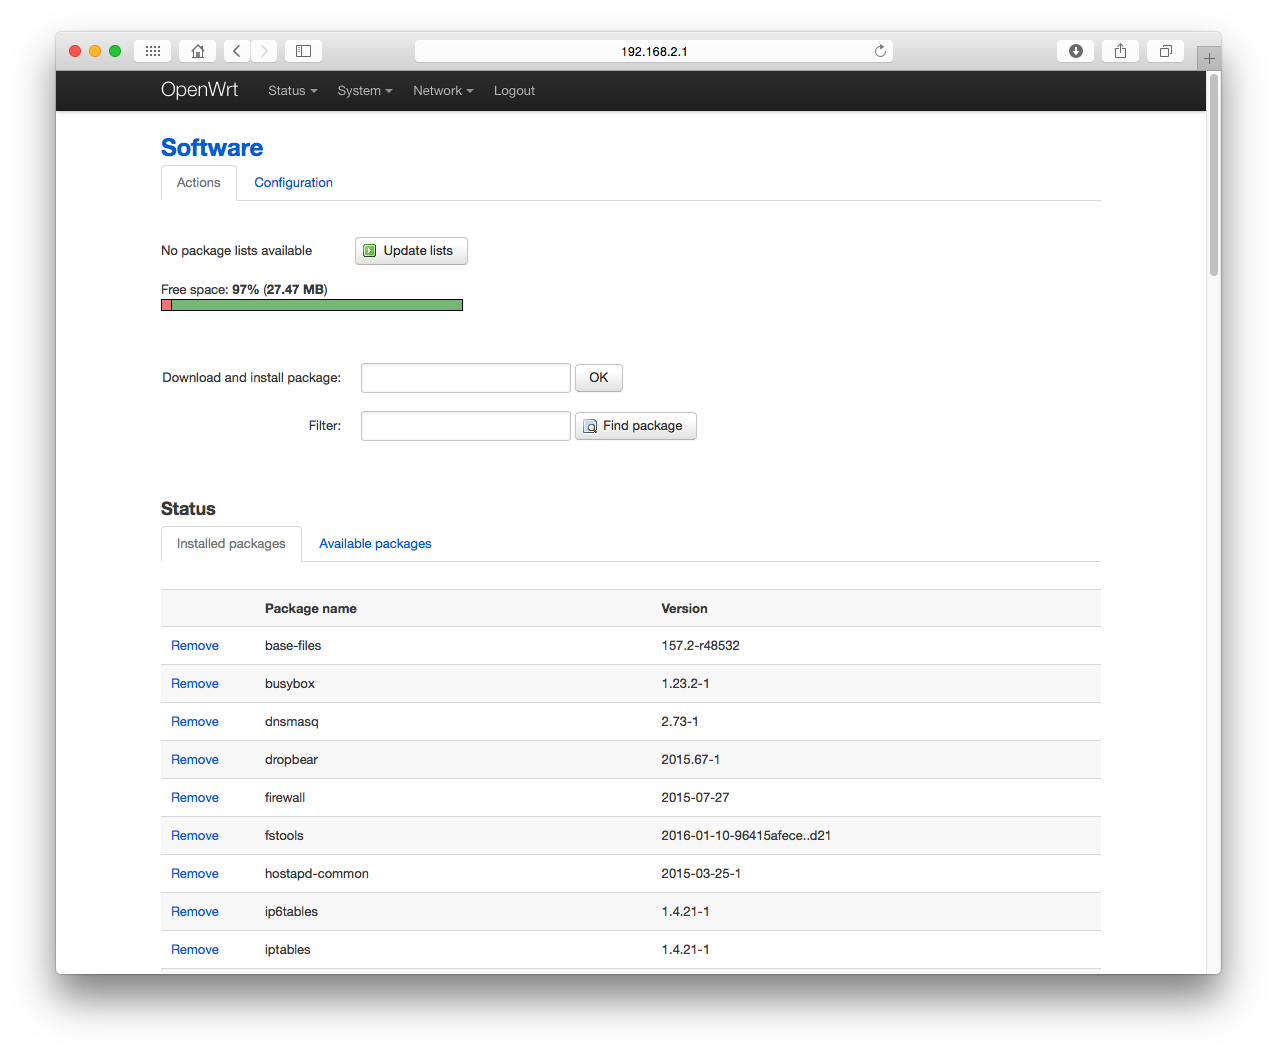
Open your router’s web-interface.
Go to System > Software, and open the Configuration tab.
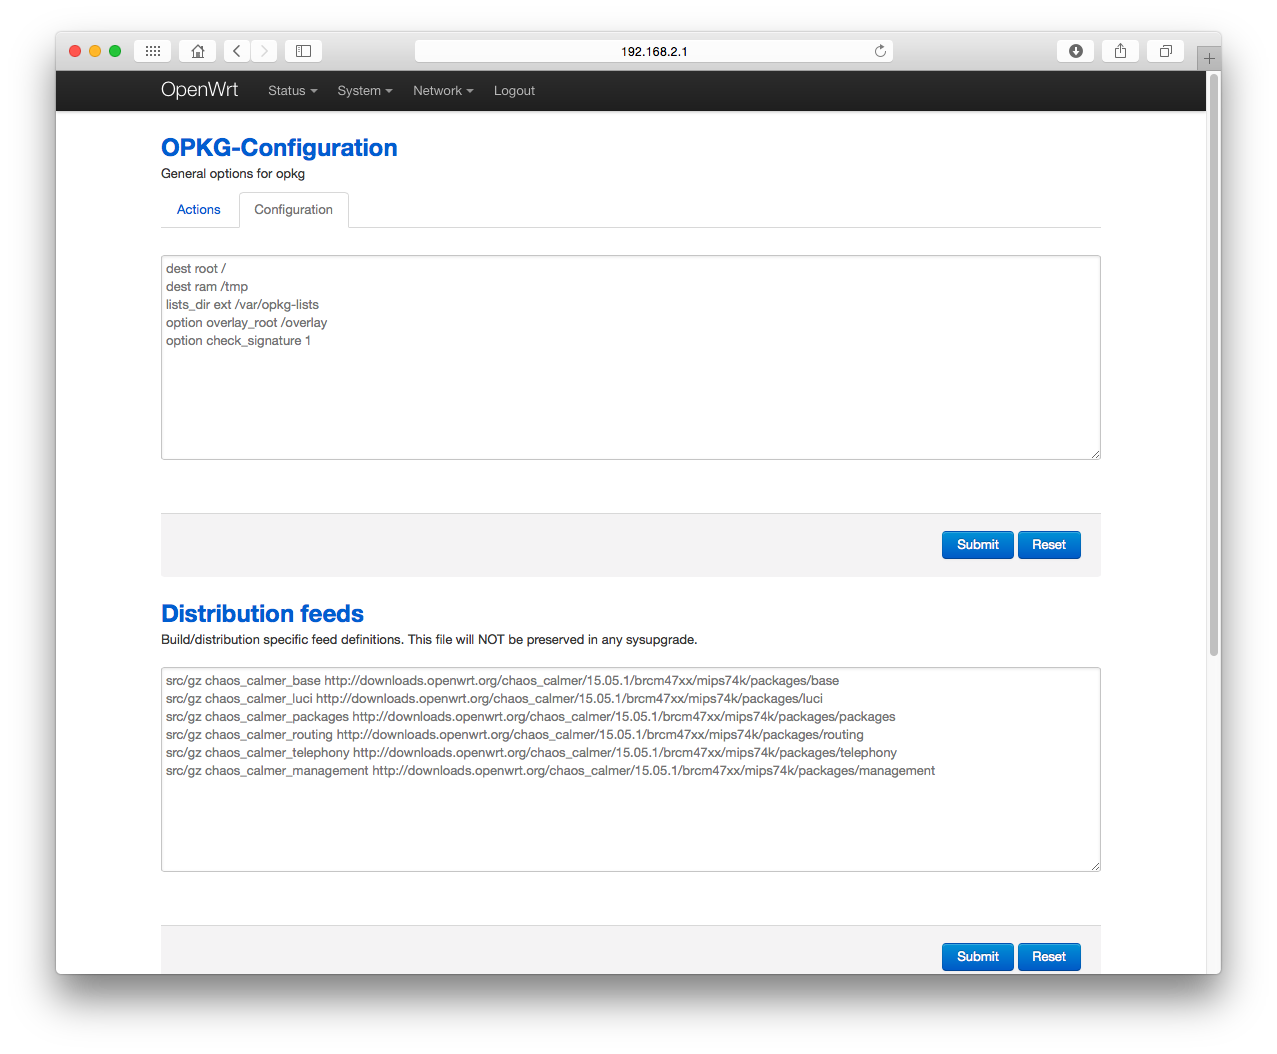
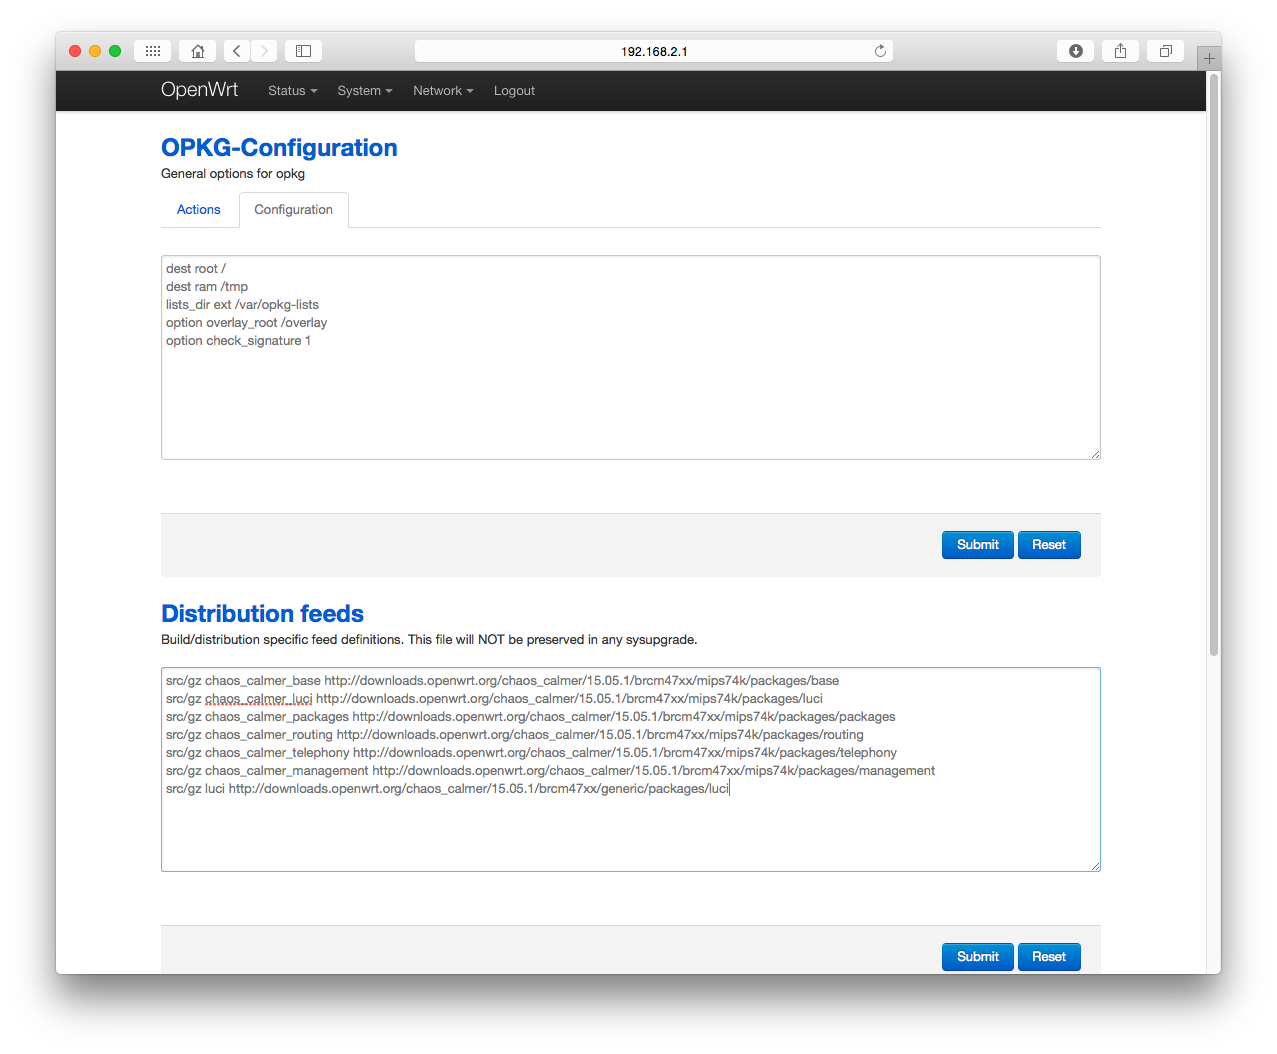
Add the following string into the Distribution feeds field:
src/gz luci http://downloads.openwrt.org/chaos_calmer/15.05.1/brcm47xx/generic/packages/luci
If you use a different model of the router, specify the appropriate path in the string
src/gz luci http://downloads.openwrt.org/$release/$version/generic/packages/luci
and click Submit.
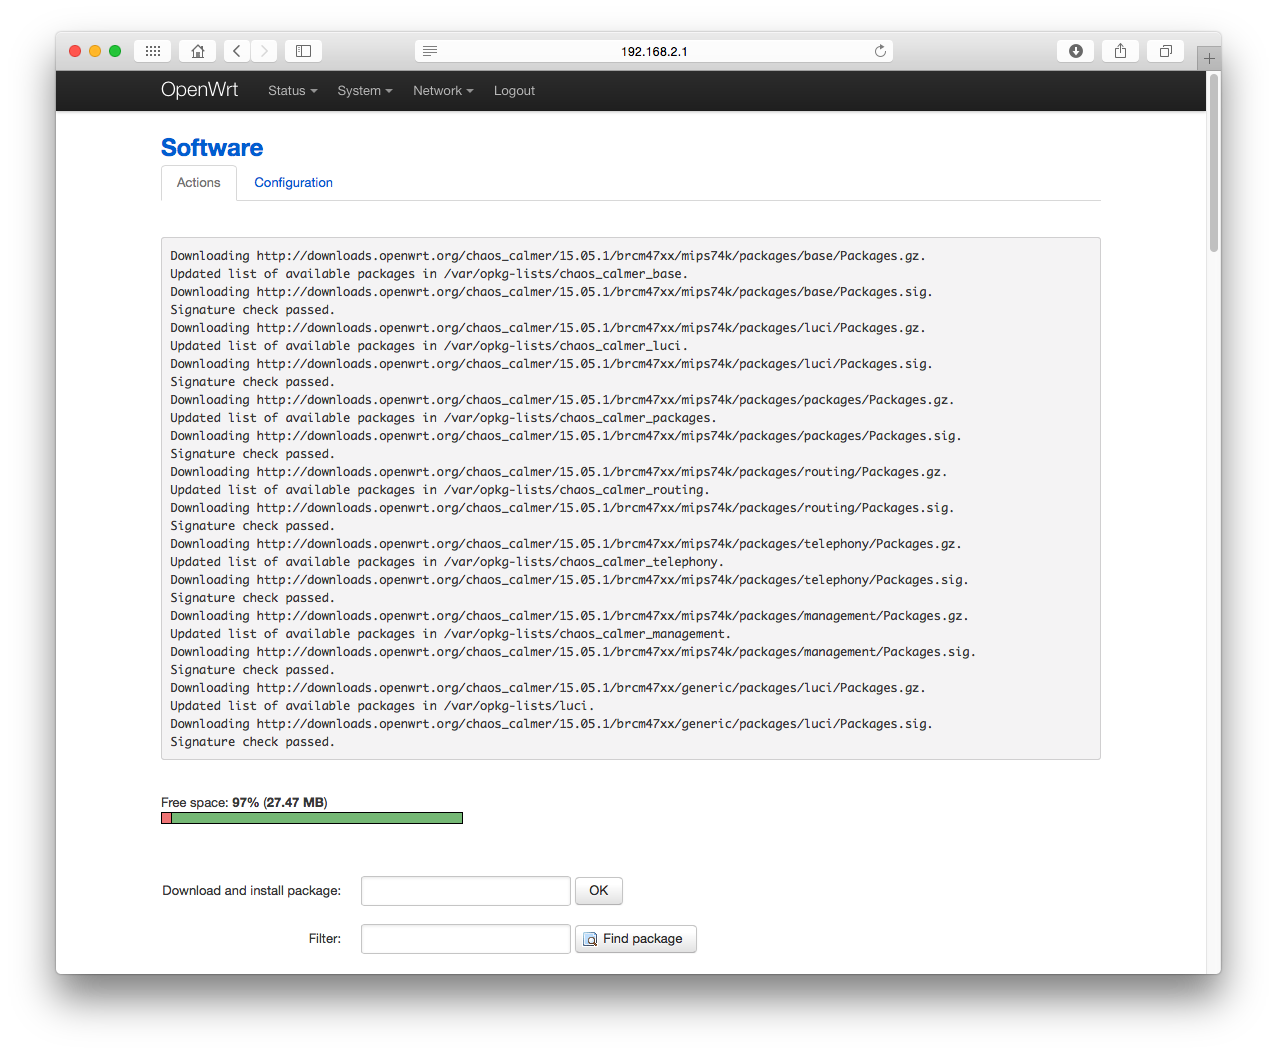
Go to the Actions tab and click Update lists.
Wait until the operation is completed.
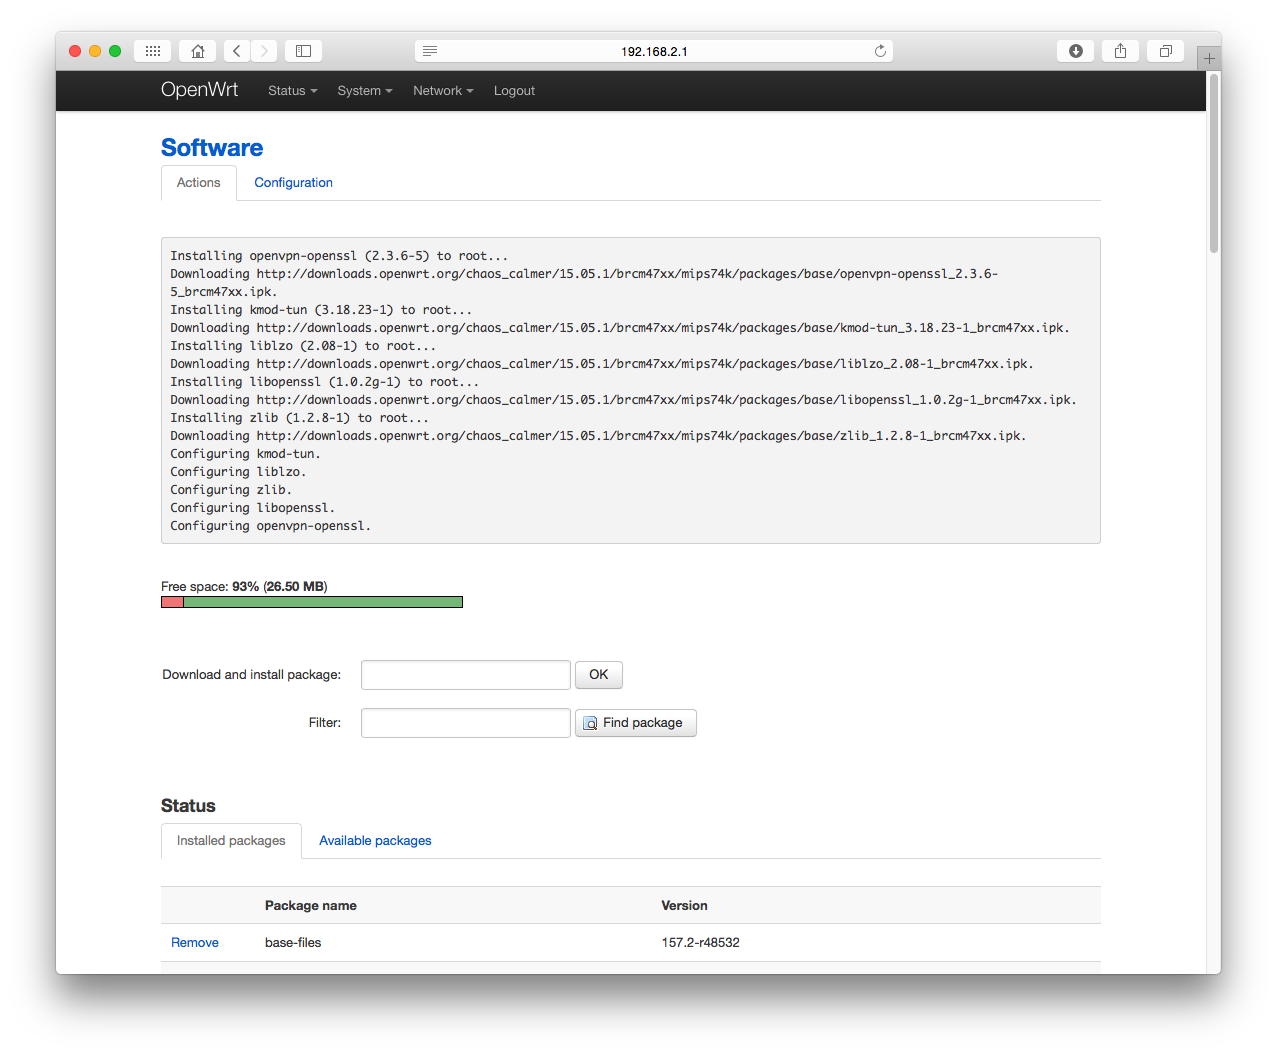
Type open-vpn-openssl in the Download and install package field and click OK.
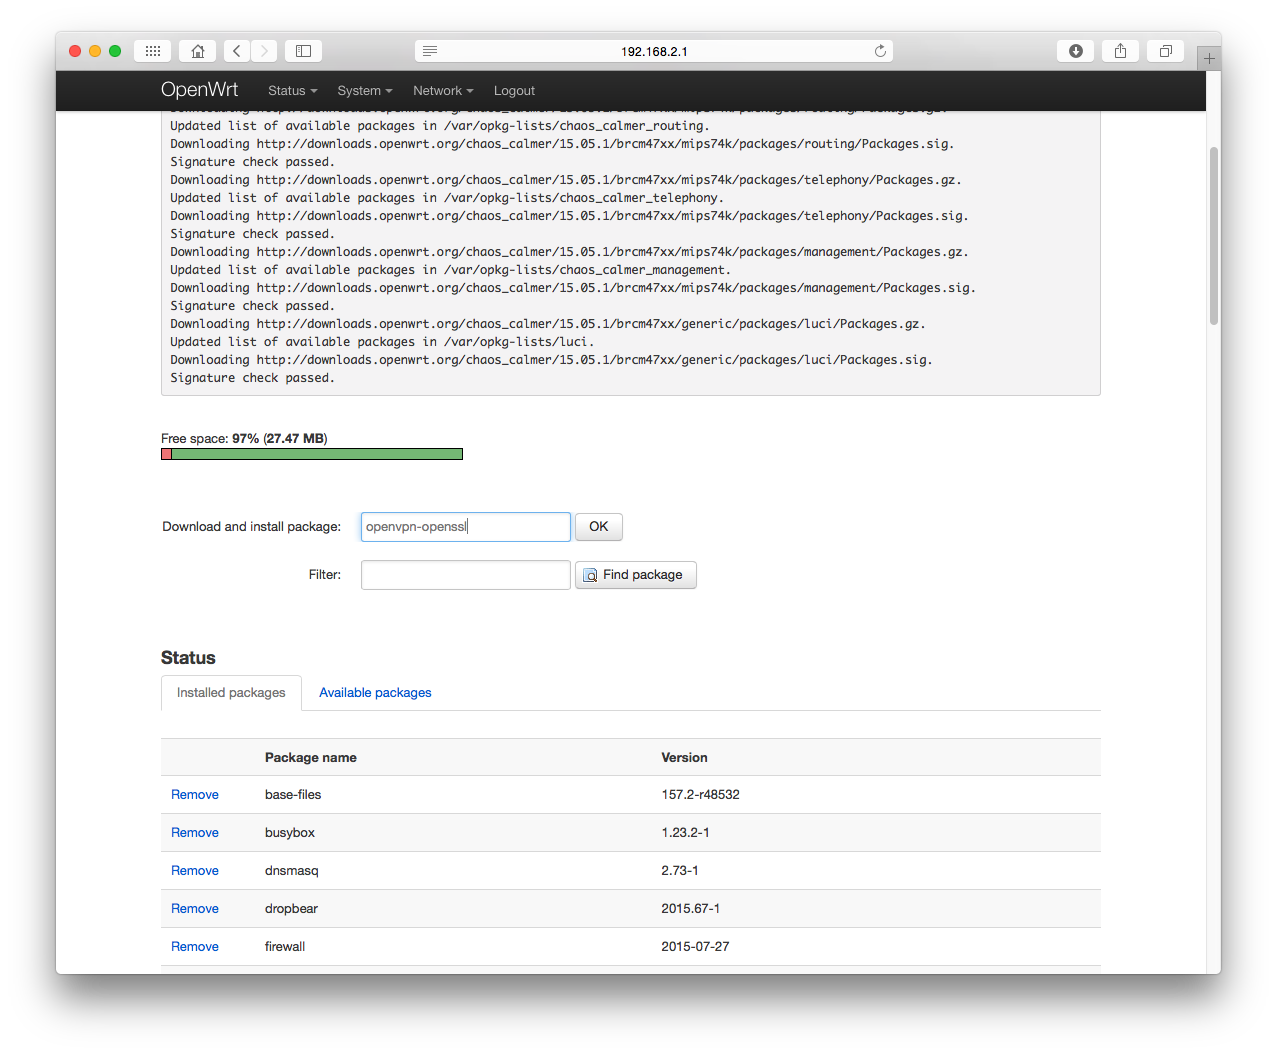
Wait until the package is installed.
Type luci-app-open-vpn in the Download and install package field and click OK.
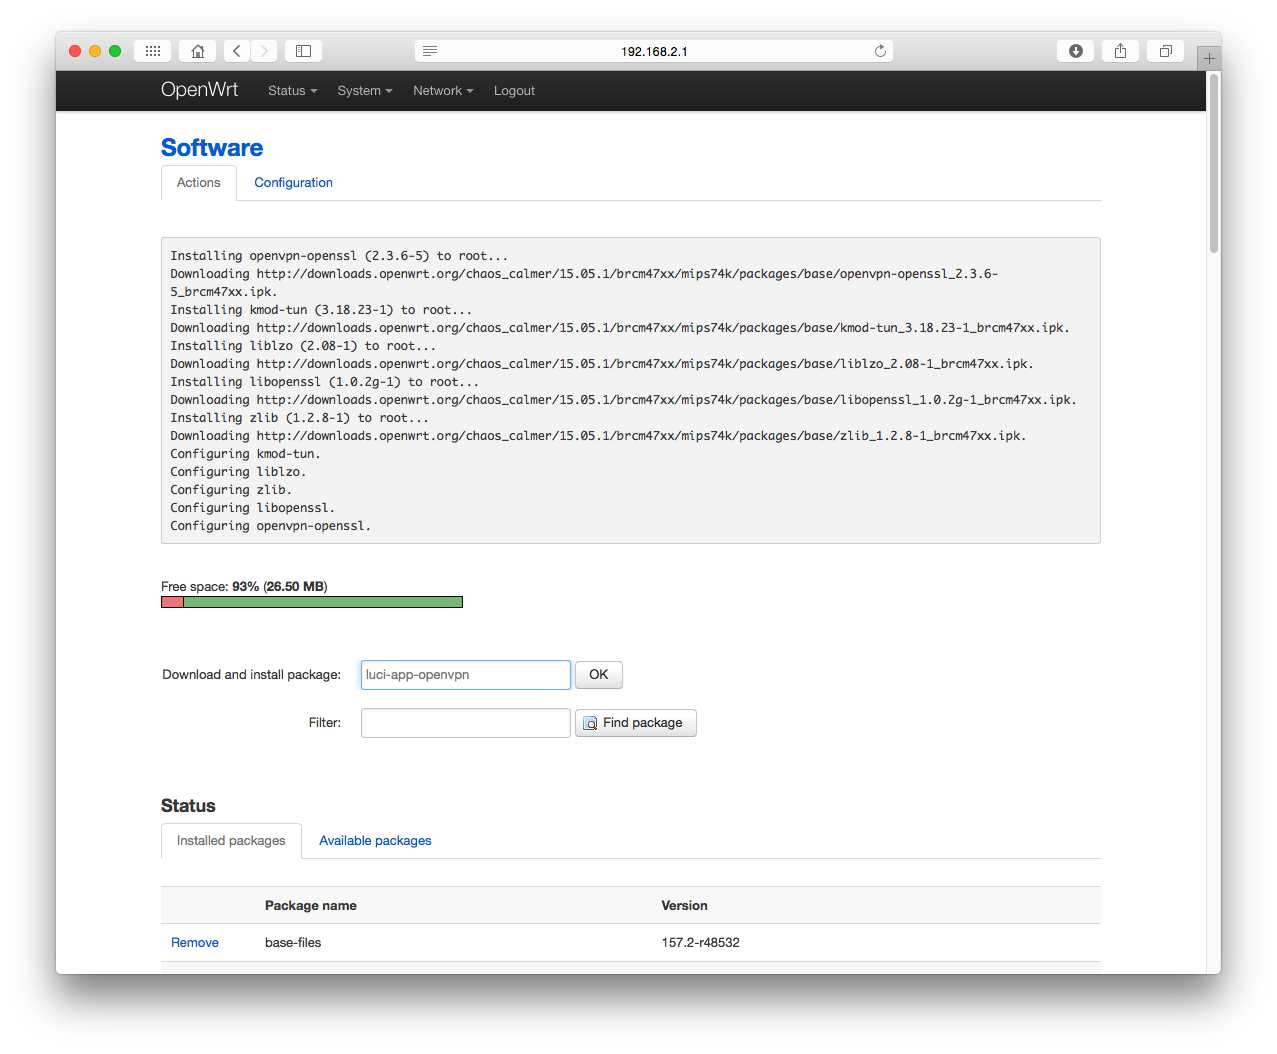
Wait until the package is installed.

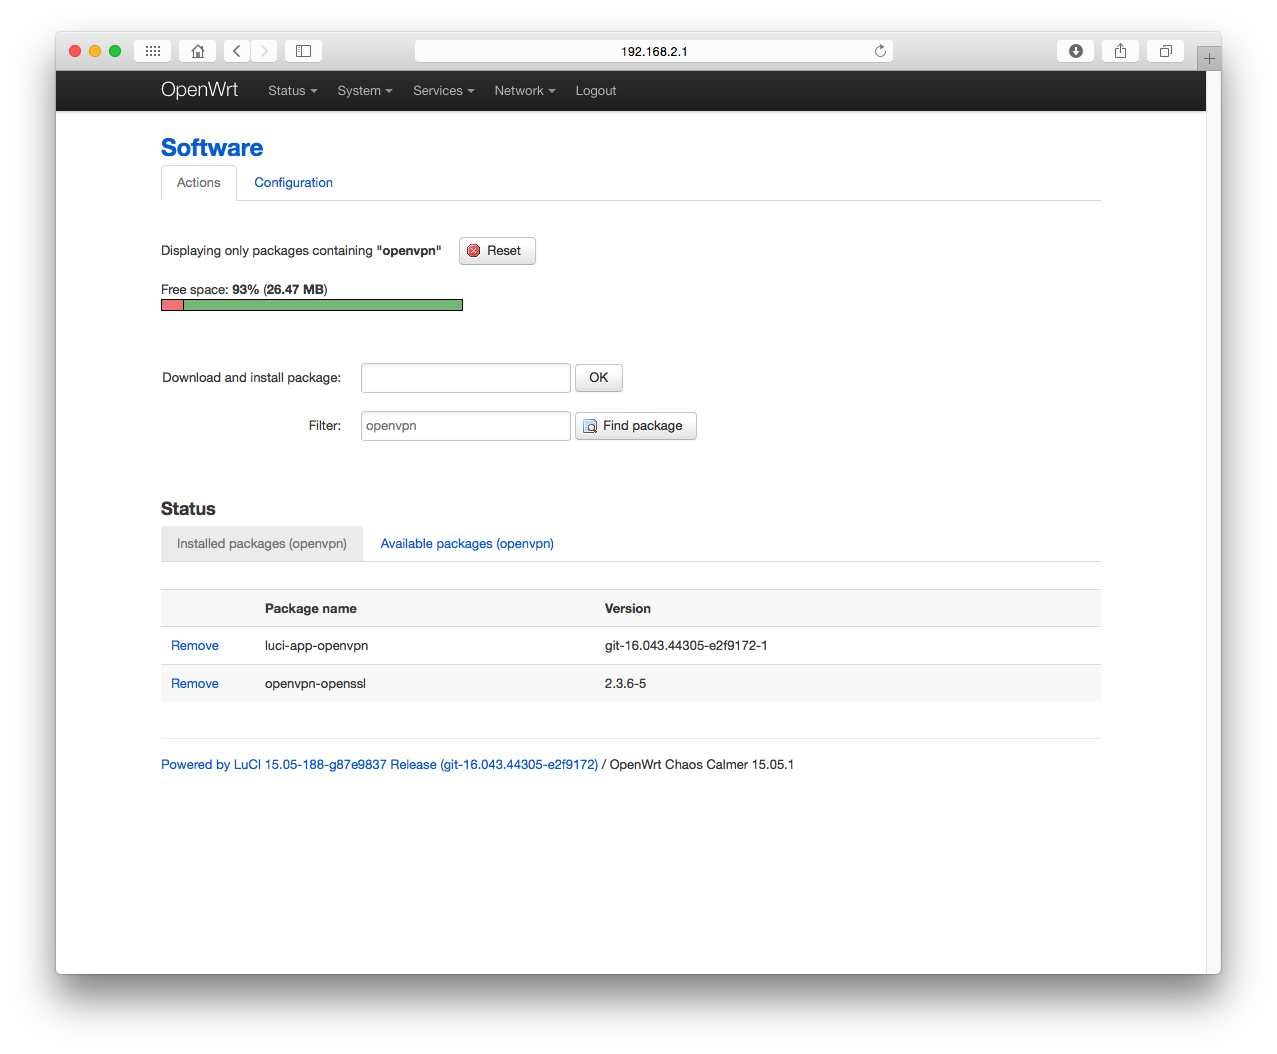
Type open-vpn in the Filter field and click Find package.
Make sure that both packages are installed.
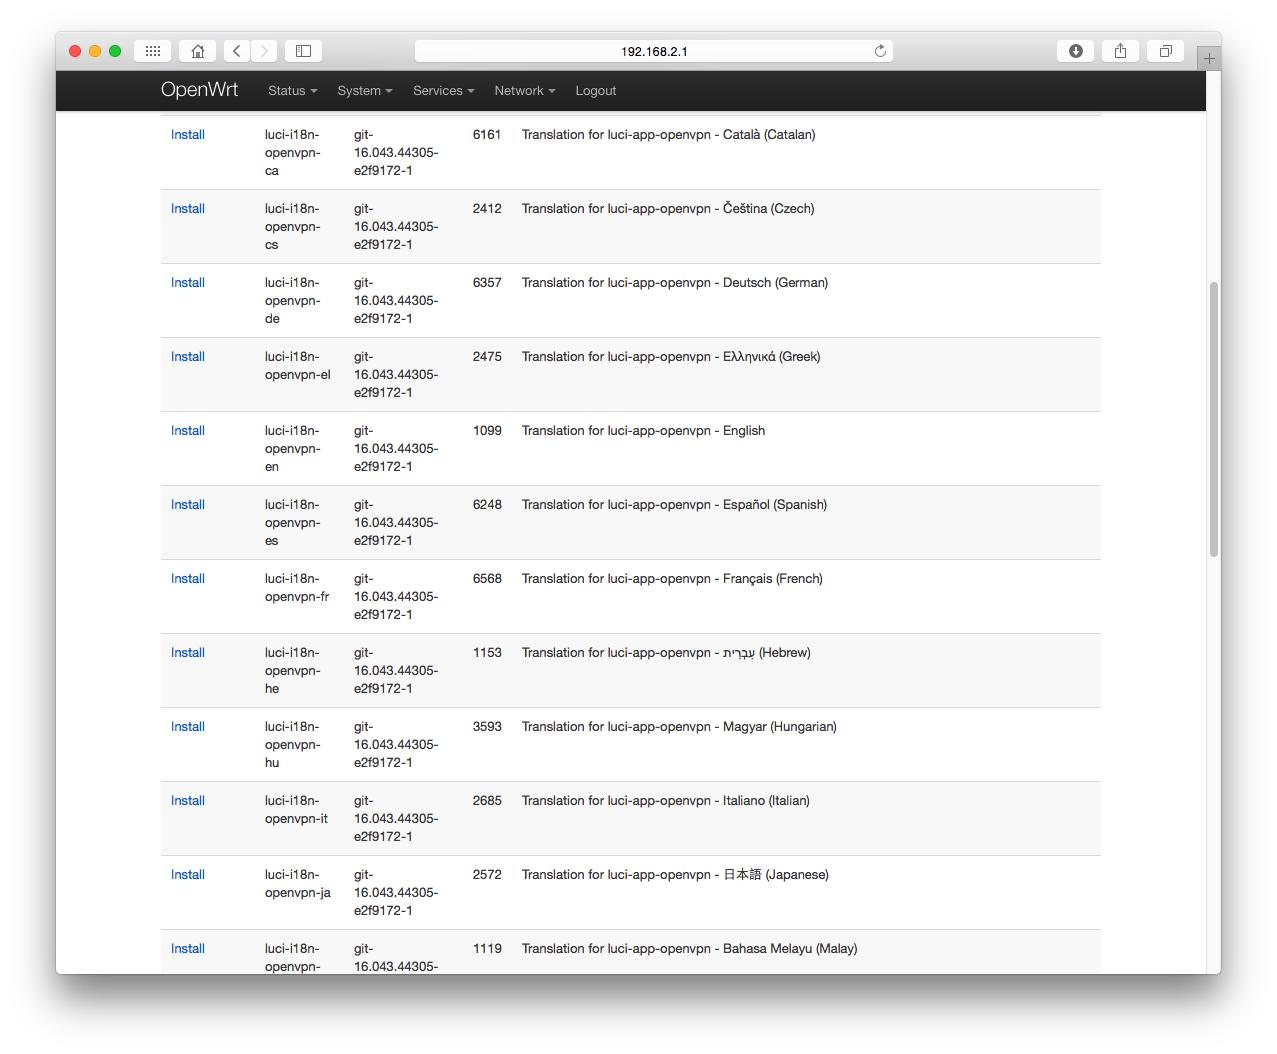
Optionally, you can install localization for the luci-app-open-vpn package. For this purpose, open the Available packages tab, and install the desired localization package.
A new item Services > OpenVPN will appear in the upper menu. Navigate to it.
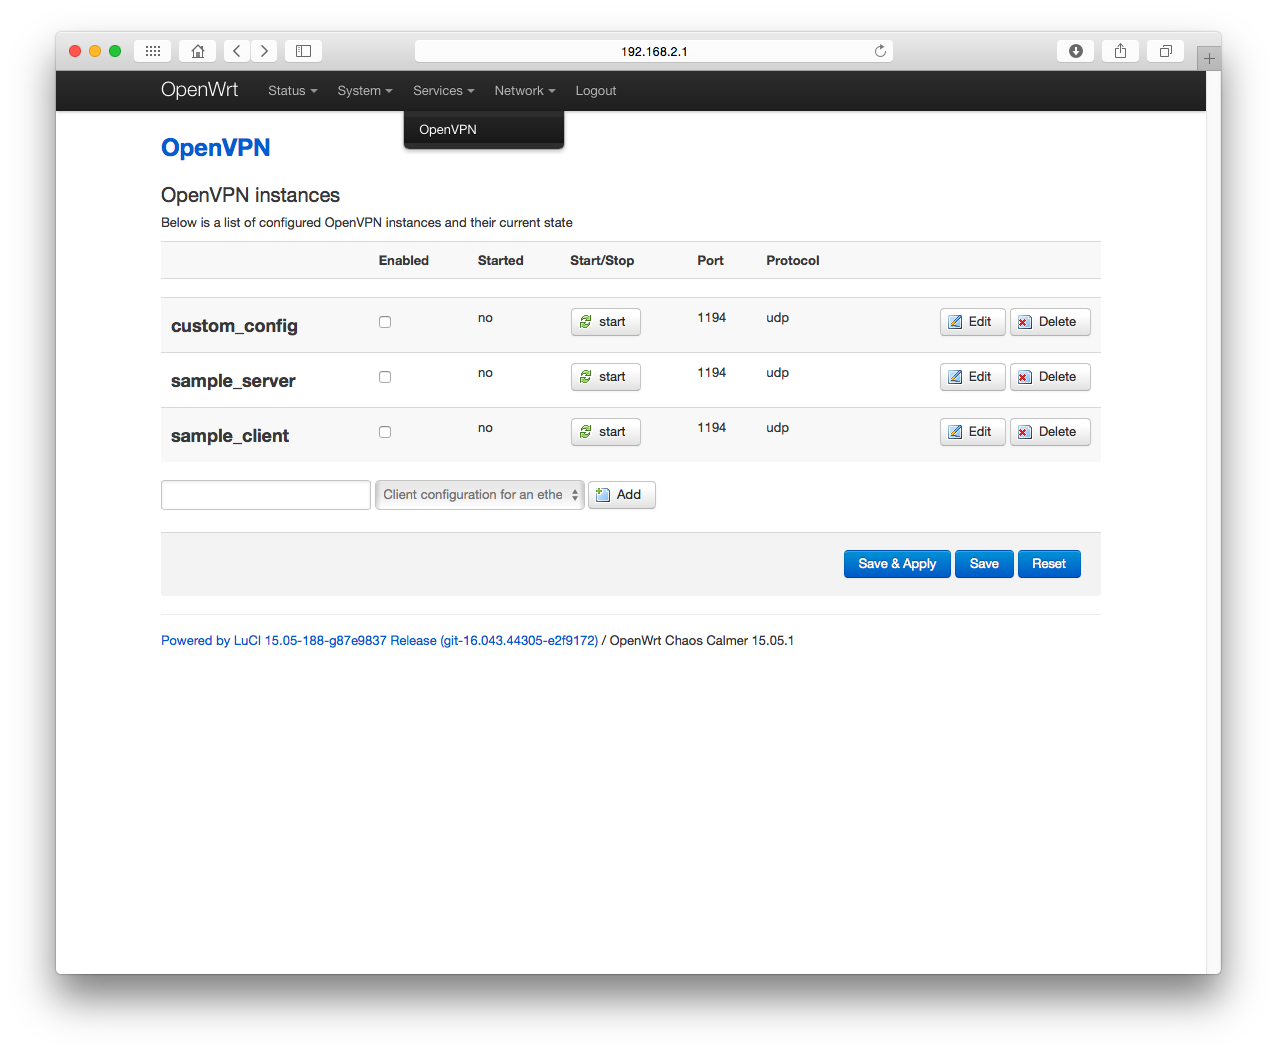
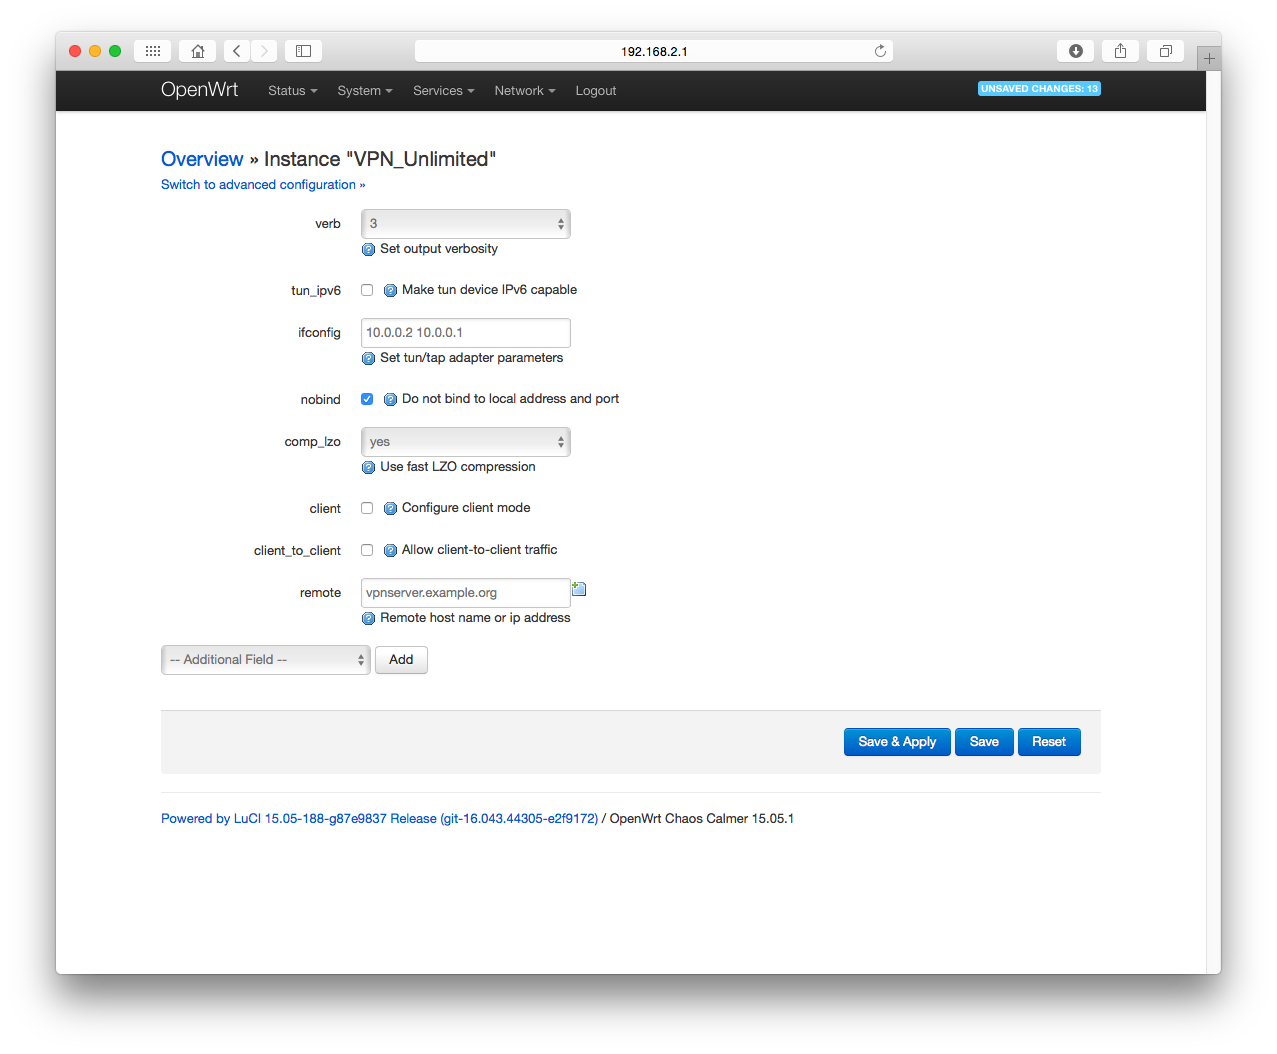
Type VPN_Unlimited in the configuration name field, select “Simple client configuration for a routed point-to-point VPN” and click Add.
You will be forwarded to the configuration page.
Click Switch to advanced configuration.
At the top of the page, click Switch to advanced configuration > Configuration category > Networking.
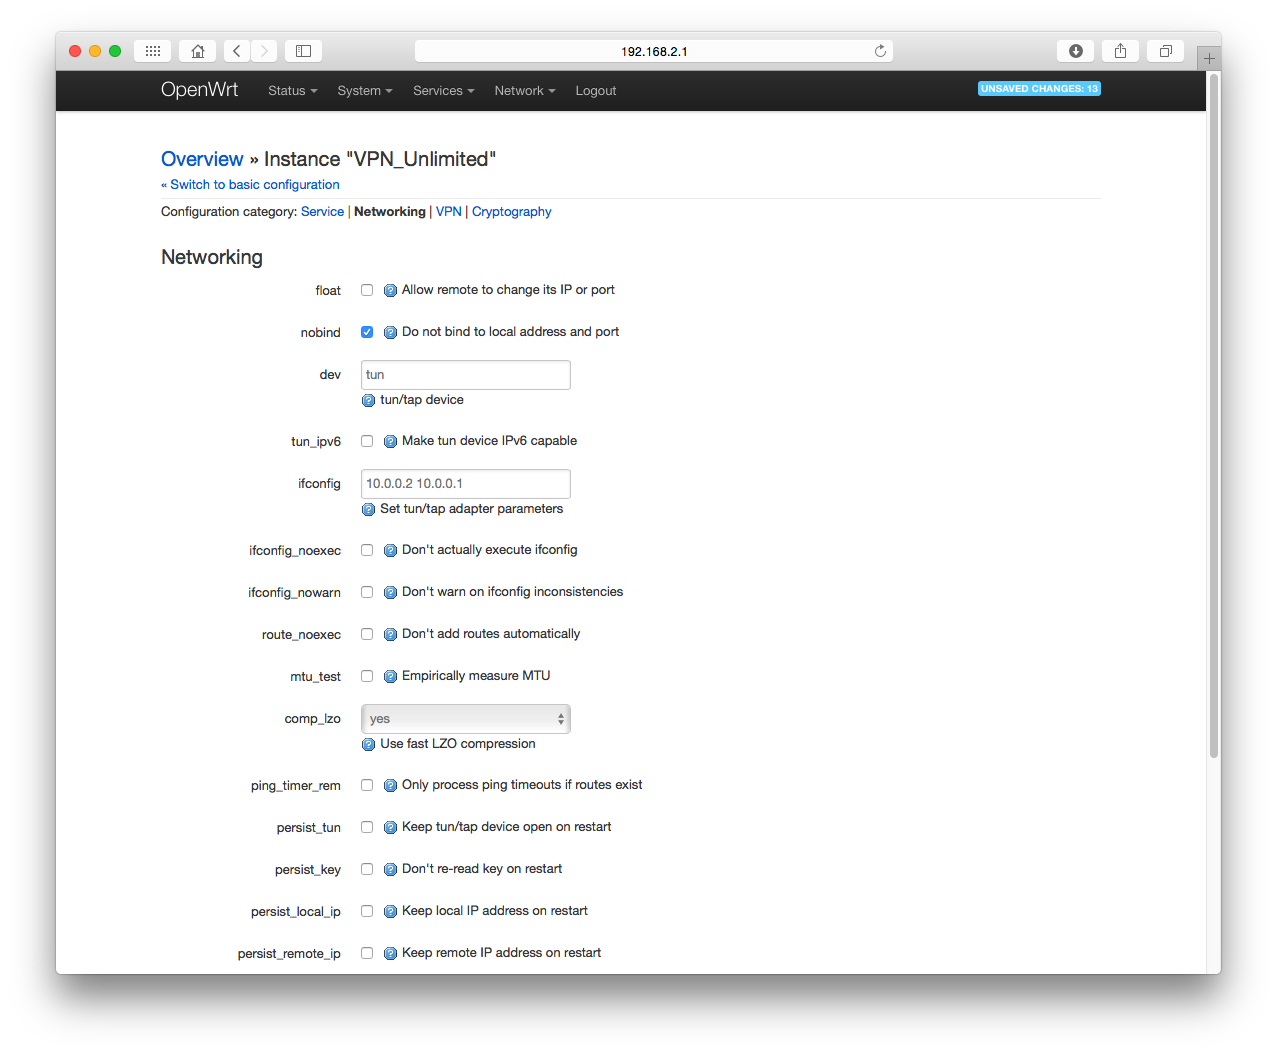
If you do not see the required parameter in the configuration tabs, select it in the dropdown menu at the bottom of the page, and click Add.
Select port in the dropdown menu and click Add.
Select keepalive in the dropdown menu and click Add.
Enter the following settings (you can choose any variant, but keep in mind different port parameters):
| Parameter | Settings 1 | Settings 2 |
| port | 1194 | 80 |
| nobind | checked | |
| dev | tun | |
| dev_type | tun | |
| keepalive | 5 30 | |
| comp-lzo | adaptive | |
| persist-tun | checked | |
| persist-key | checked | |
| ifconfig | leave blank (if an IP address is shown here, delete it) | |
Click Save.
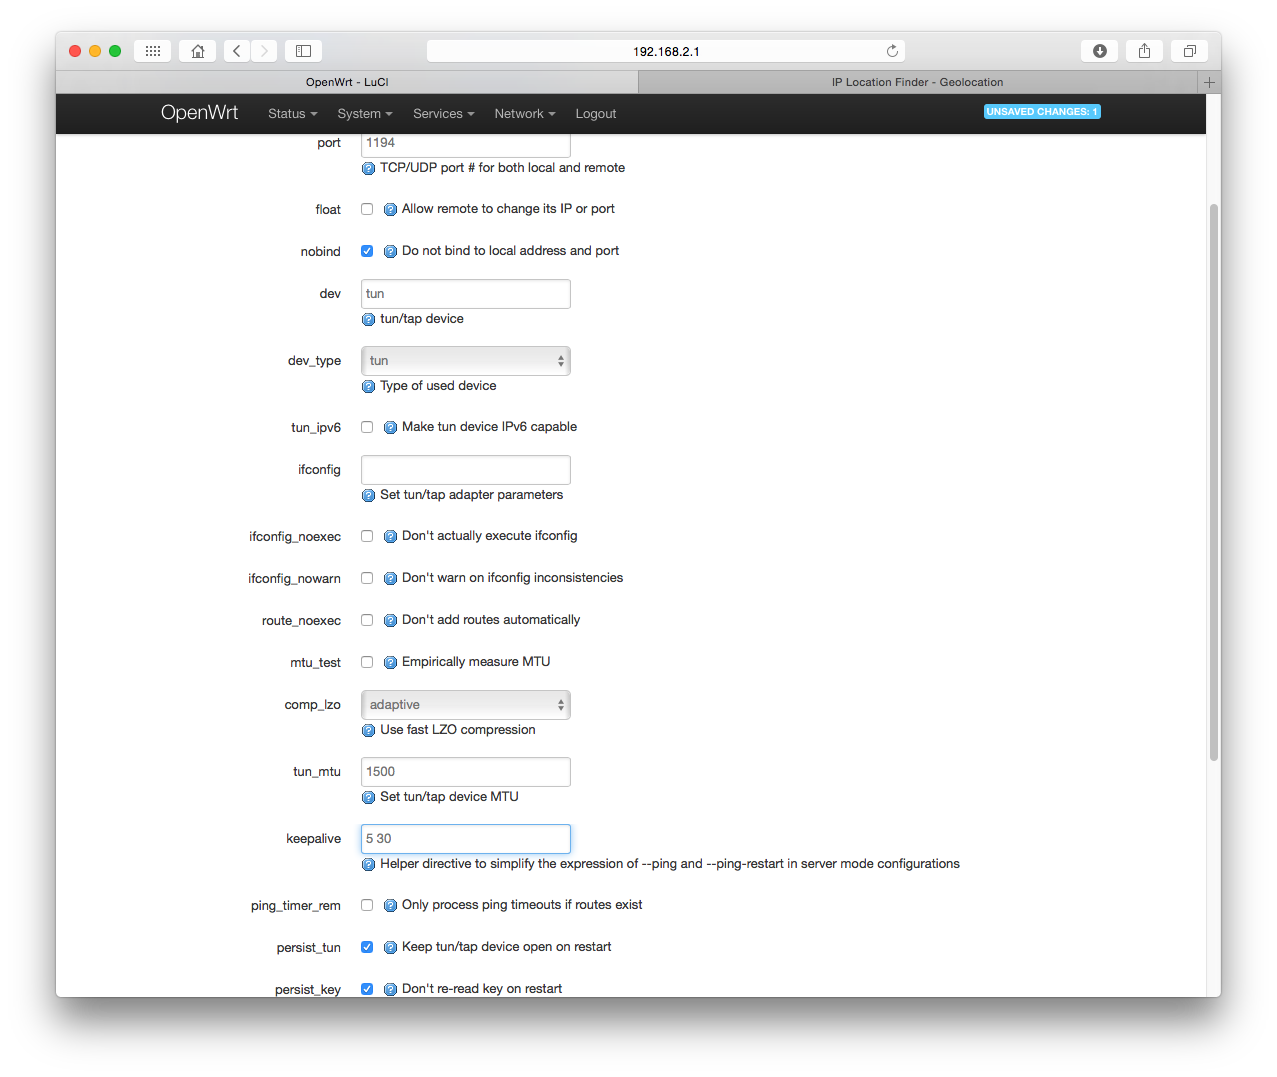
At the top of the page, navigate to Configuration category > VPN.
Set a checkbox for client.
At the bottom of the page, select proto in the dropdown menu and click Add.
Enter the following settings:
| Parameter | Settings 1 | Settings 2 |
| port | checked | |
| remote | Specify a server name from the created configuration set | |
| remote-random | checked | |
| dev_type | udp | tcp-client |

Click Save.
At the top of the page, navigate to Configuration category > Cryptography.
Select ca in the dropdown menu, and click Add. Click Choose File, to the right of the ca parameter, and choose the previously created ca.key file.
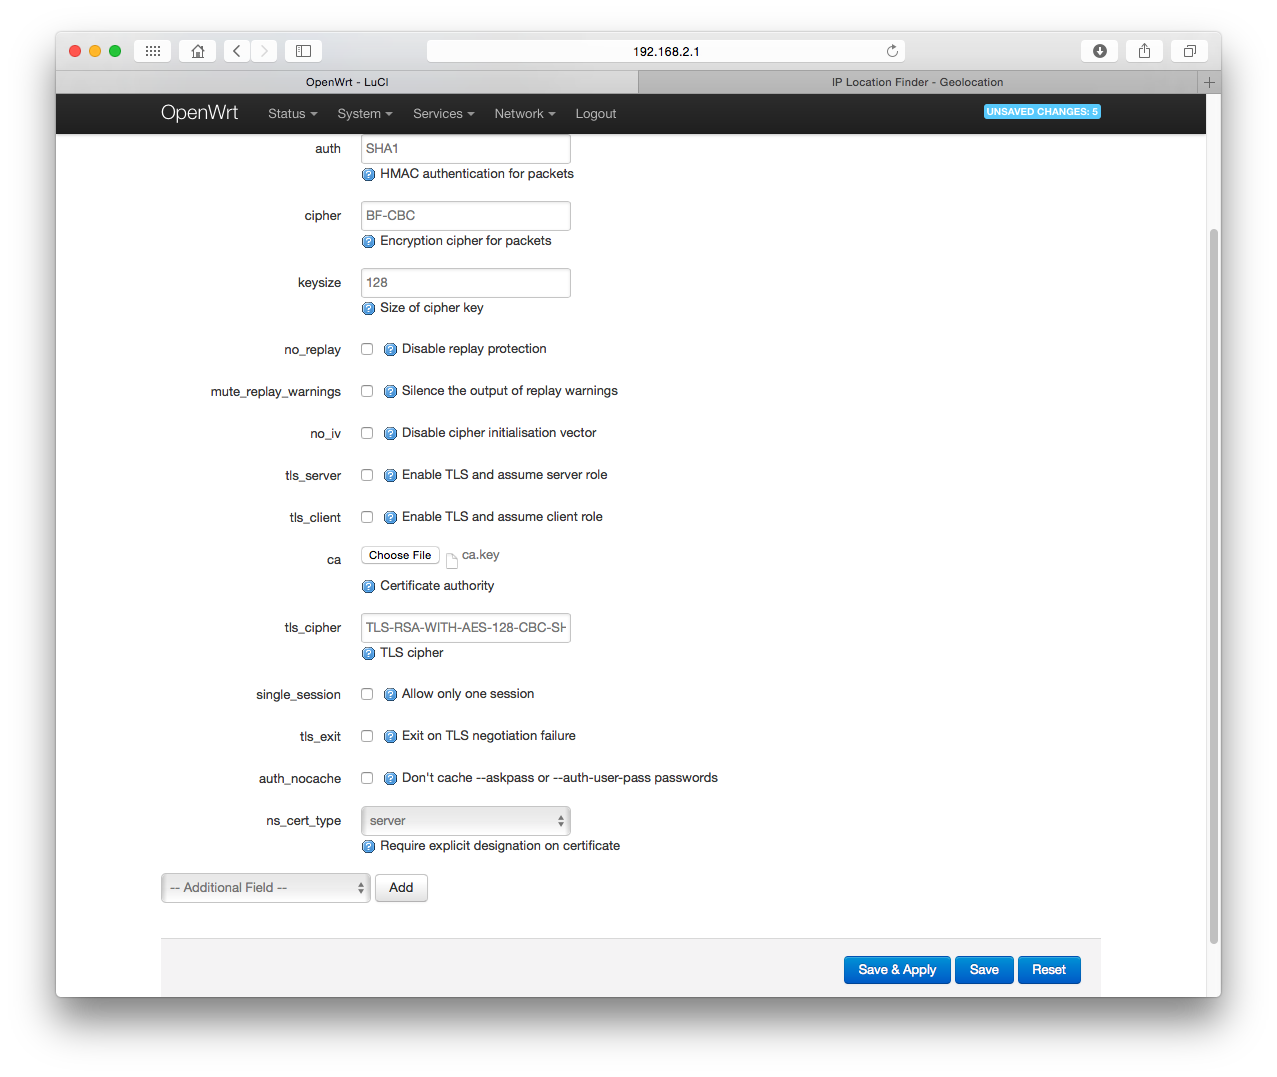
Select cert in the dropdown menu, and click Add. Click Choose File, to the right of the cert parameter, and choose the previously created cert.key file.
Select key in the dropdown menu, and click Add. Click Choose File, to the right of the key parameter, and choose the previously created key.key file.
| Parameter | Value 1 |
| auth | SHA1 |
| remote | BF-CBC |
| keysize | 128 |
| tls_cipher | TLS-RSA-WITH-AES-128-CBC-SHA |
| ns-cert-type | server |
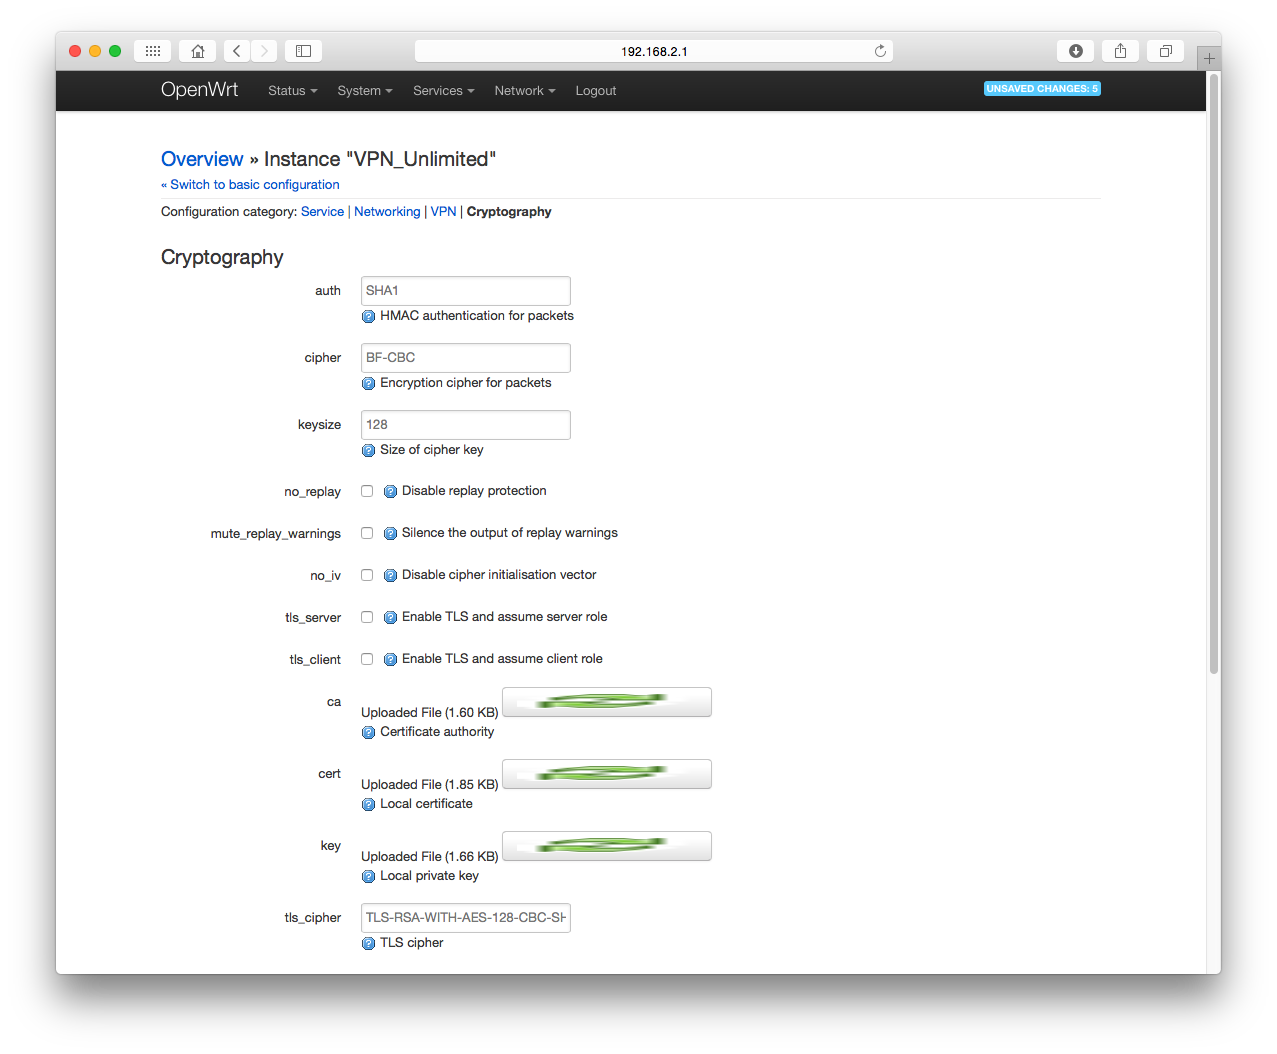
Click Save & Apply.
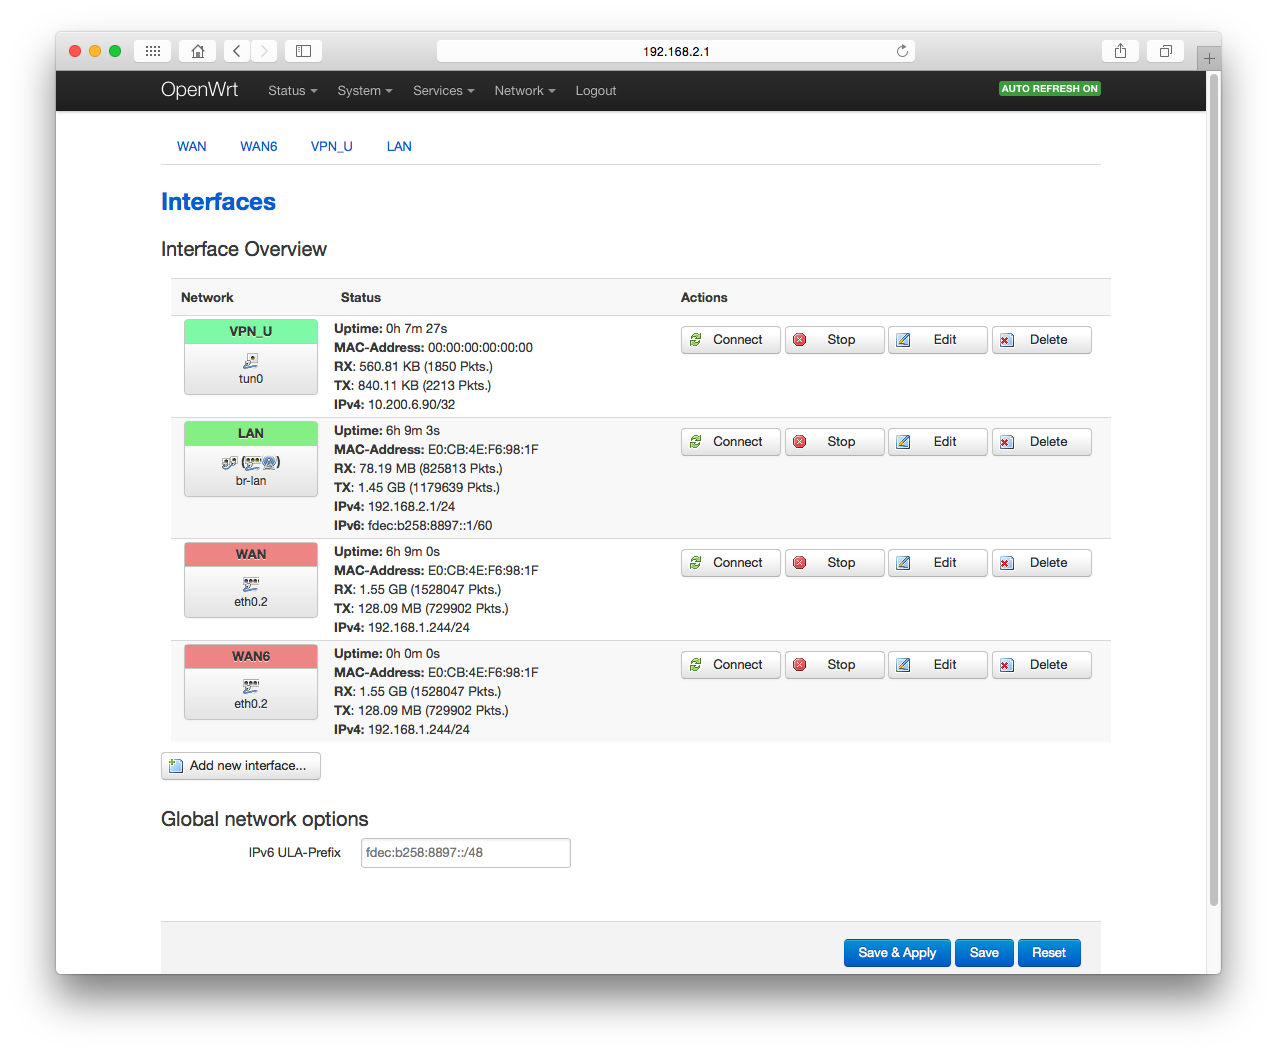
Go to Network > Interfaces, and click Add new interface…
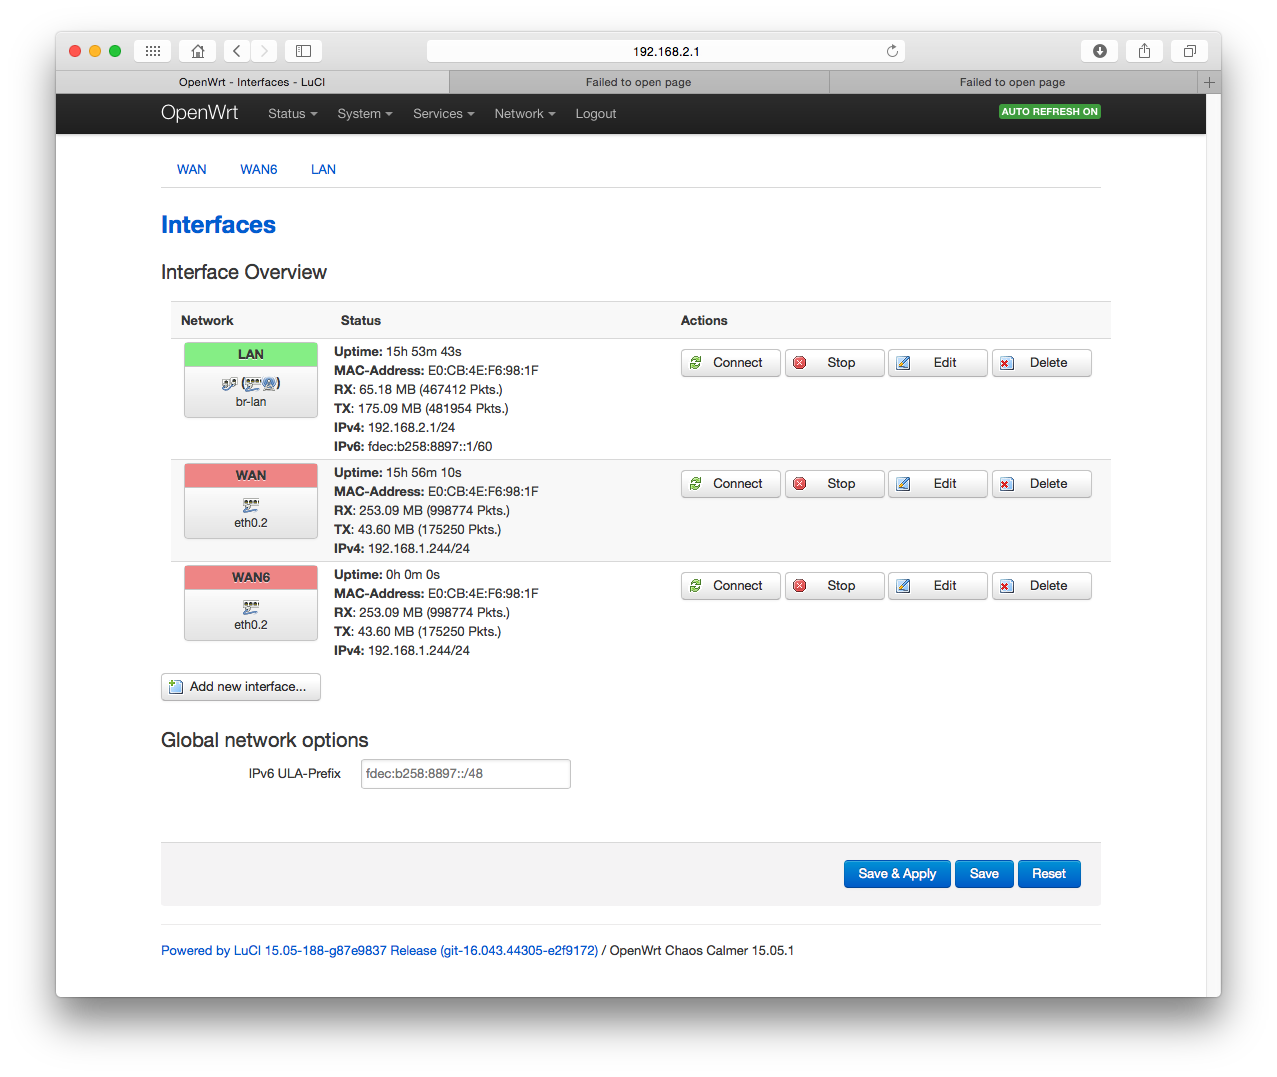
Enter the following data:
Name of the new interface: VPN_U
Protocol of the new interface: Unmanaged
Cover the following interface: Custom Interface: tun0
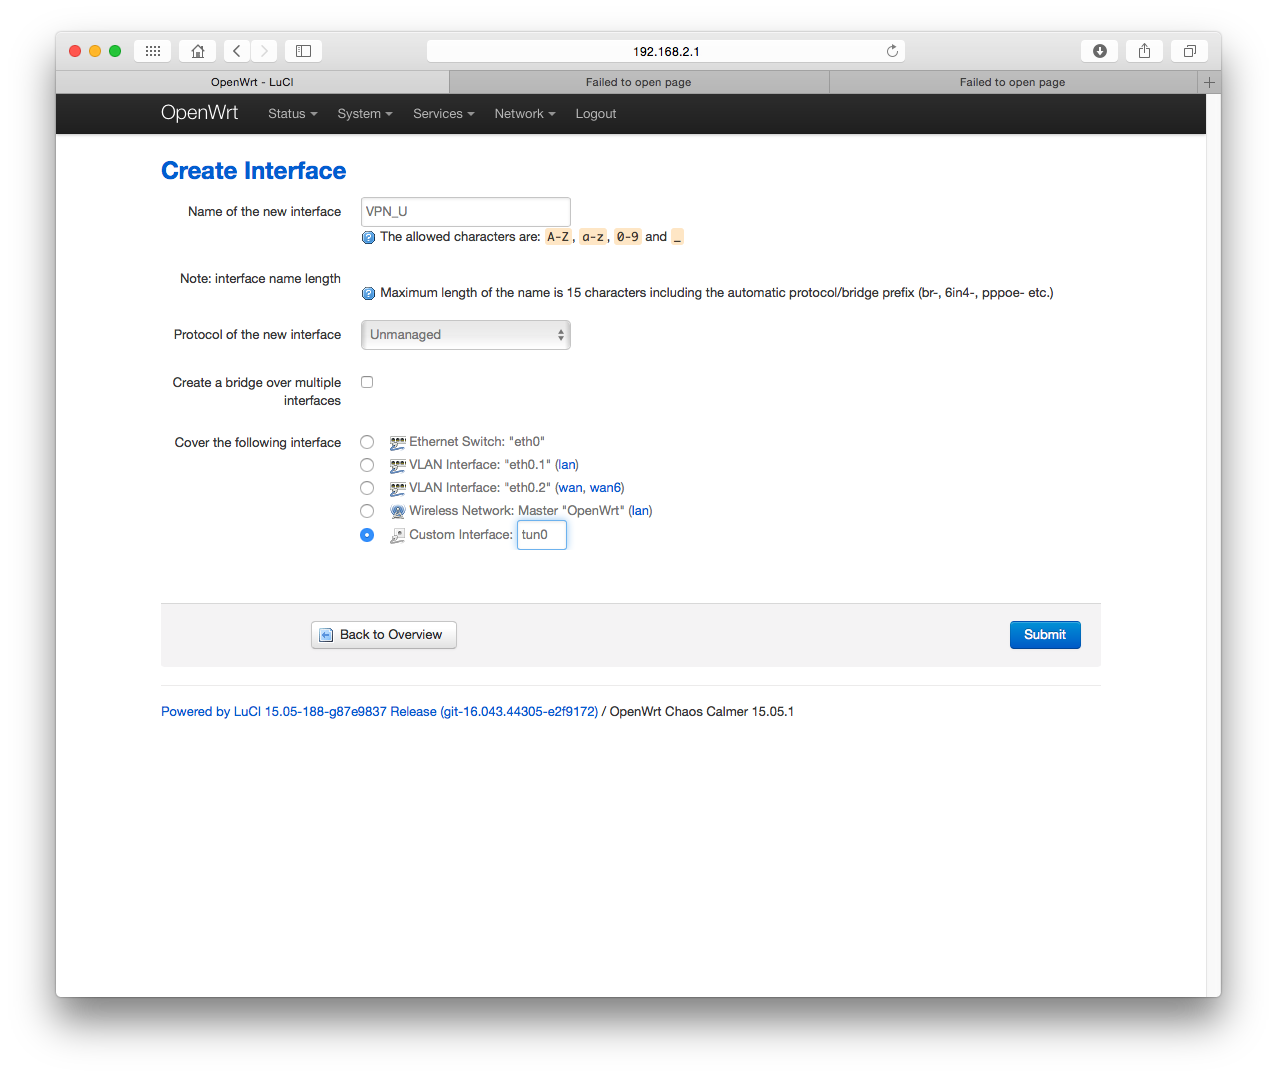
and click Submit.
Navigate to the Advanced Settings tab. Enable the checkbox for Bring up on boot, and disable it for Use built-in IPv6-management.
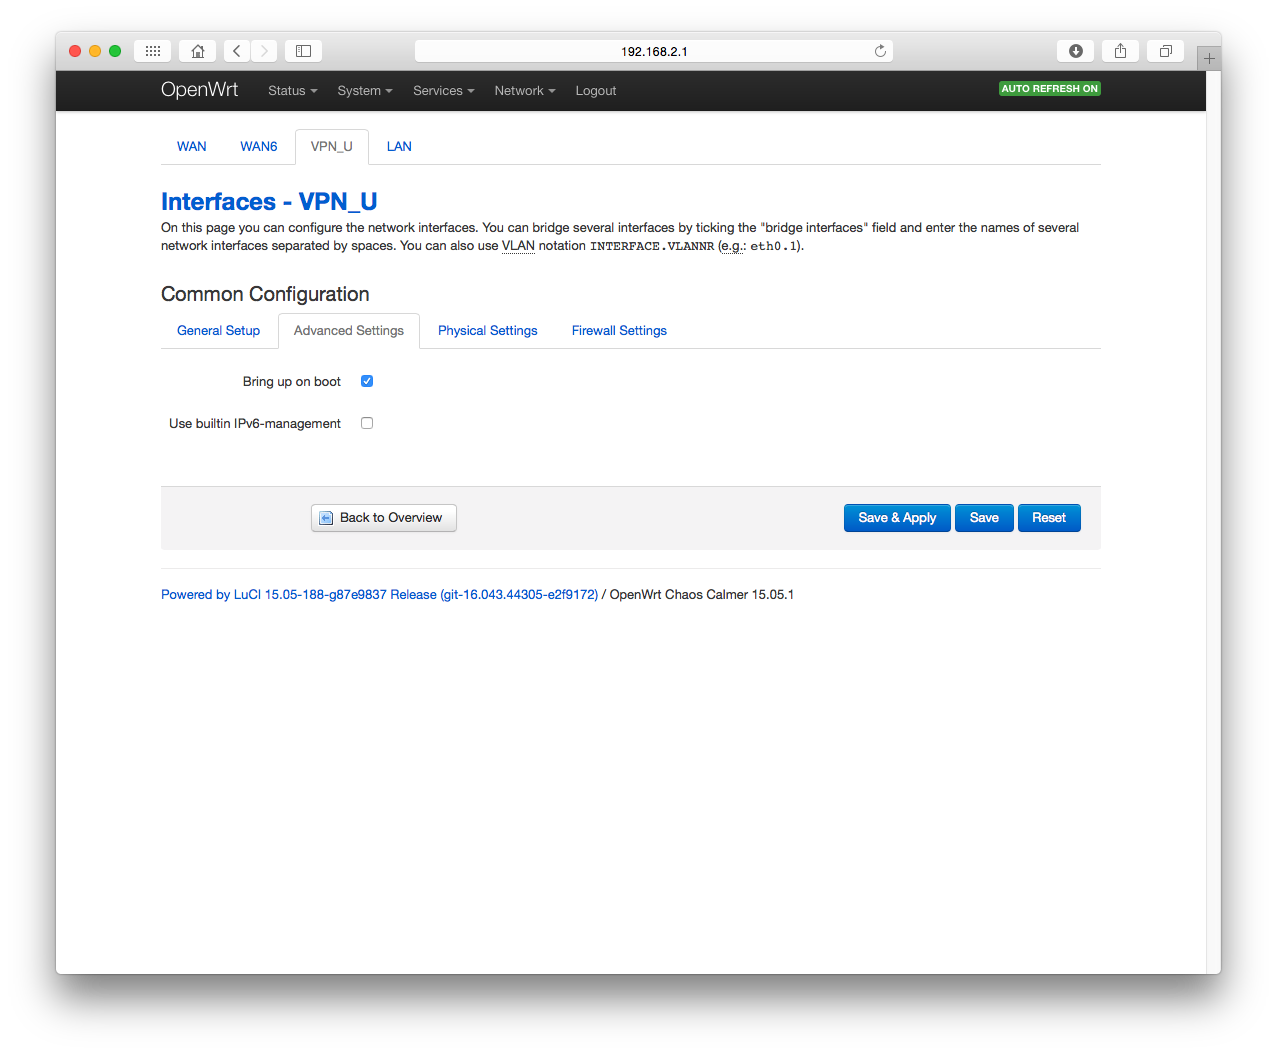
Click Save.
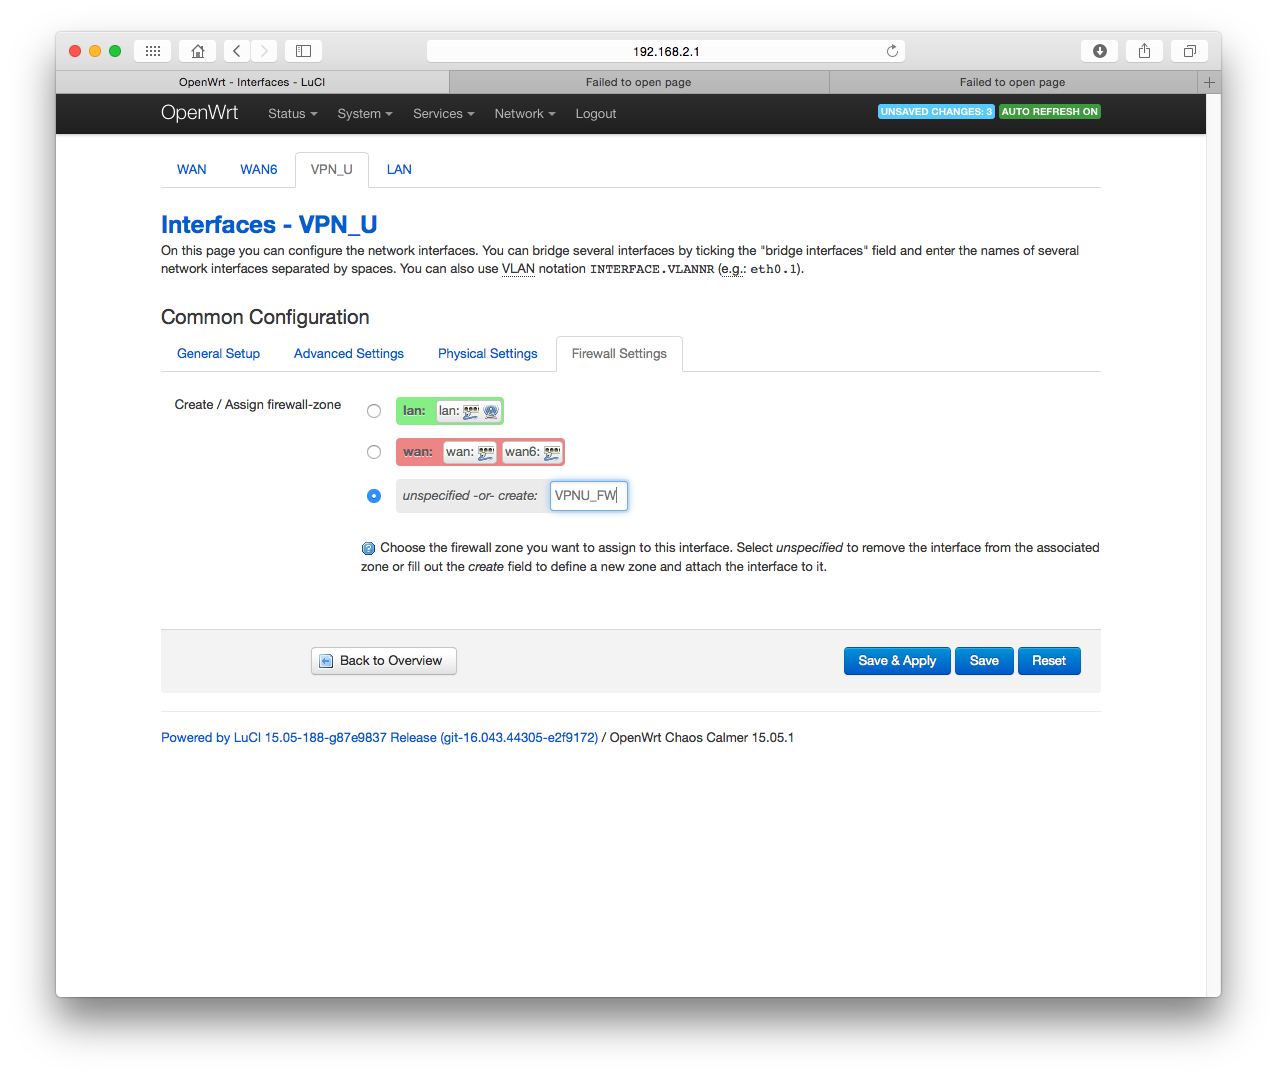
Navigate to the Firewall Settings tab.
In the Create / Assign firewall-zone - unspecified -or- create: field, type the zone name – VPNU_FW.
Click Save & Apply.
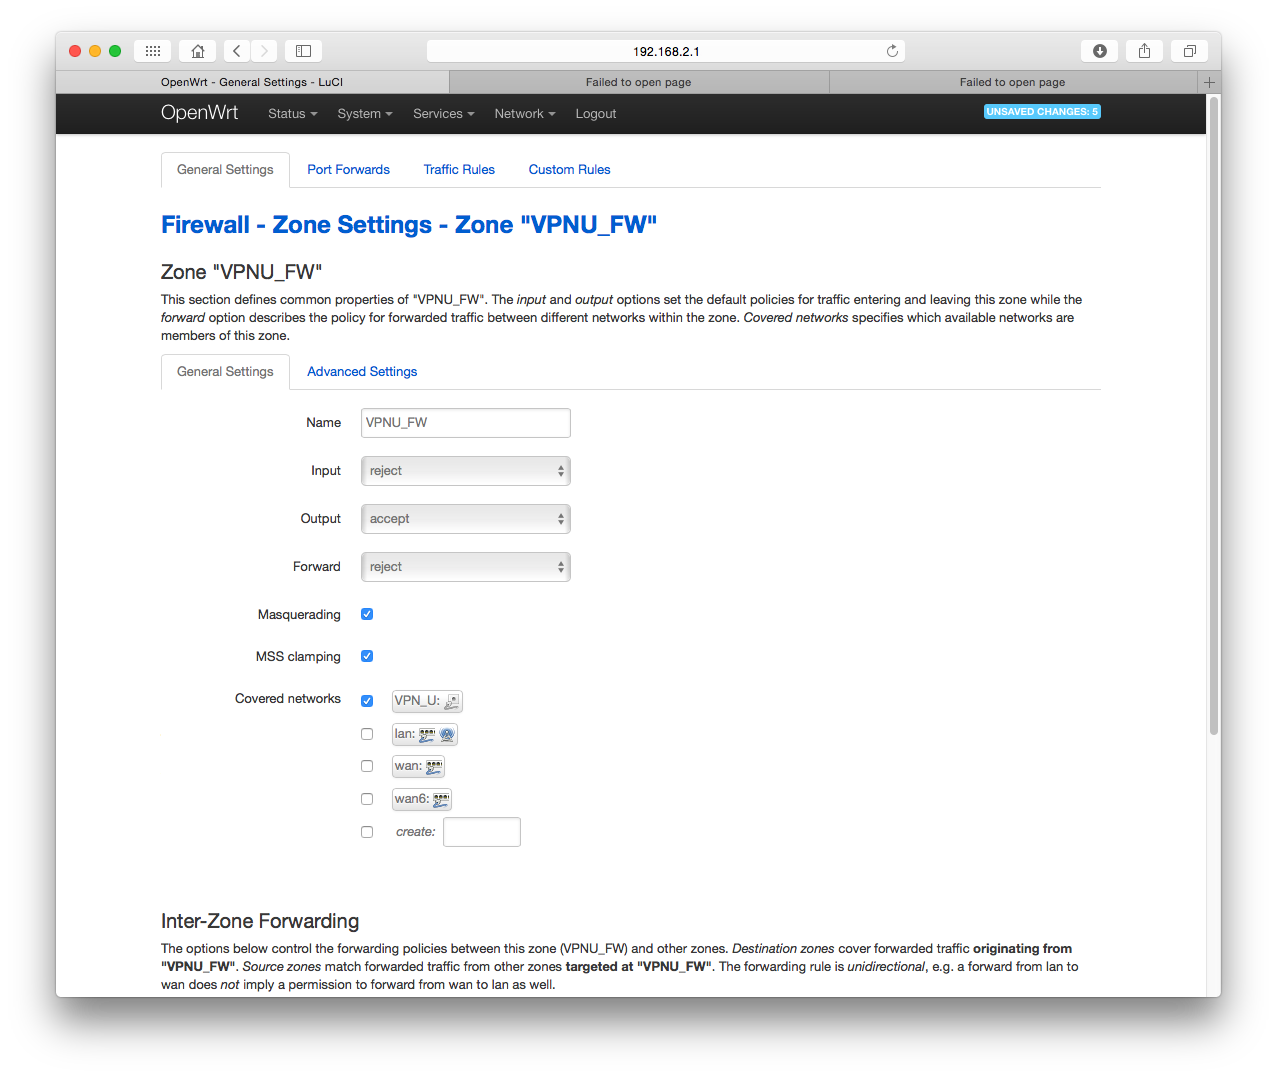
Go to Network > Firewall, and click Edit to the right of VPNU_FW.
In the General Settings tab, select the following settings:
Input: reject
Output: accept
Forward: reject
Masquerading – checked
MSS clamping – checked
Covered networks – checked VPN_U
In the Inter-Zone Forwarding section, set the checkbox for Allow forward from source zones: lan.
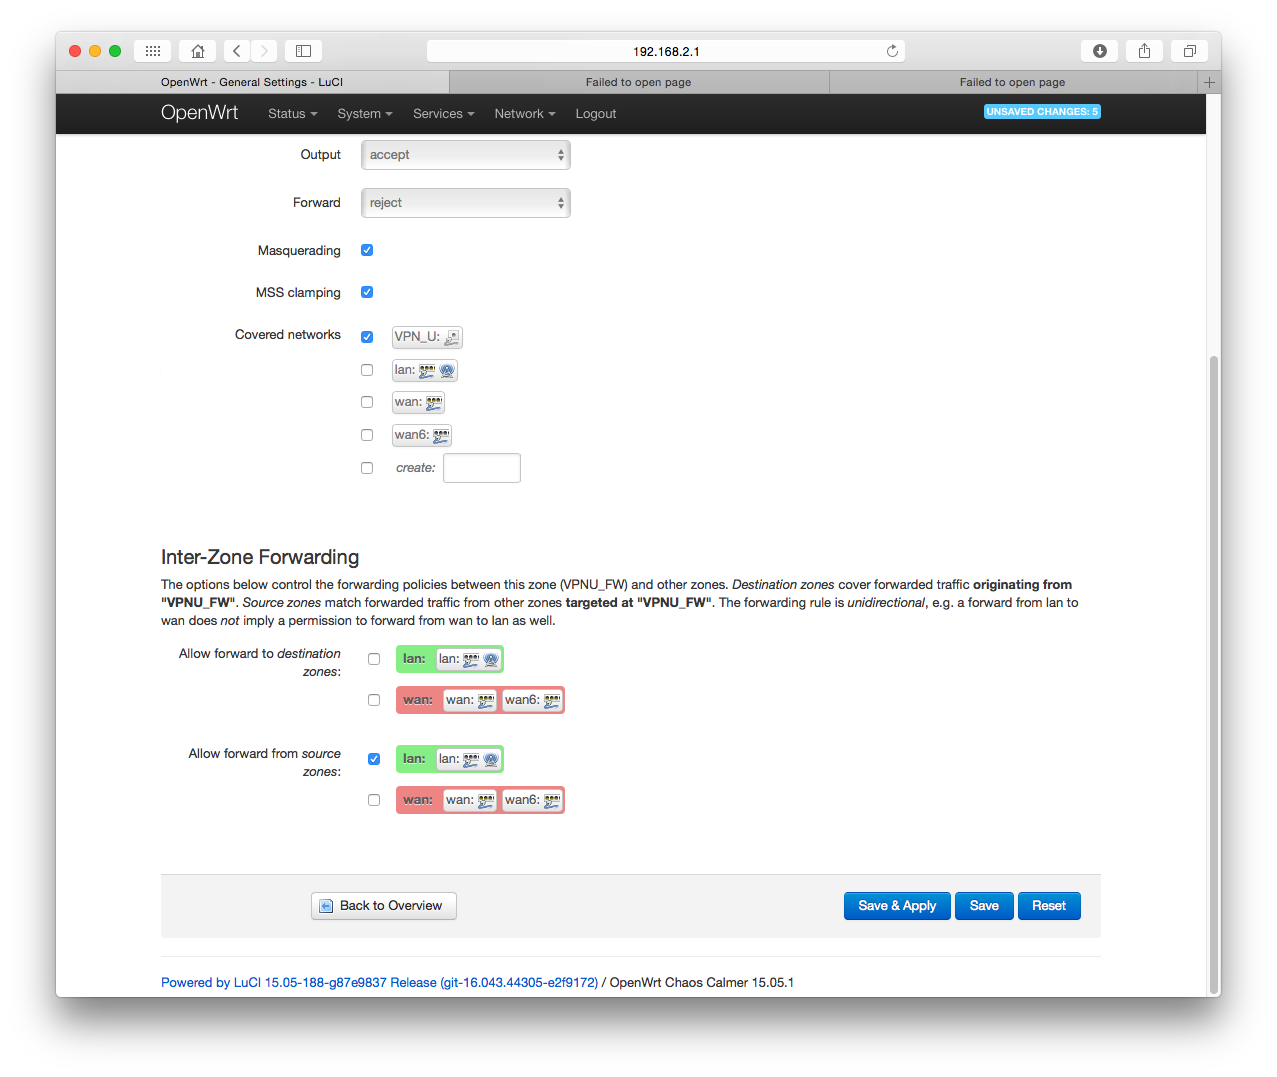
Click Save & Apply
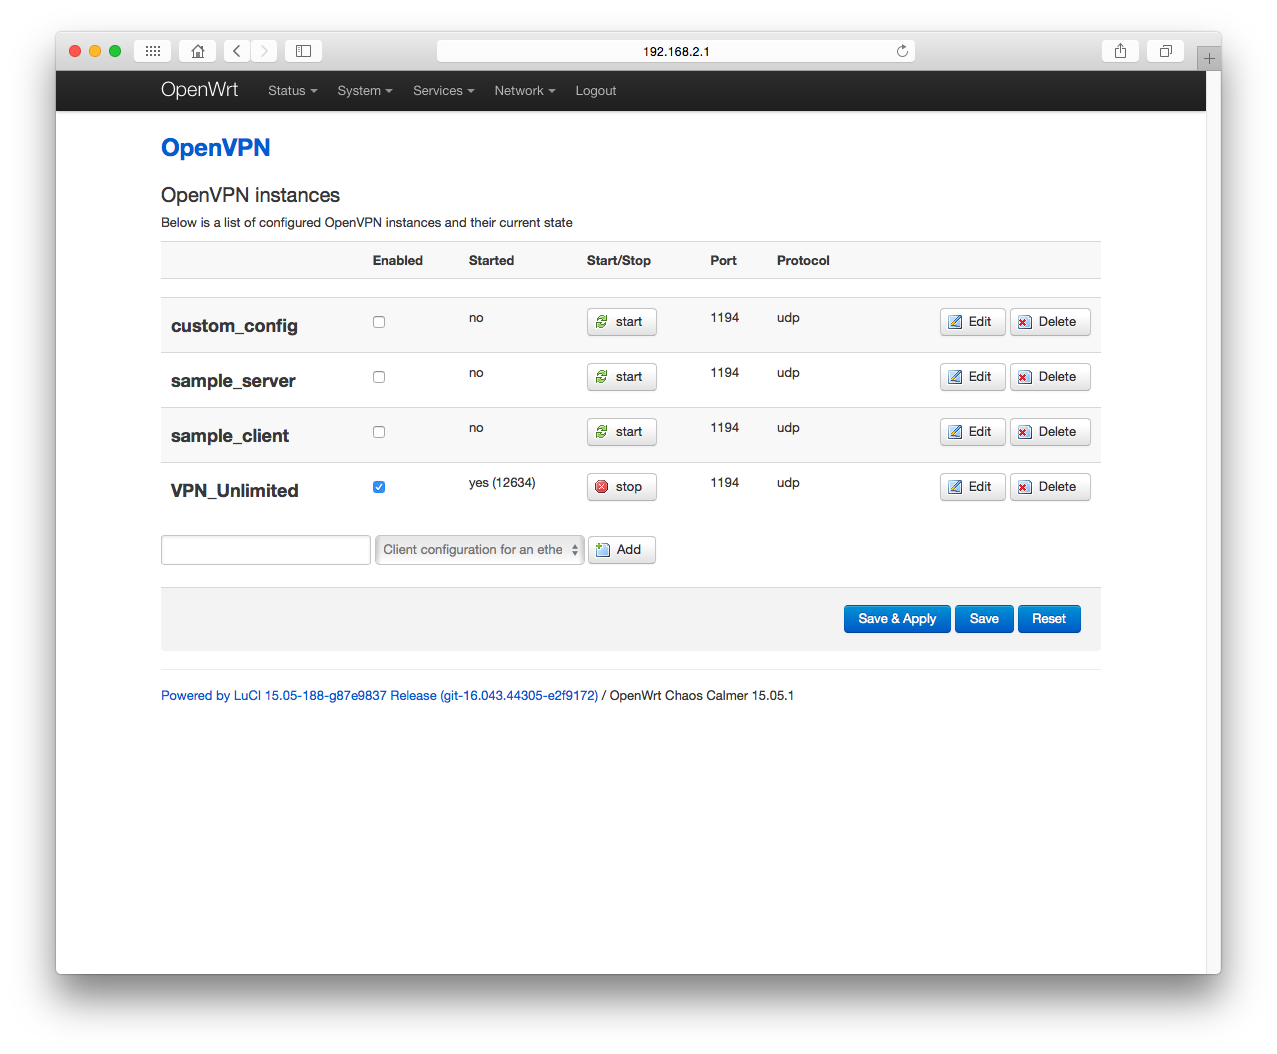
Go to Services > OpenVPN. Set the checkbox Enabled for VPN_Unlimited, and click Save & Apply.
Click start to the right of VPN_Unlimited.
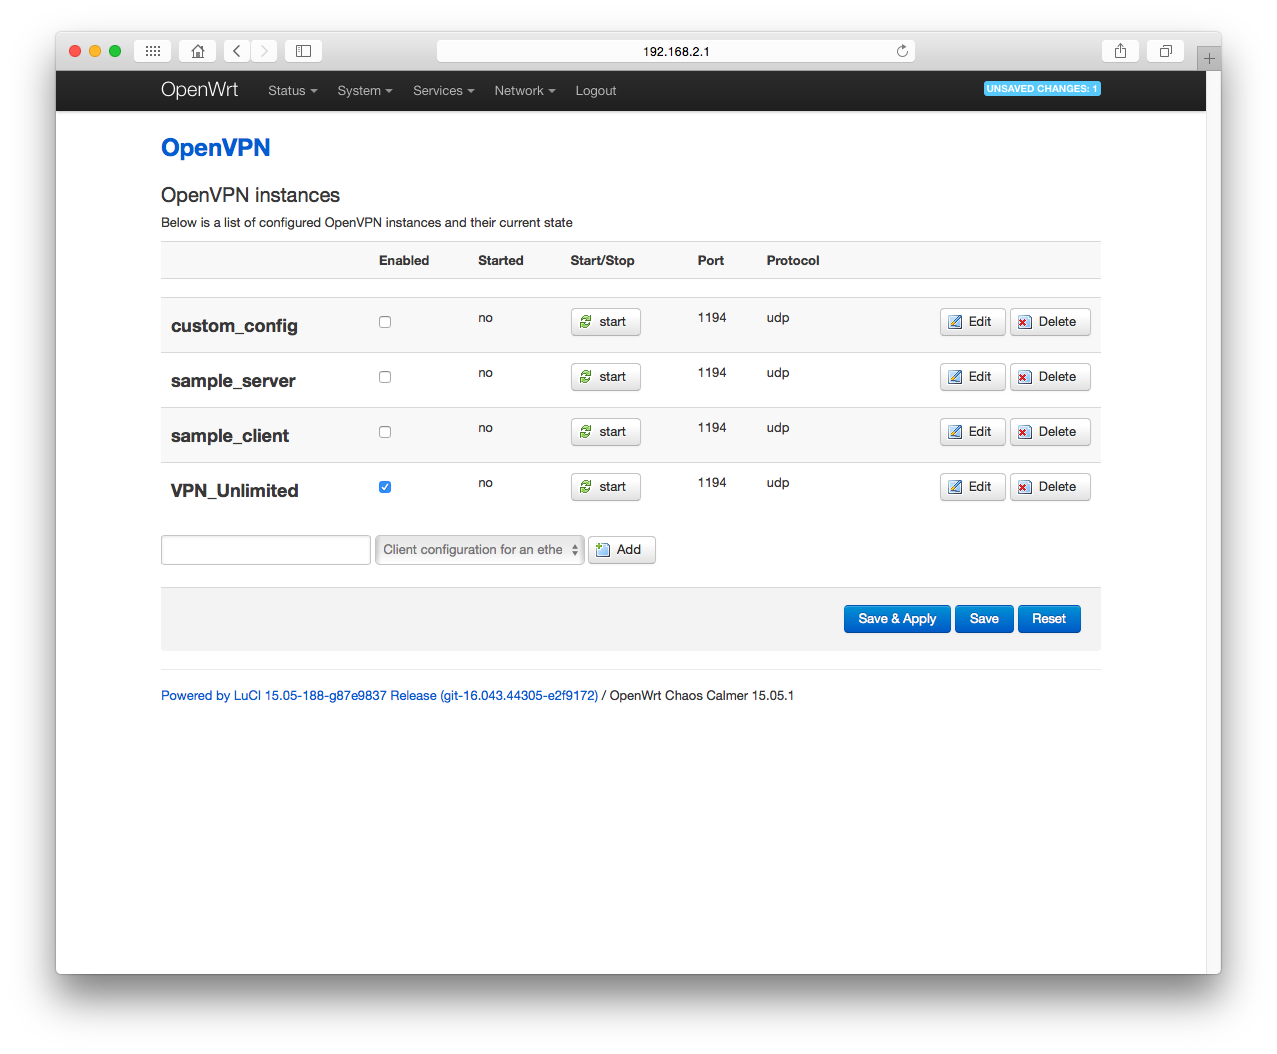
Wait for about 30 seconds to setup a connection with a VPN server.
Well done!
That’s about it! Now you have a running OpenVPN connection on your router.
OpenWRT factory reset
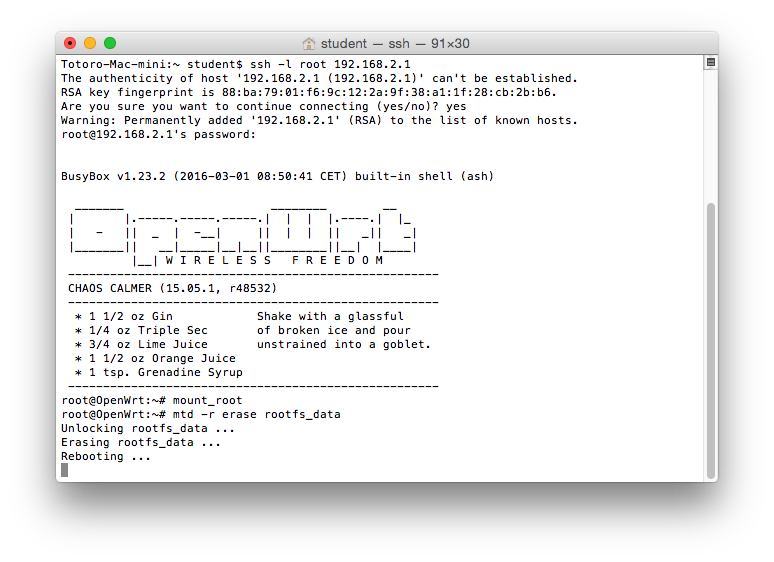
Sometimes, there is a need to perform a factory reset on your router.
In short, if you can telnet/ SSH to it, do that as a privileged user, and type the following:
mount_root
mtd -r erase rootfs_data
reboot -f
If you have other questions, comments, or suggestions regarding our service, please contact our customer support at support@keepsolid.com.