pfSense OpenVPN configuration guide for VPN Unlimited users
This tutorial guide will walk you through the steps to set up a VPN connection using the OpenVPN protocol on your pfSense router.
First of all, you need to create the OpenVPN settings and download the configuration file. In this regard, please complete a few simple actions described in our tutorial.
Now, please carefully follow the configuration steps below.
1. Open your pfSense router interface and navigate to System > Certificate Manager > CAs and click Add.
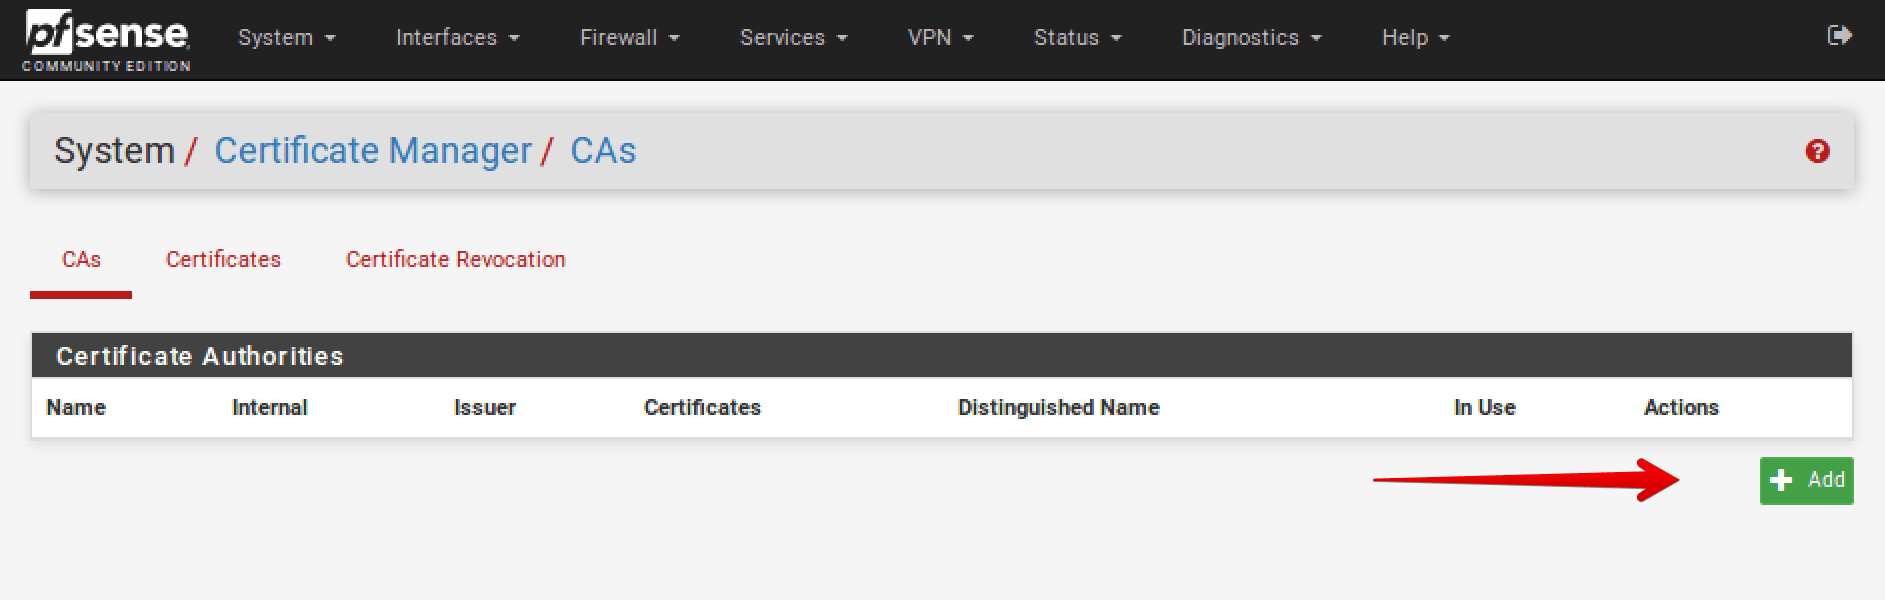
Complete the following fields:
-
Descriptive name: Enter any name of your choice
-
Method: Select Import an existing Certificate Authority
-
Certificate data: Paste the text from the configuration file, which appears between <CA> and </CA>, including BEGIN CERTIFICATE and END CERTIFICATE lines
-
Serial for next certificate: Enter any number of your choice
When you finish, click Save.

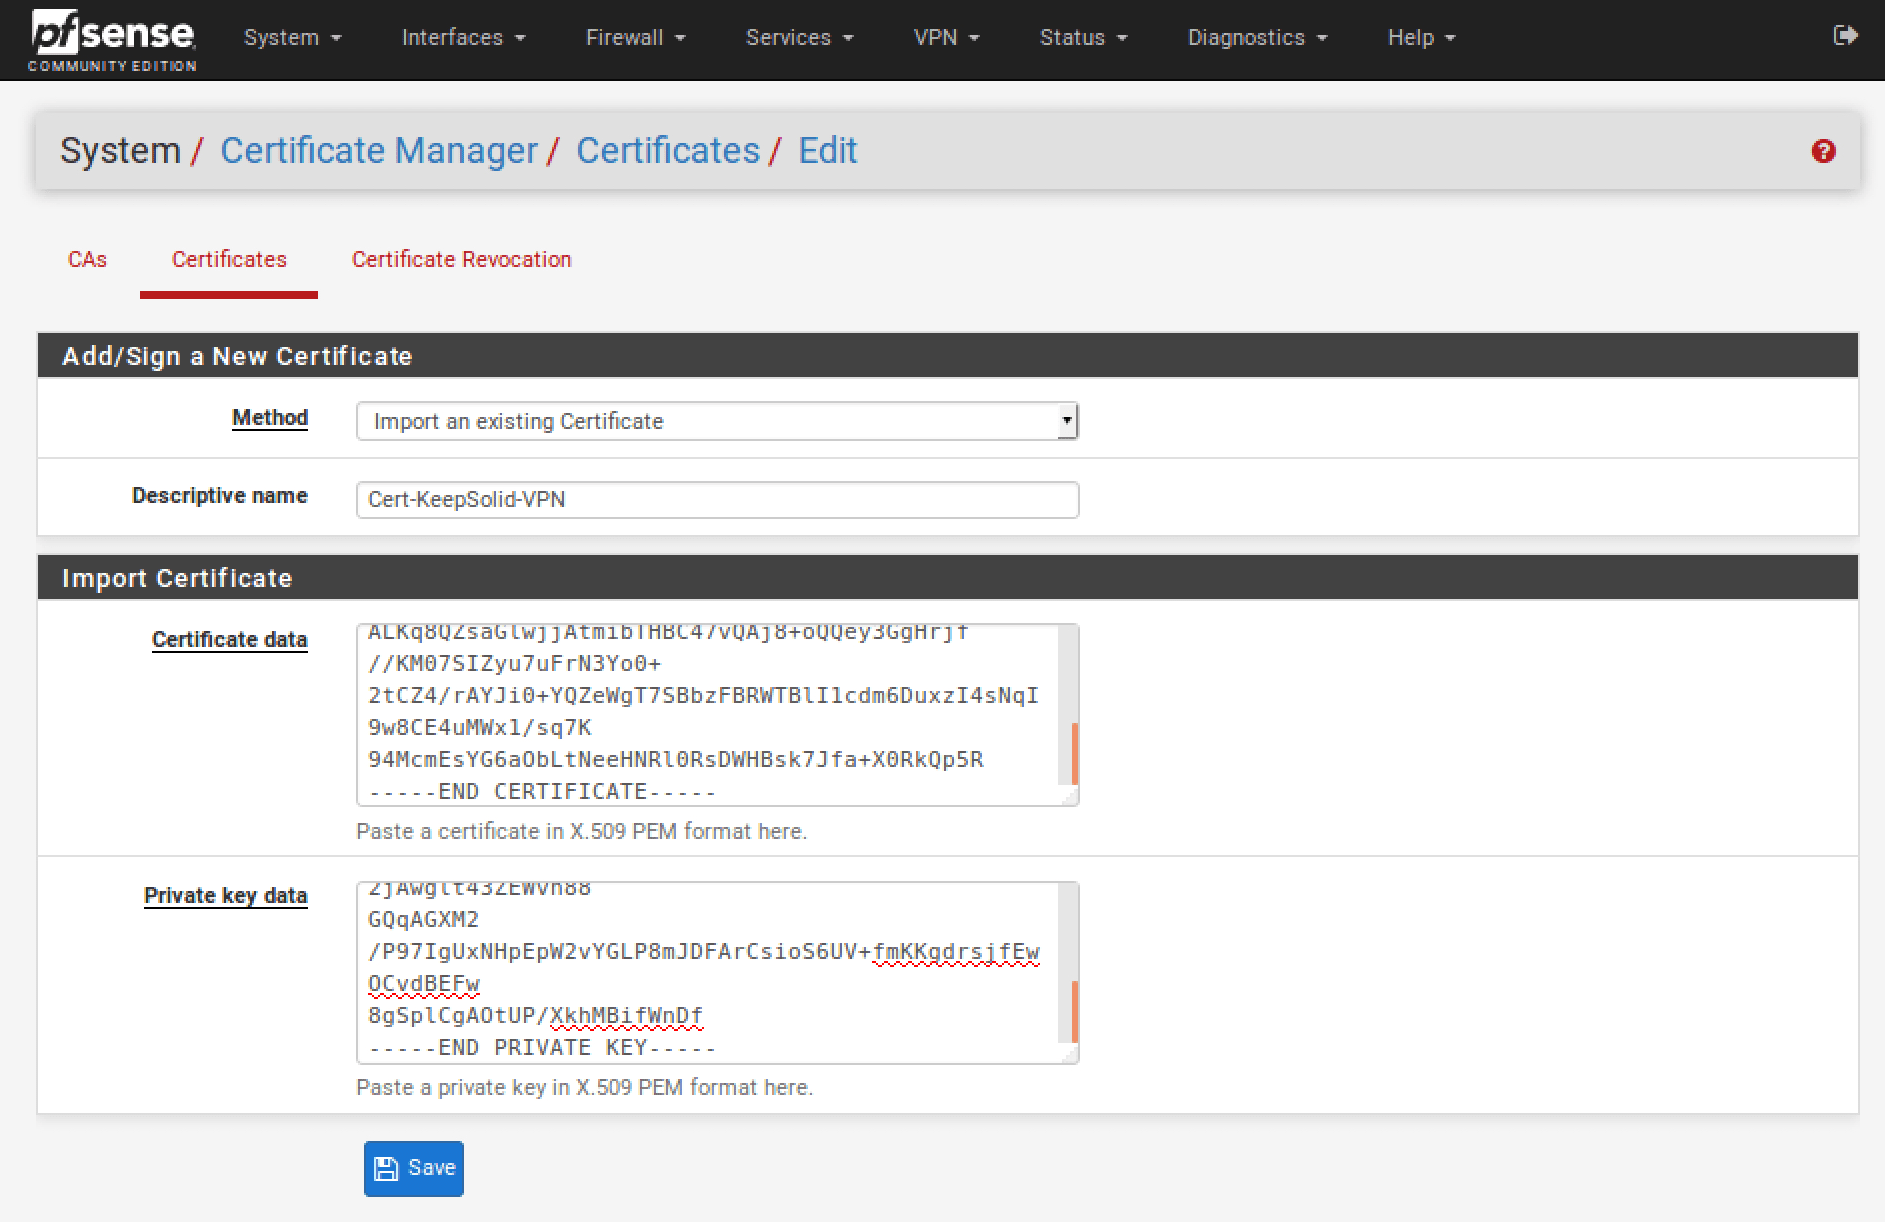
2. Go to System > Certificate Manager > Certificates and click Add.
Complete the following fields:
-
Descriptive name: Enter any name of your choice
-
Method: Select Import an existing Certificate Authority
-
Certificate data: Paste the text from the configuration file, which appears between <CERT> and </CERT>, including BEGIN CERTIFICATE and END CERTIFICATE lines
-
Private key data: Paste the text from the configuration file, which appears between <KEY> and </KEY>, including BEGIN PRIVATE KEY and END PRIVATE KEY lines
-
Serial for next certificate: Enter any number of your choice
When you finish, click Save.
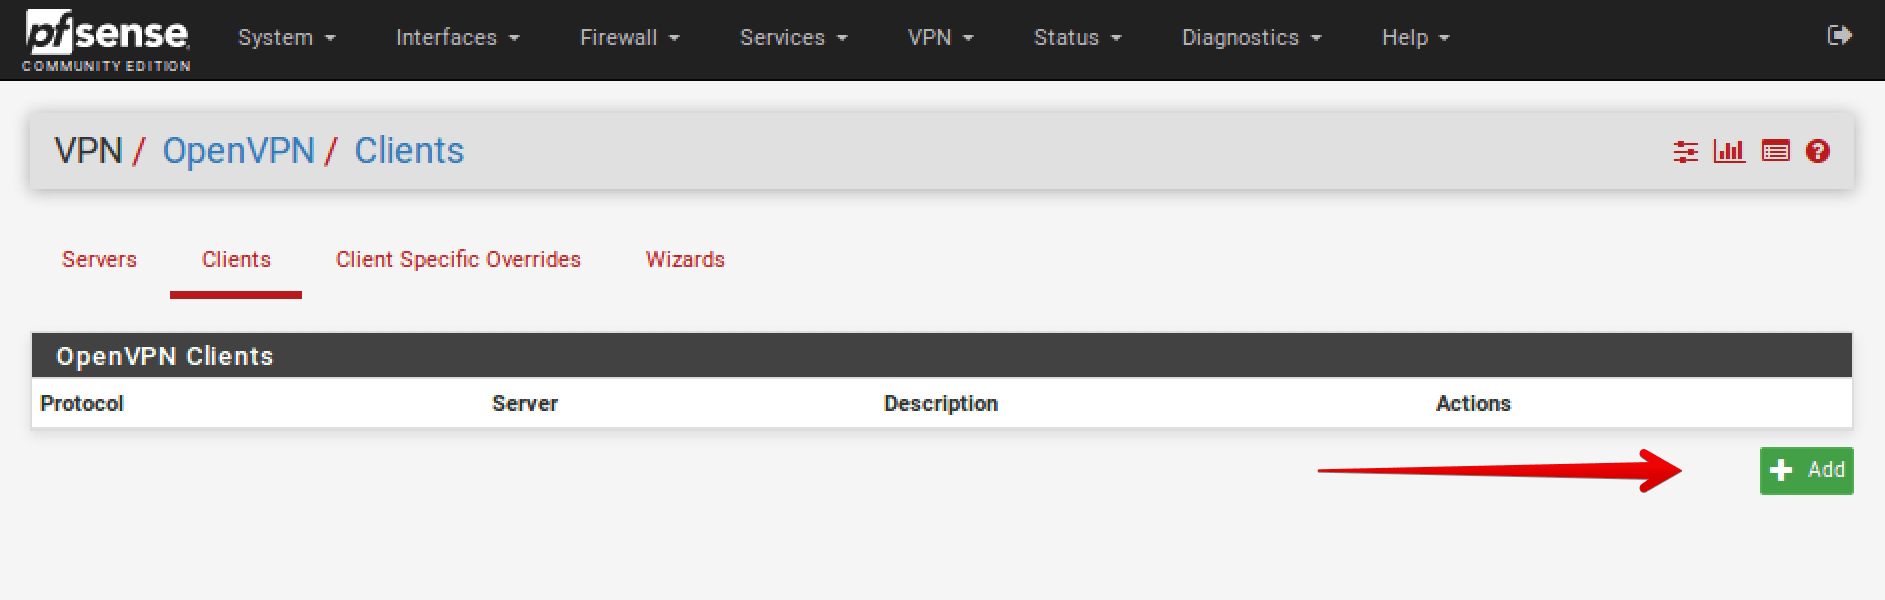
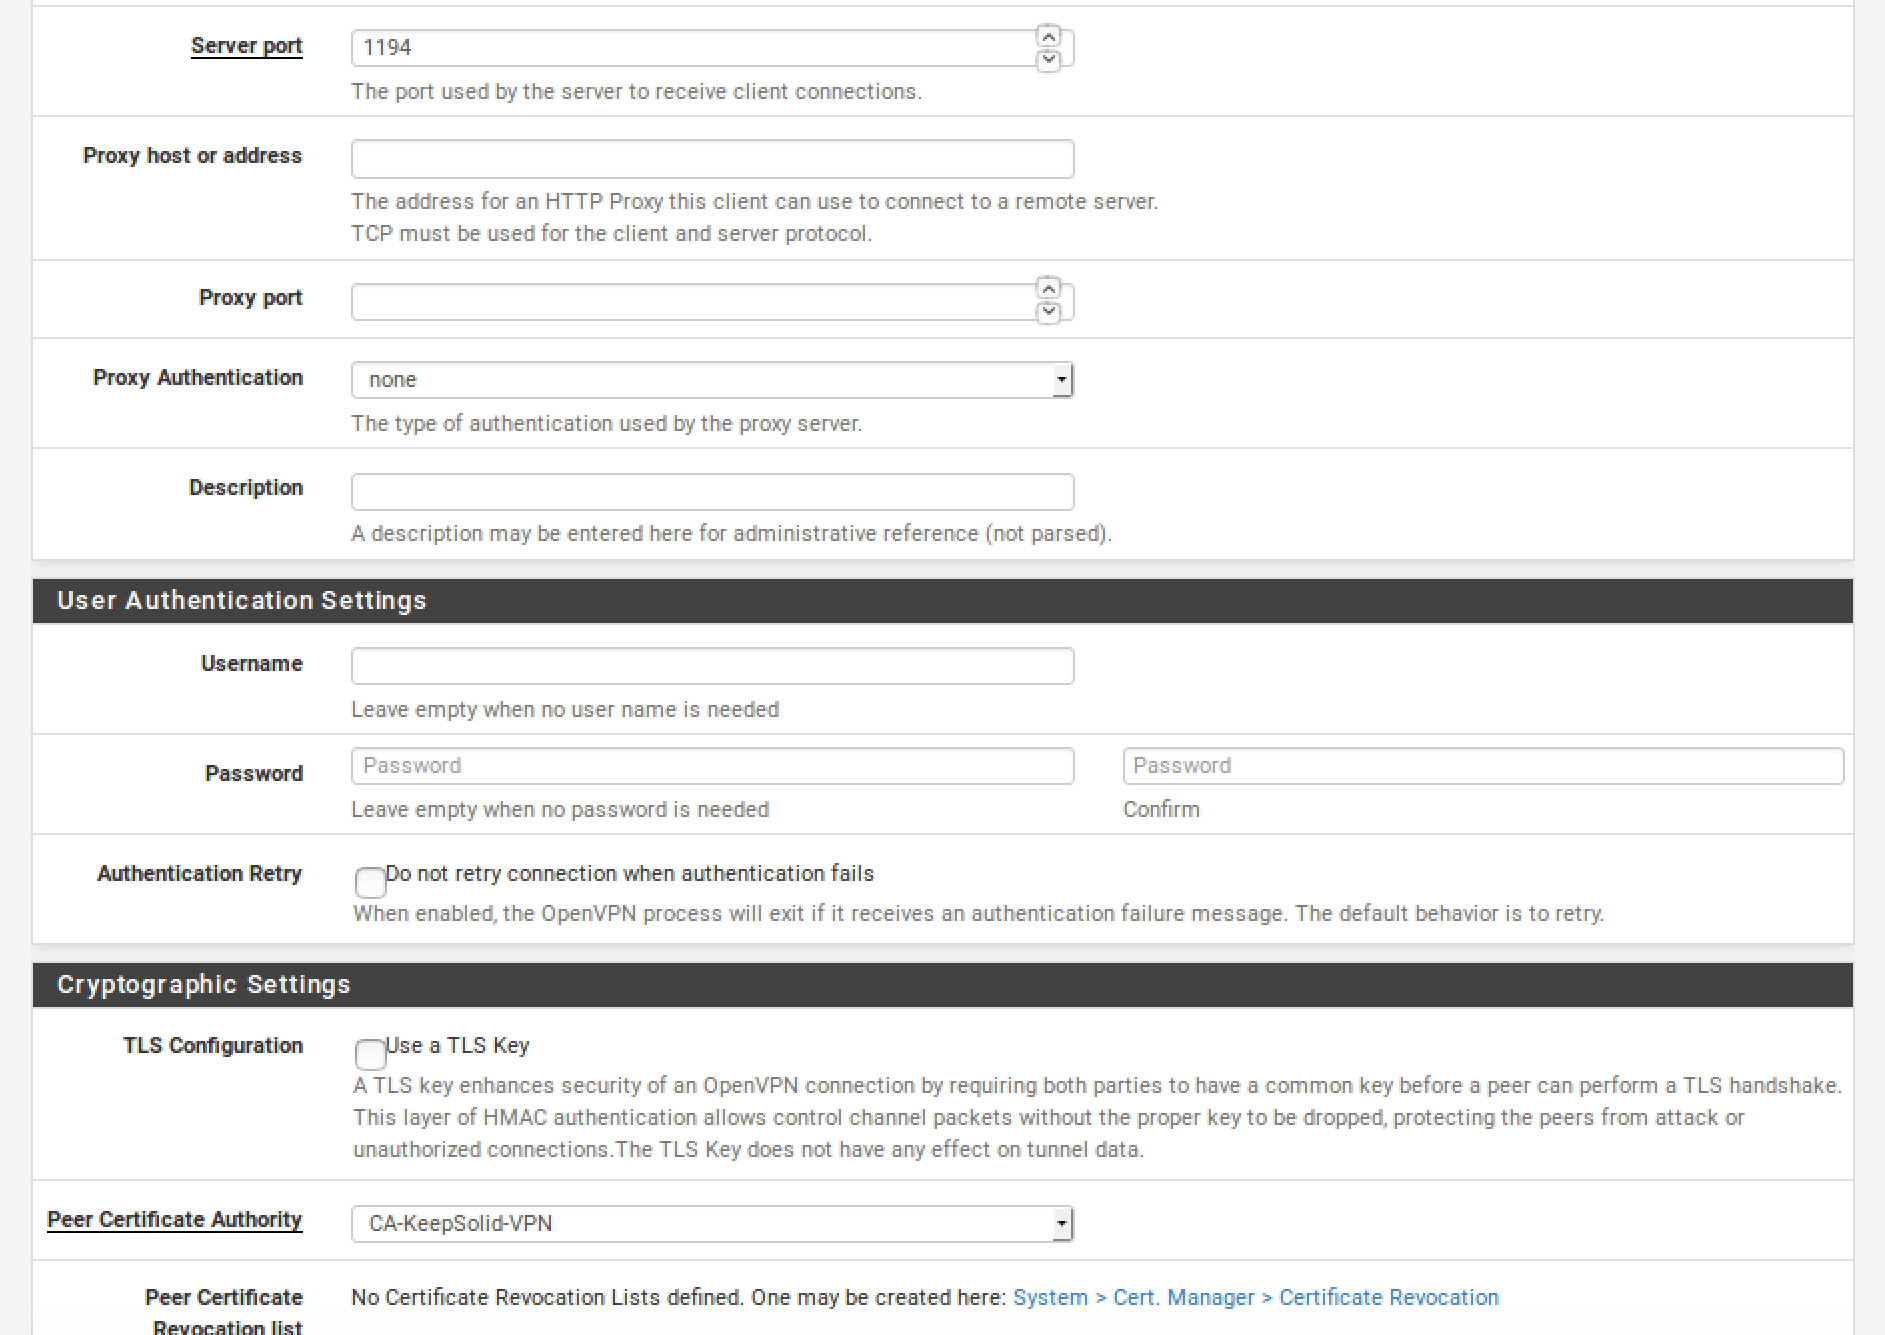
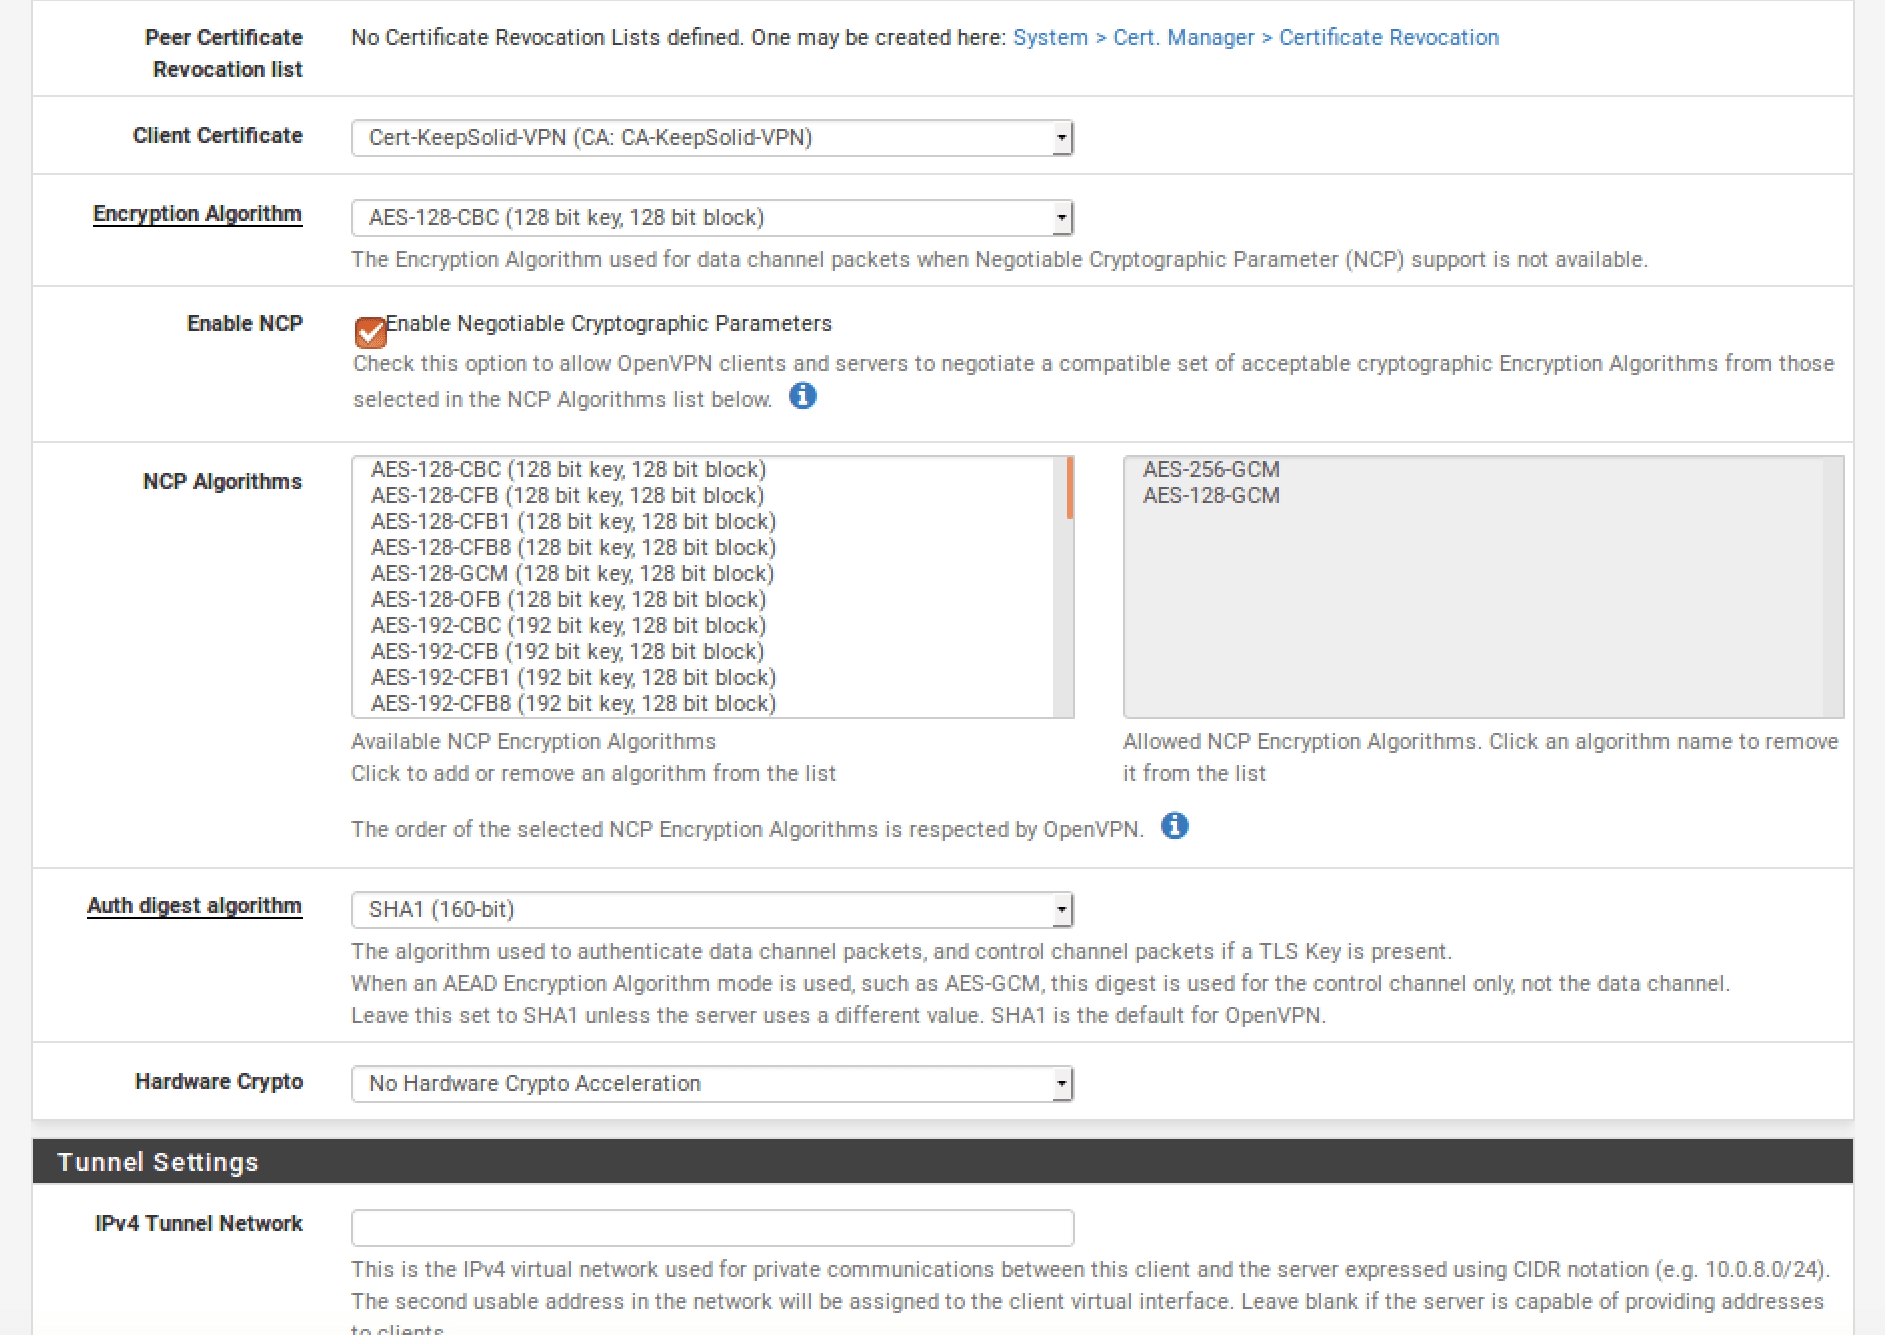
3. Go to VPN > OpenVPN > Clients and click Add.
Complete the fields as shown below. As you can see, most of them are left default.
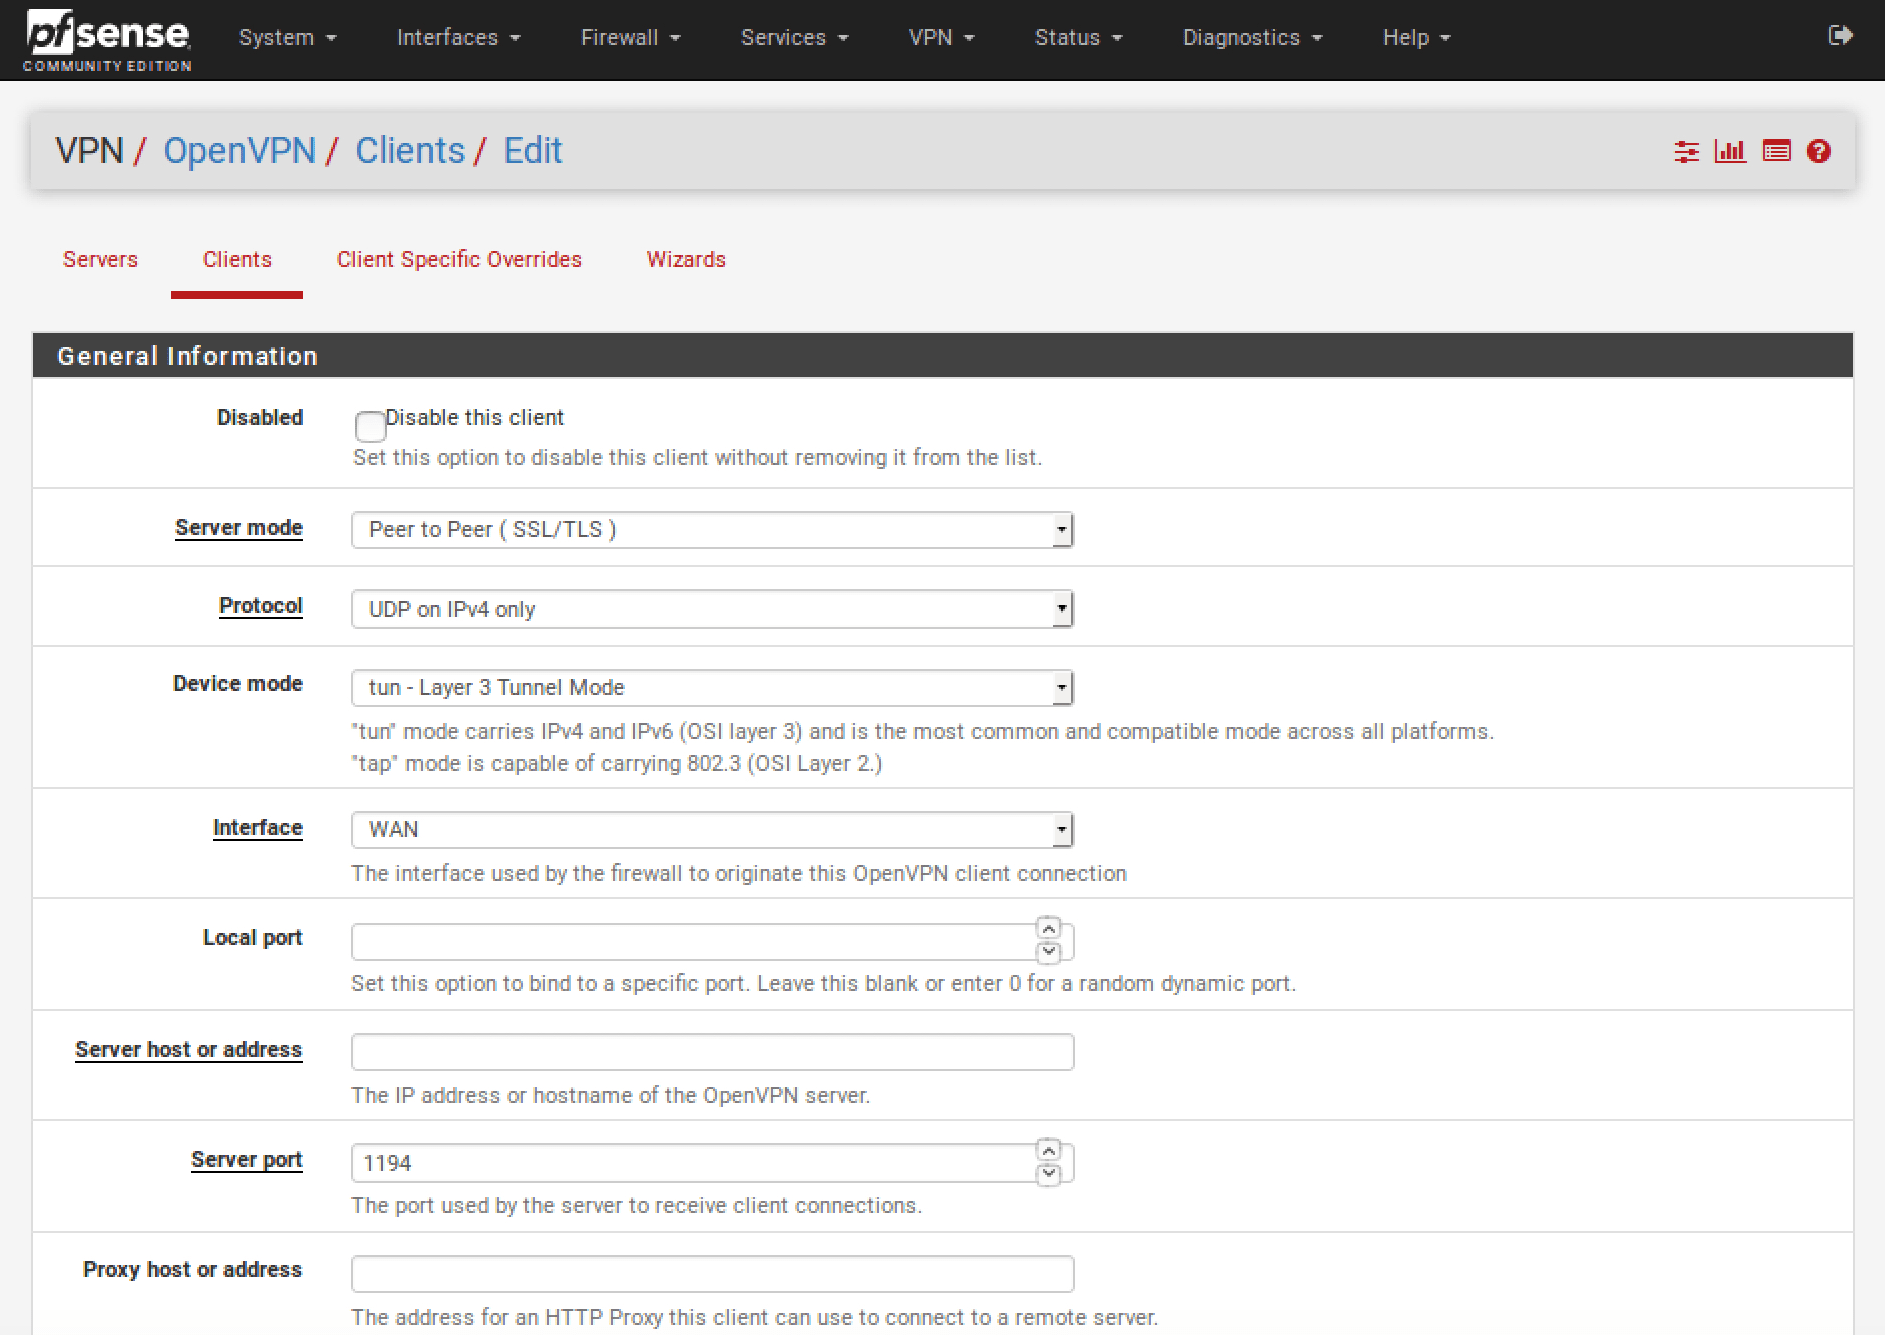
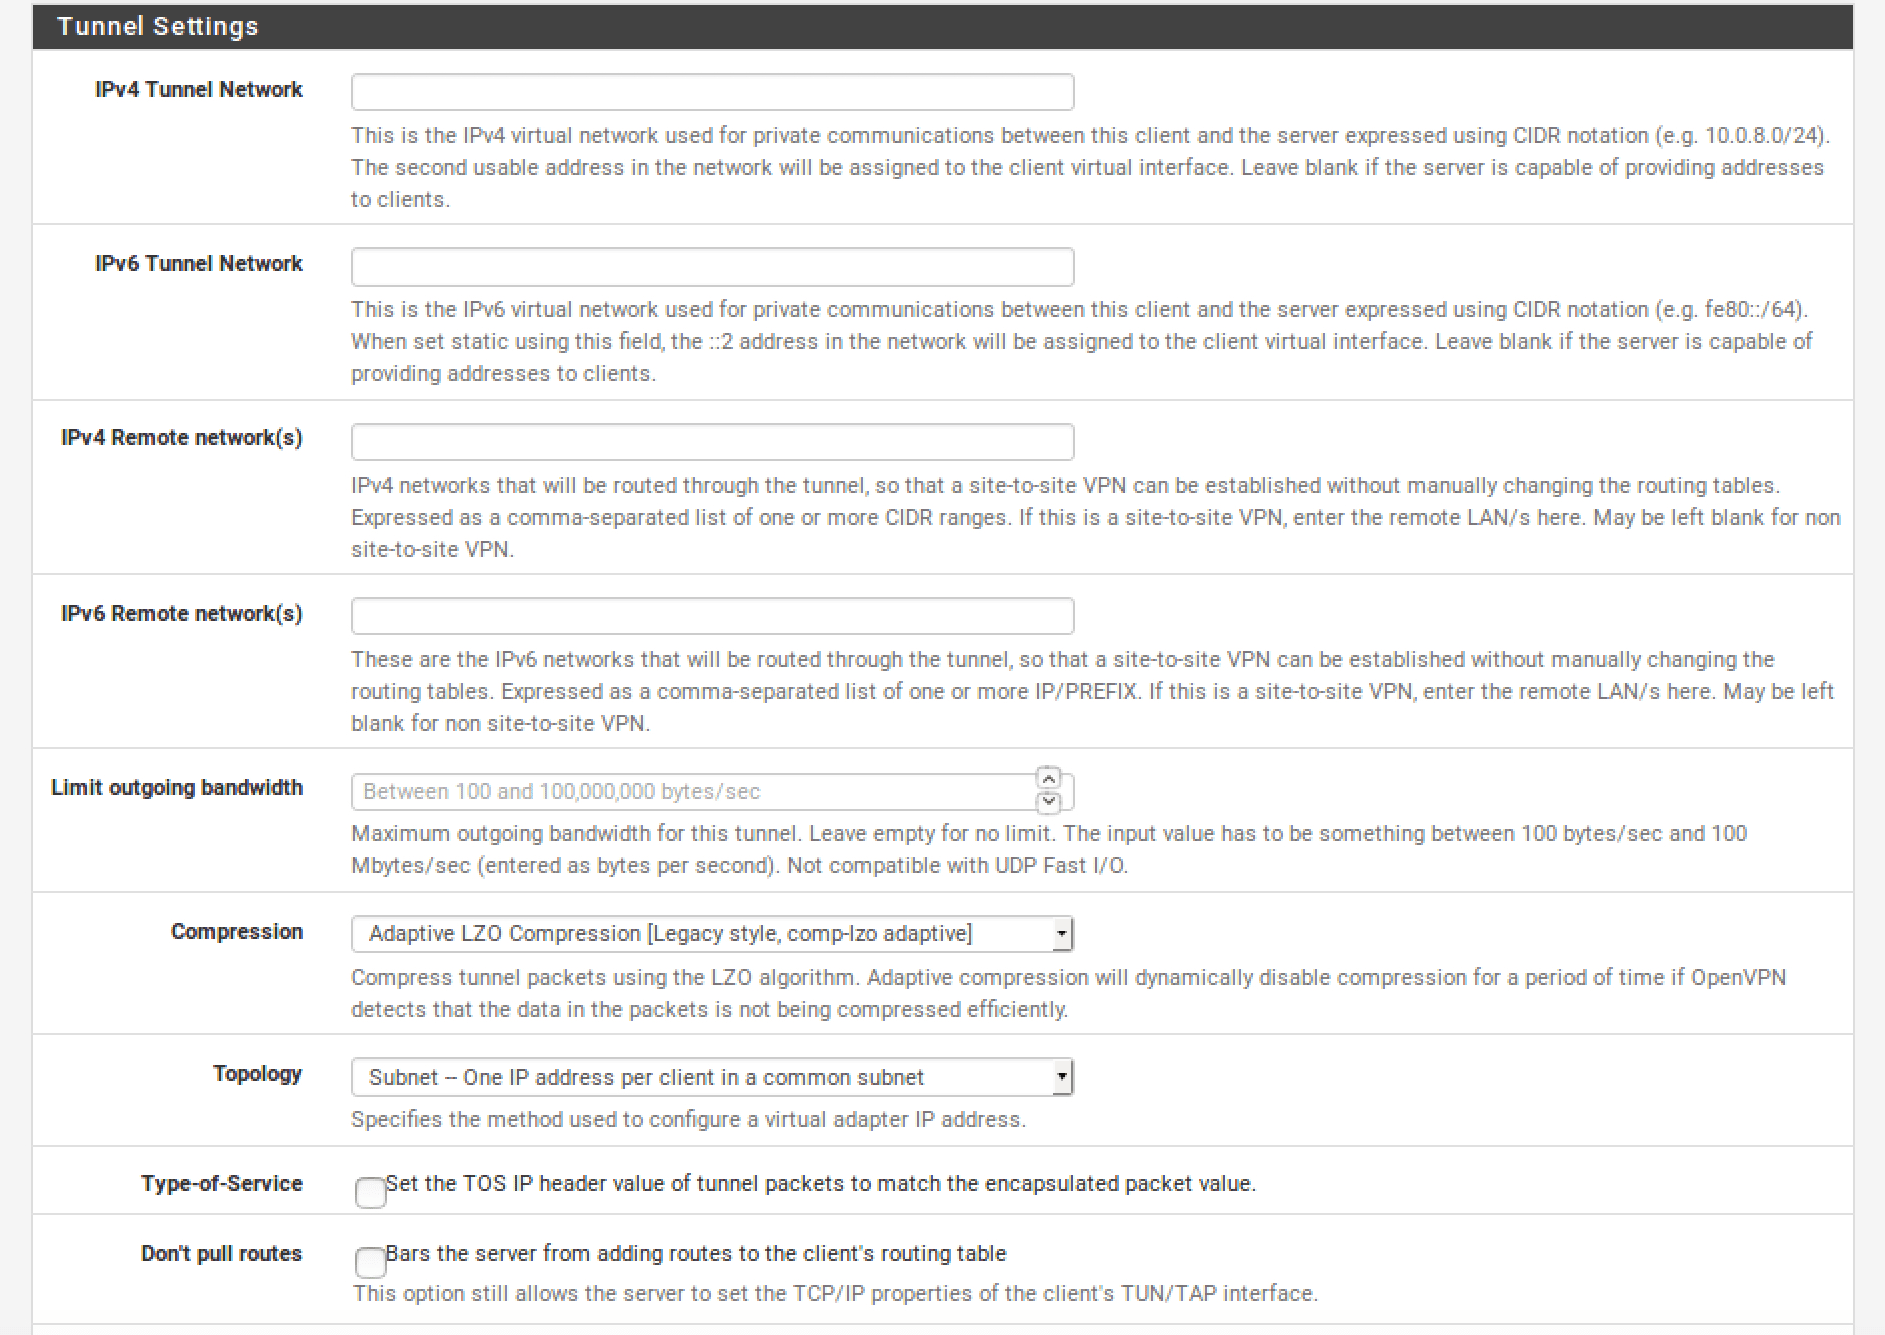
Input the following data within the Custom options field: redirect-gateway def1;persist-key;persist-tun;tun-mtu 1460;mssfix 1420;
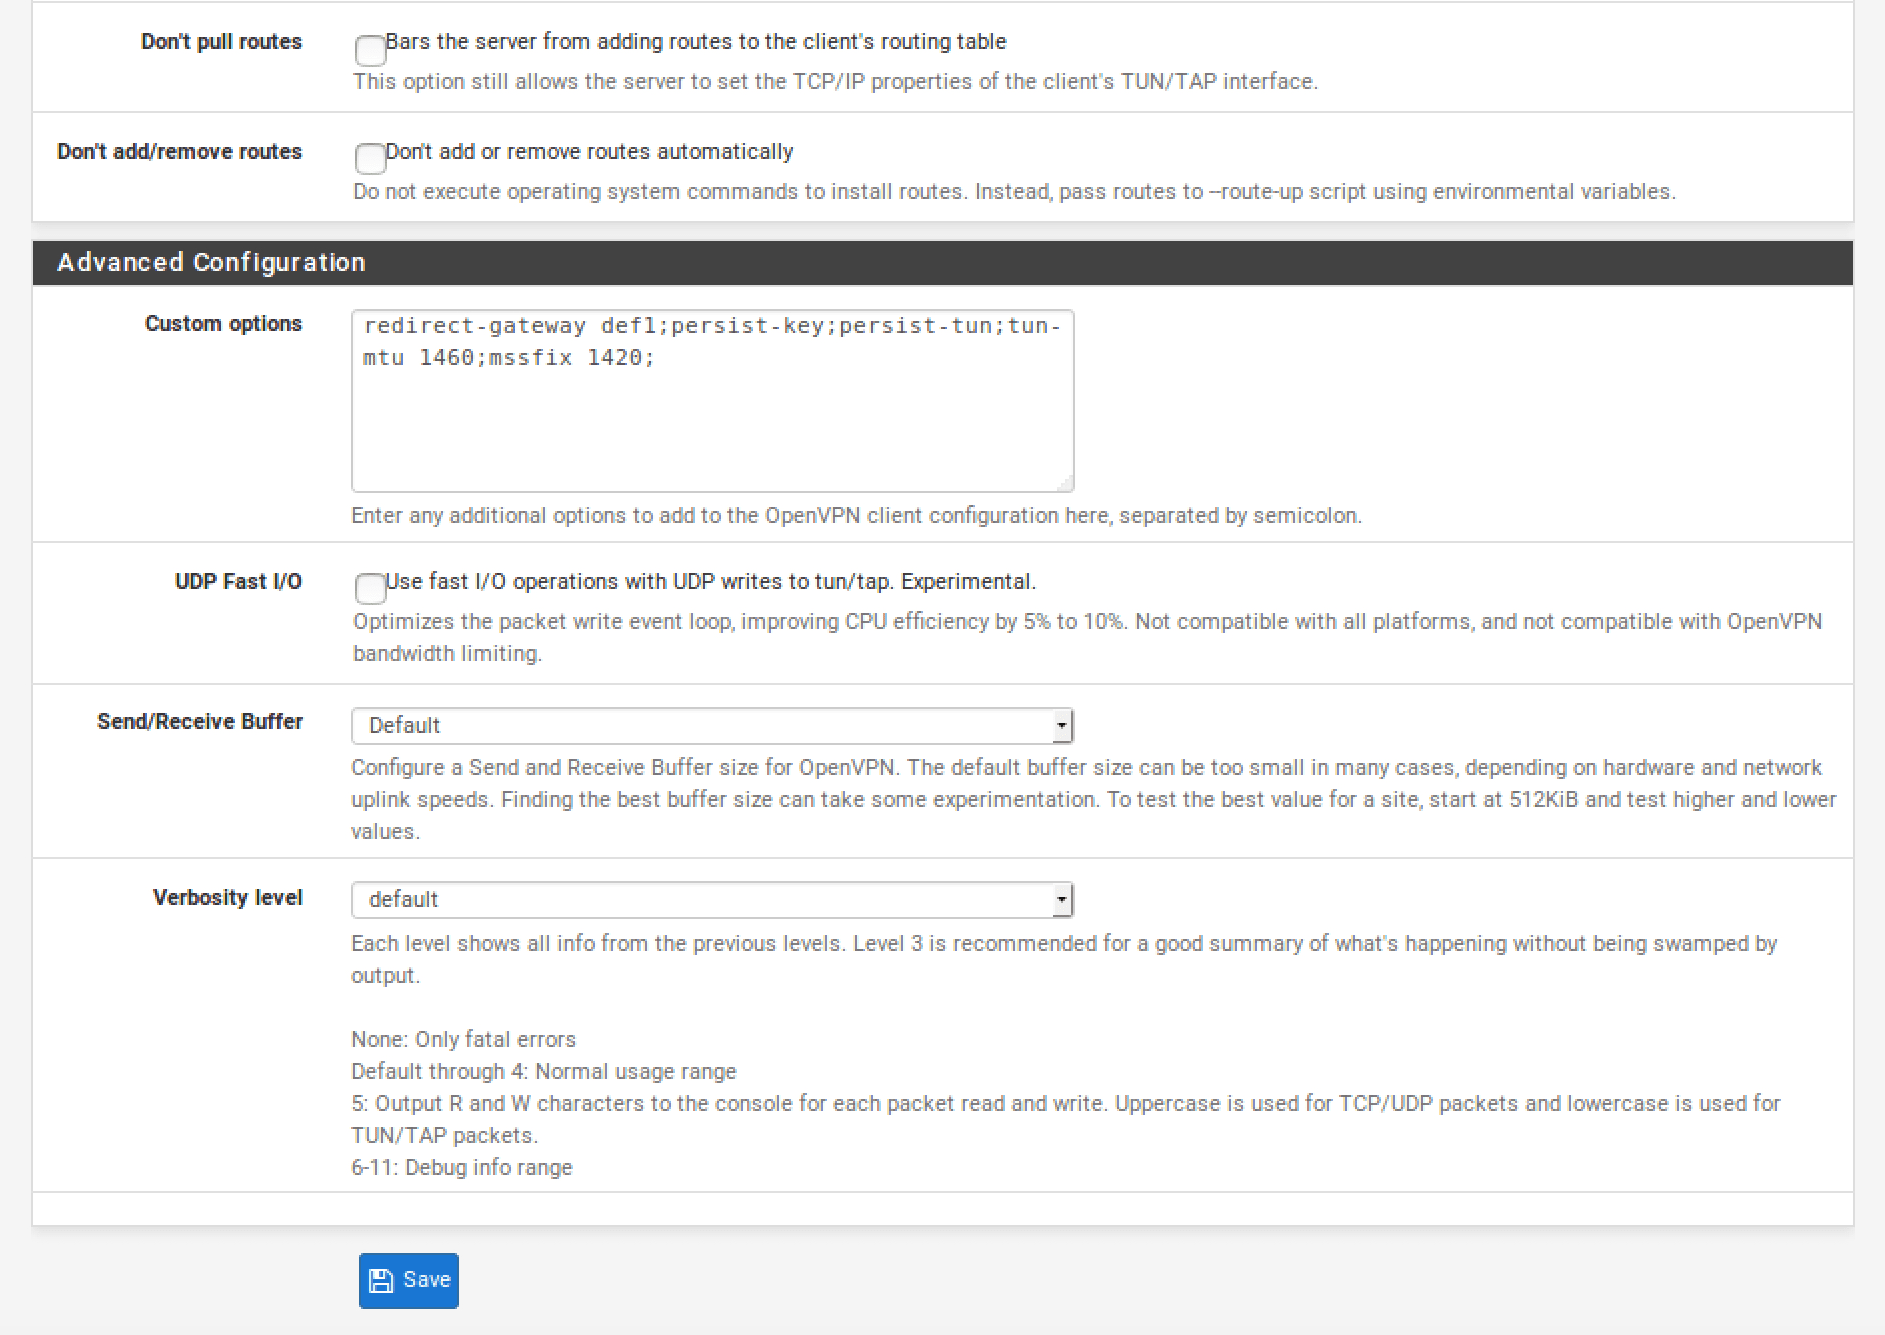
When you finish, click Save.
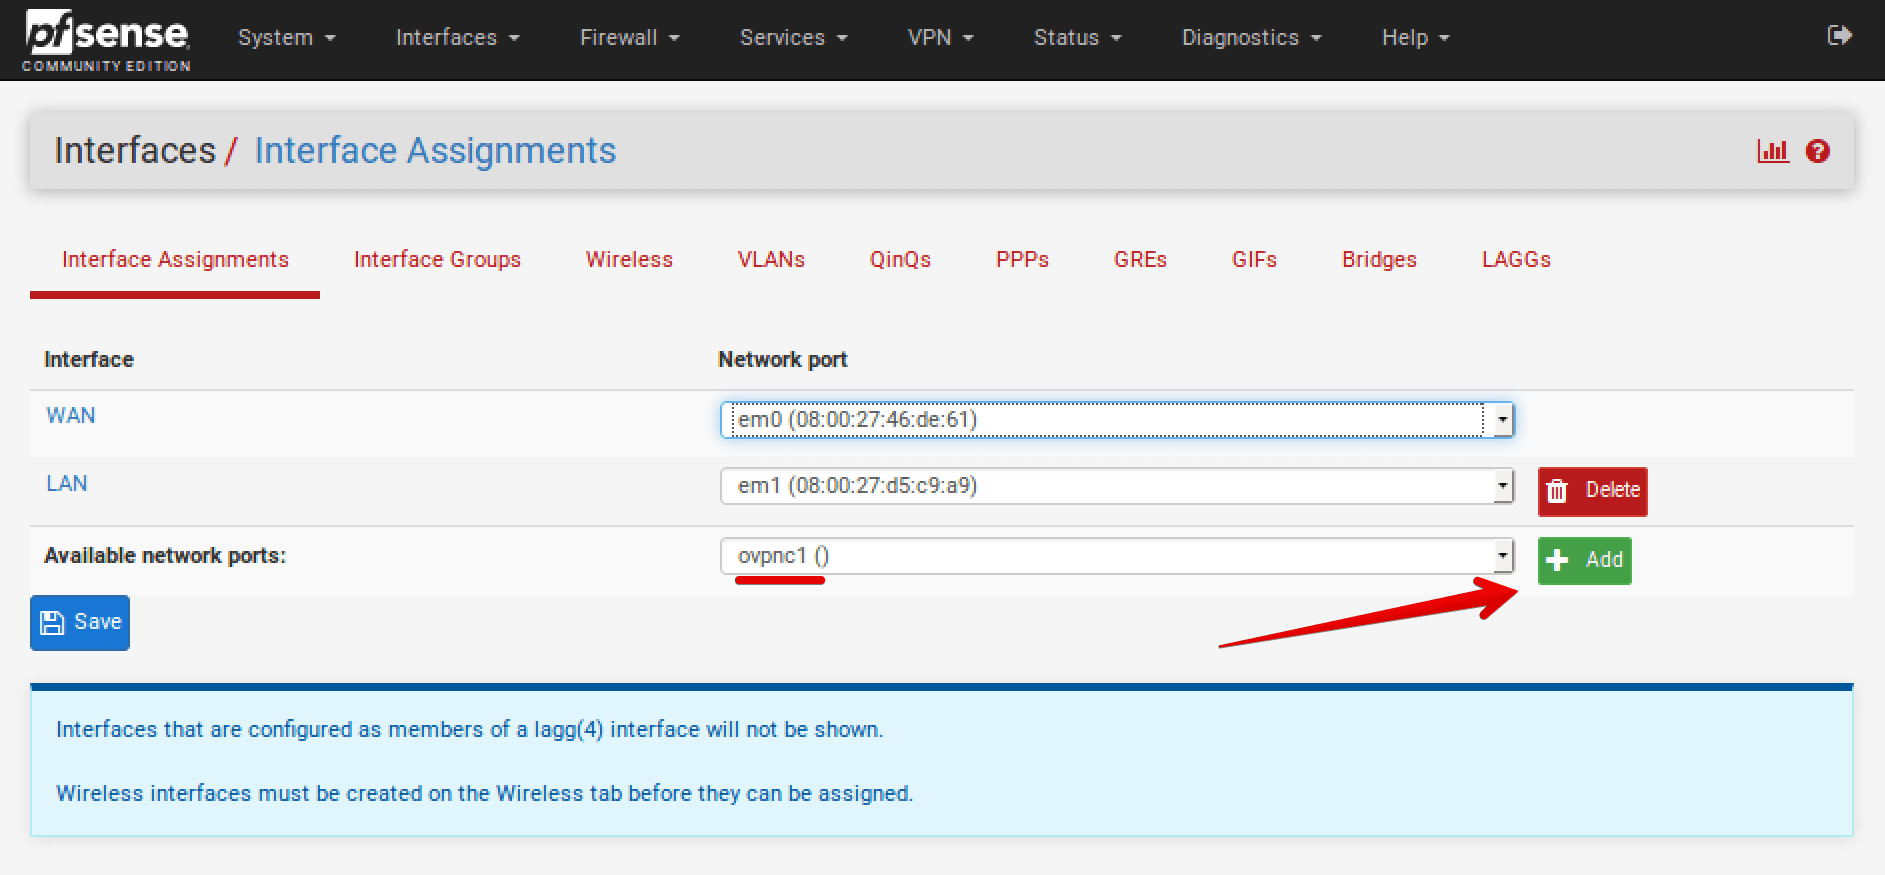
4. Go to Interfaces > Assignments and click Add.
The network port name most likely will be named ovpnc1. Please make sure that the new interface is selected as ovpnc1 (it can be ovpnc2, ovpnc3, etc, depending whether you have other ovpn interfaces or not).
When you finish, click Save.
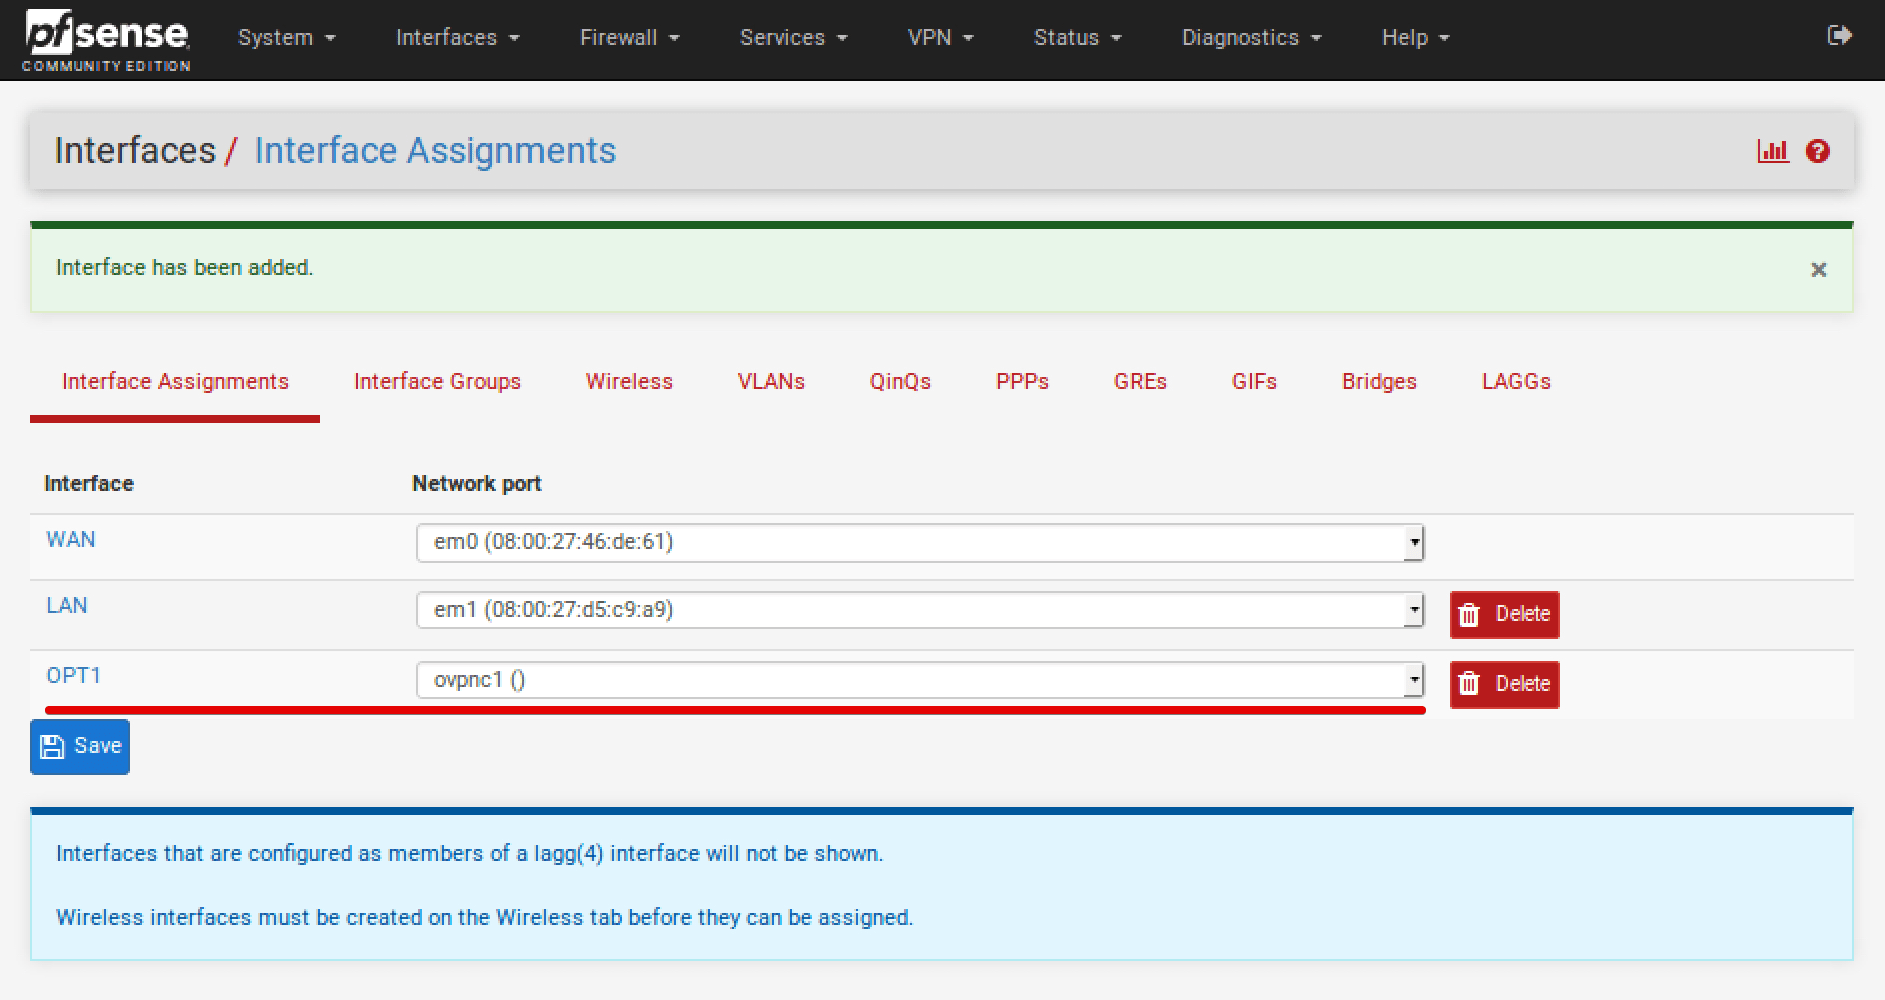
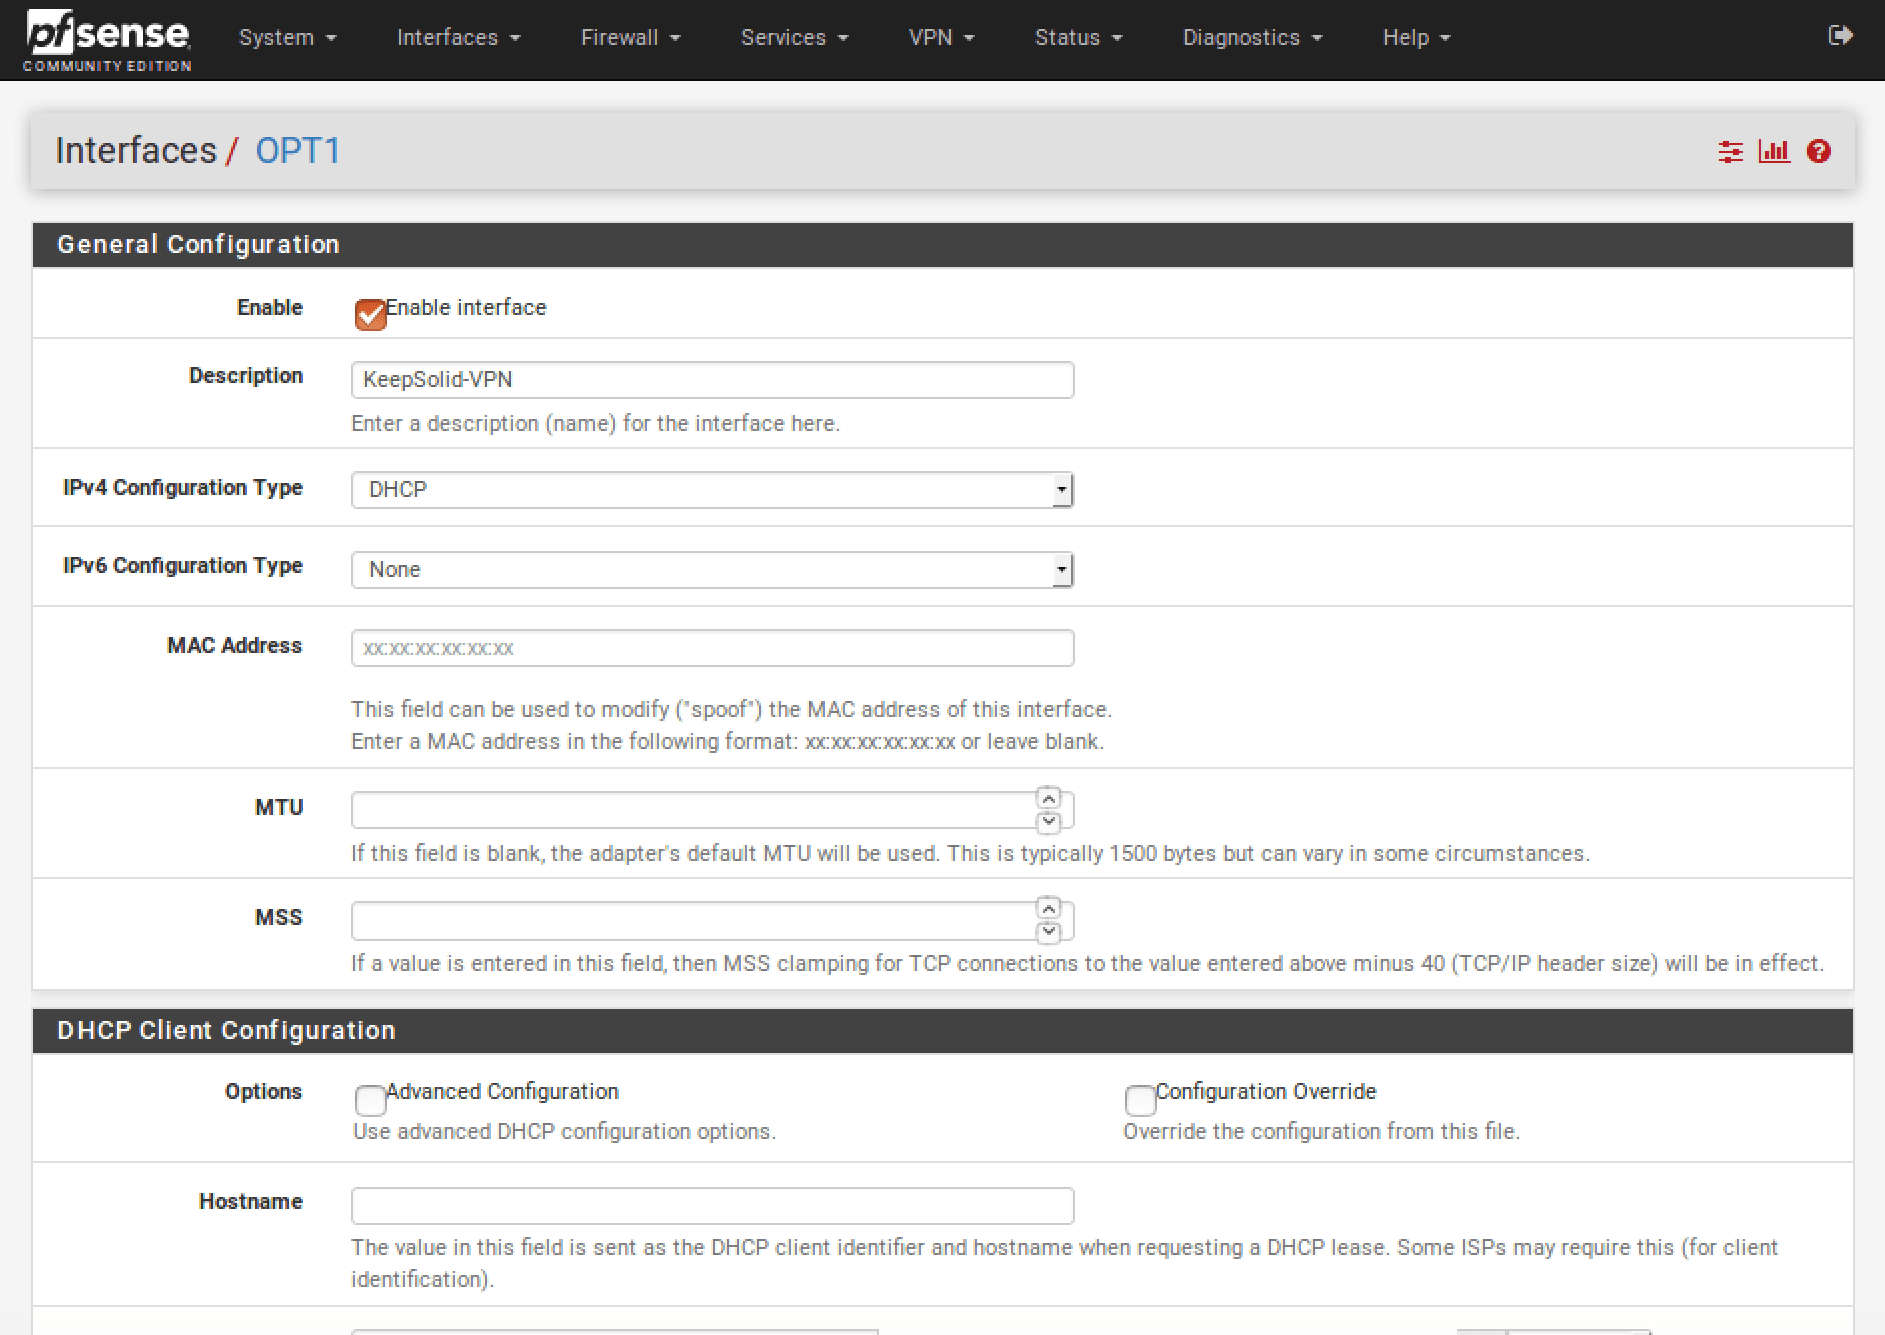
5. Go to Interfaces > OPT1 (your new interface name from the previous step).
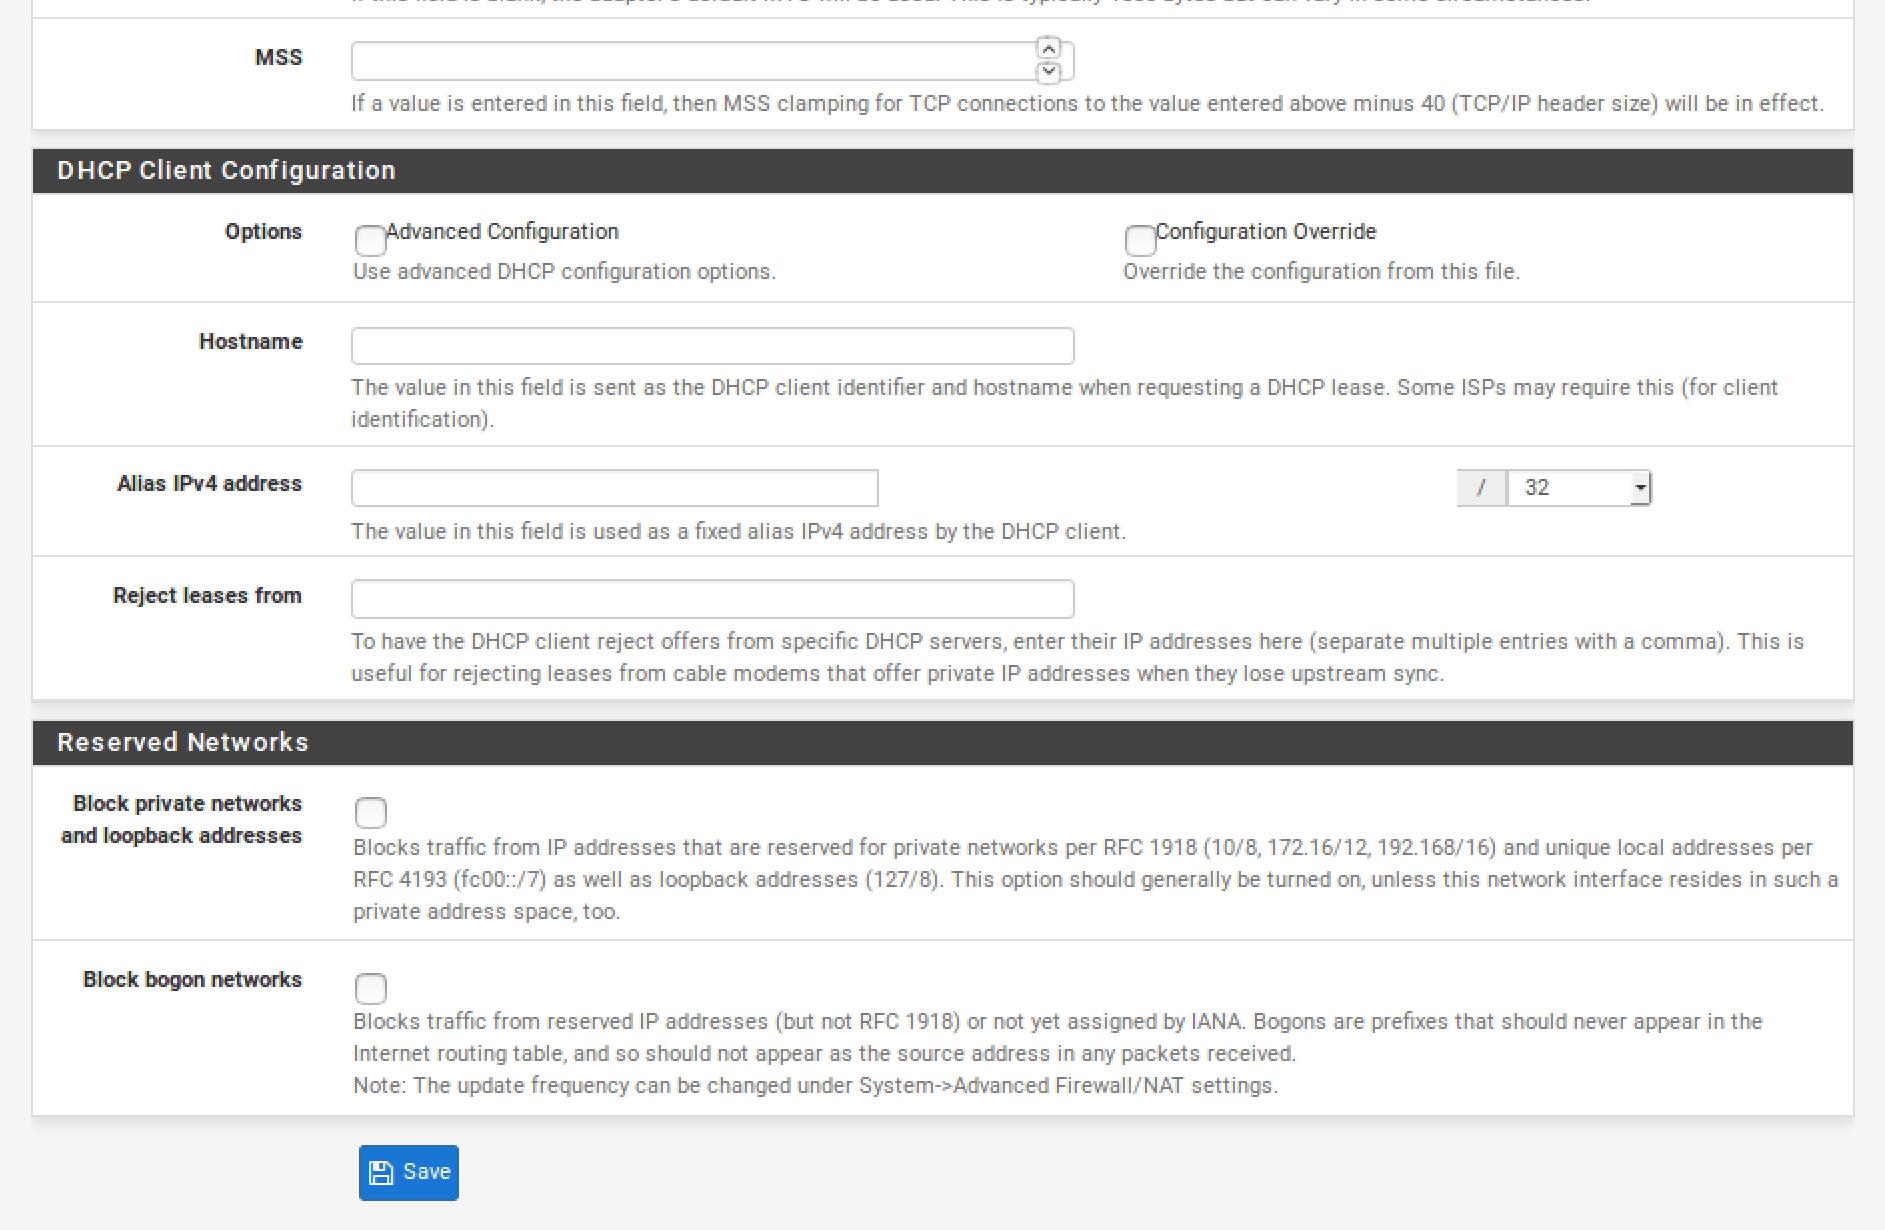
Complete the fields as shown below. As you can see, most of them should be left empty.
-
Enable: Set the checkbox for Enable interface
-
Description: Enter any name of your choice, for example, KeepSolid-VPN
-
IPv4 Configuration Type: Select DHCP
When you finish, click Apply Changes and Save.
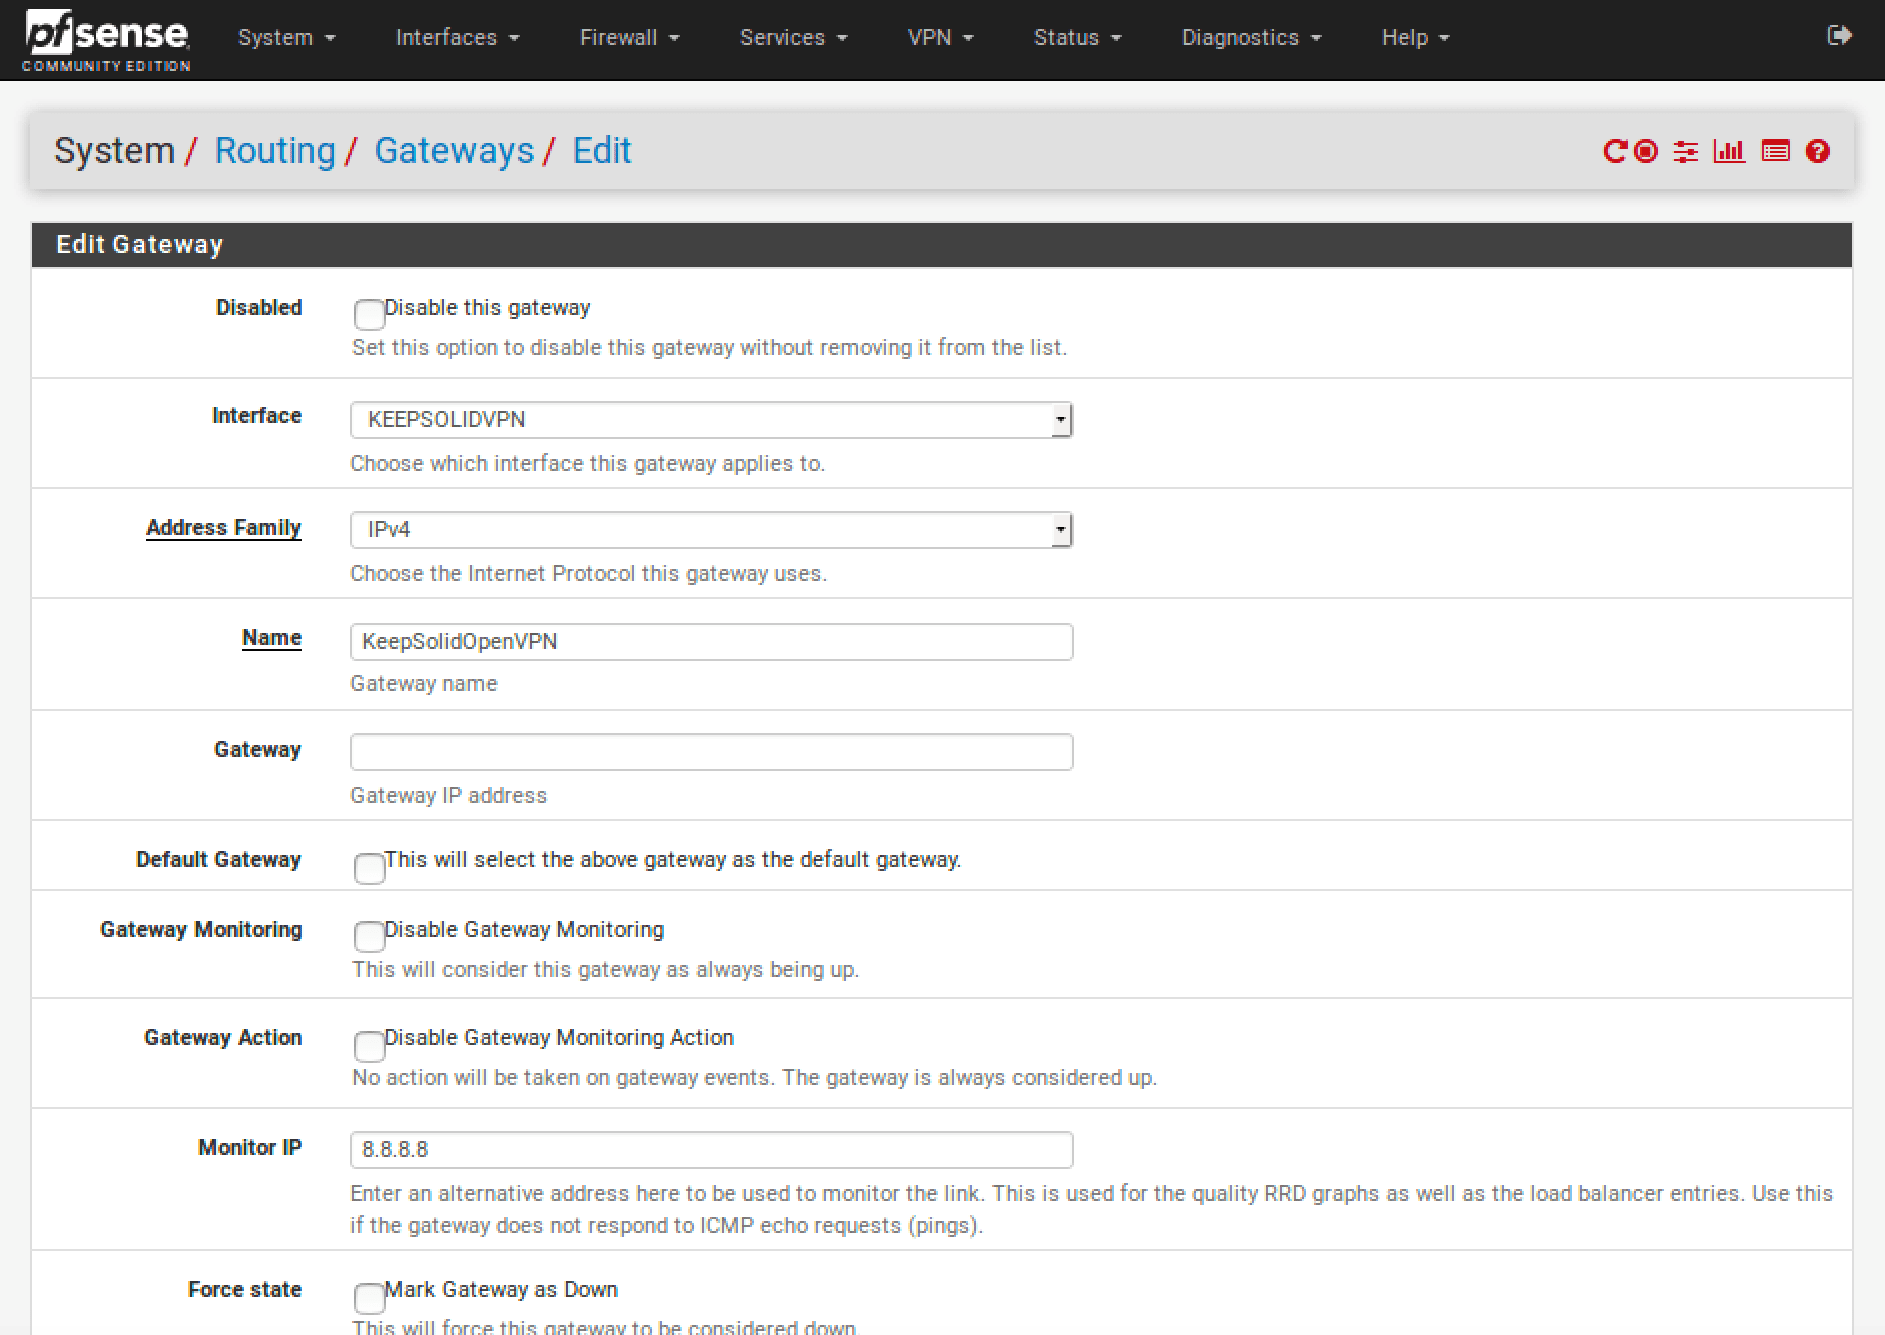
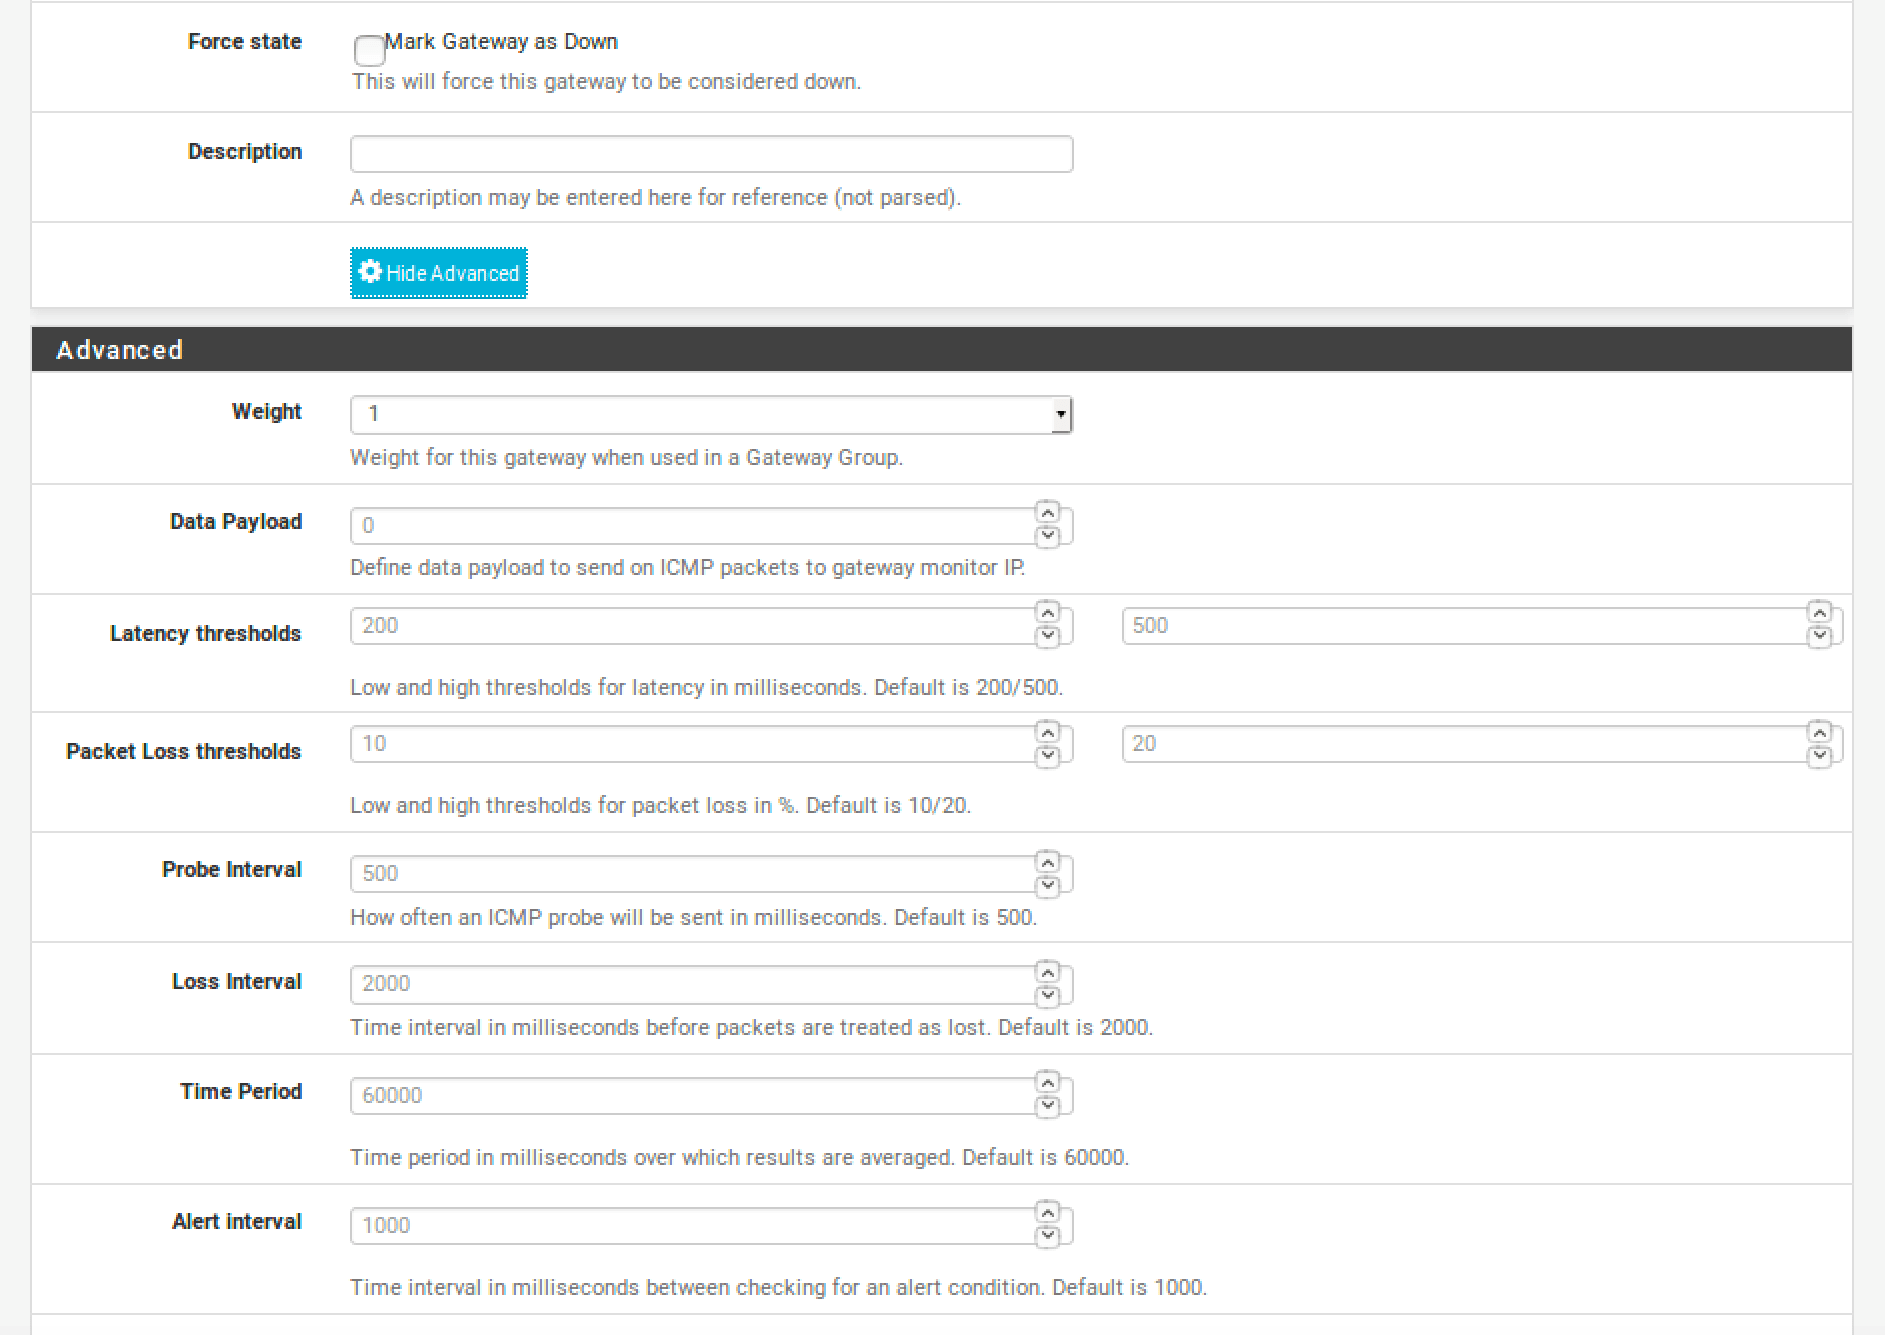
6. Go to System > Routing and click Add.
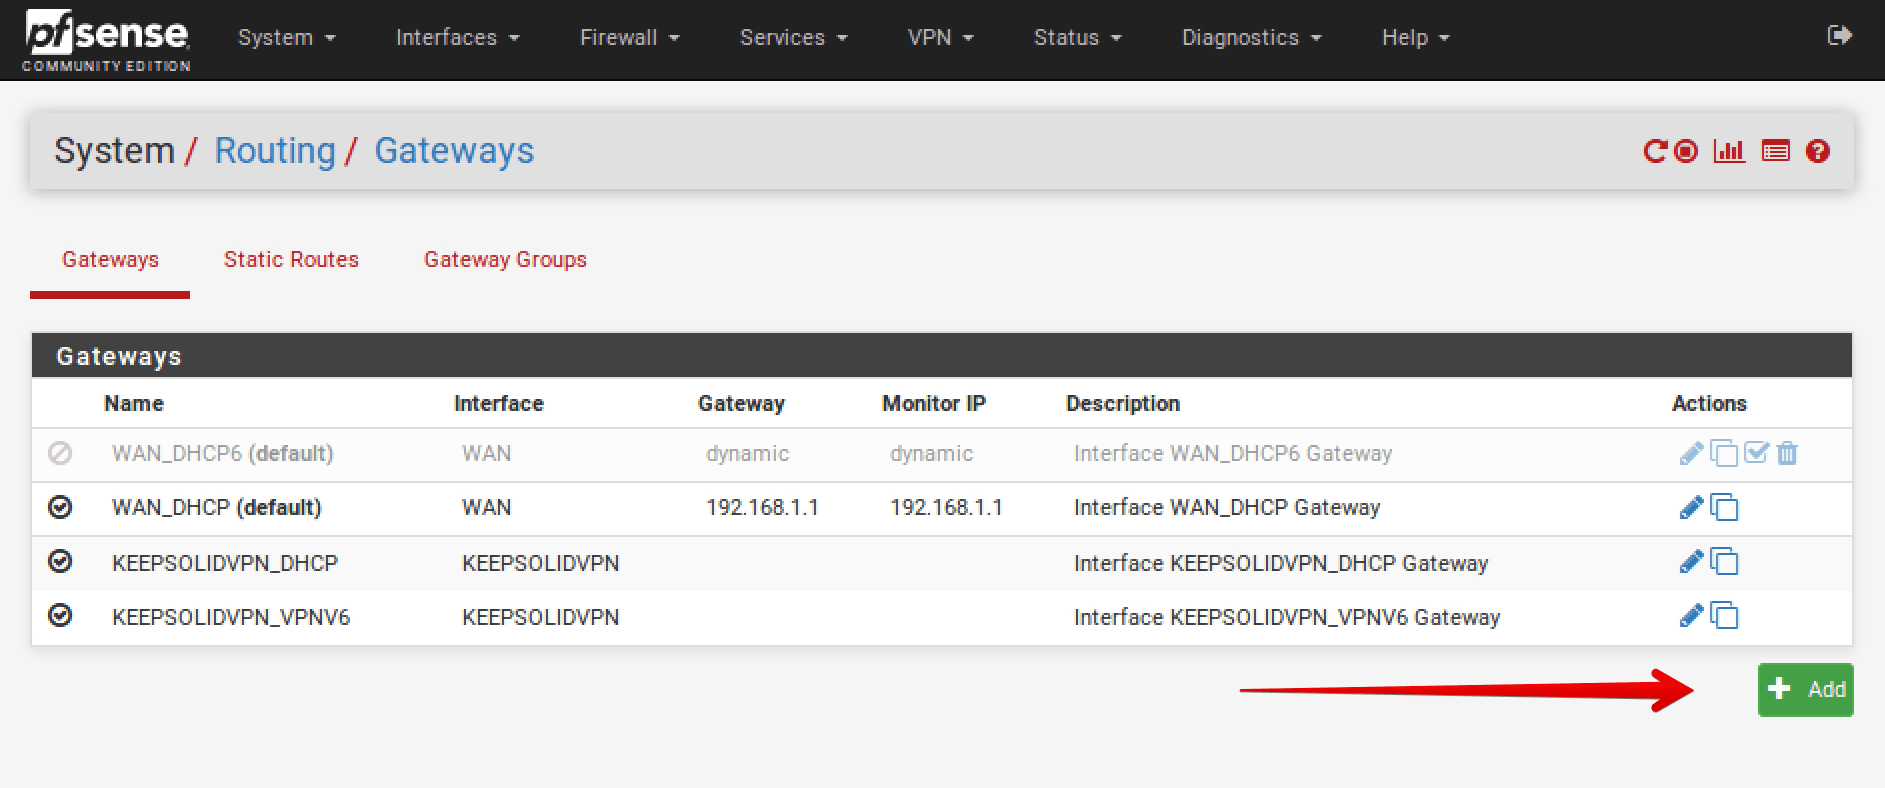
Complete the fields as shown below. As you can see, most of them are left default or empty.
When you finish, click Save and Apply Changes.
7. Go to Firewall > Aliases > IP and click Add.
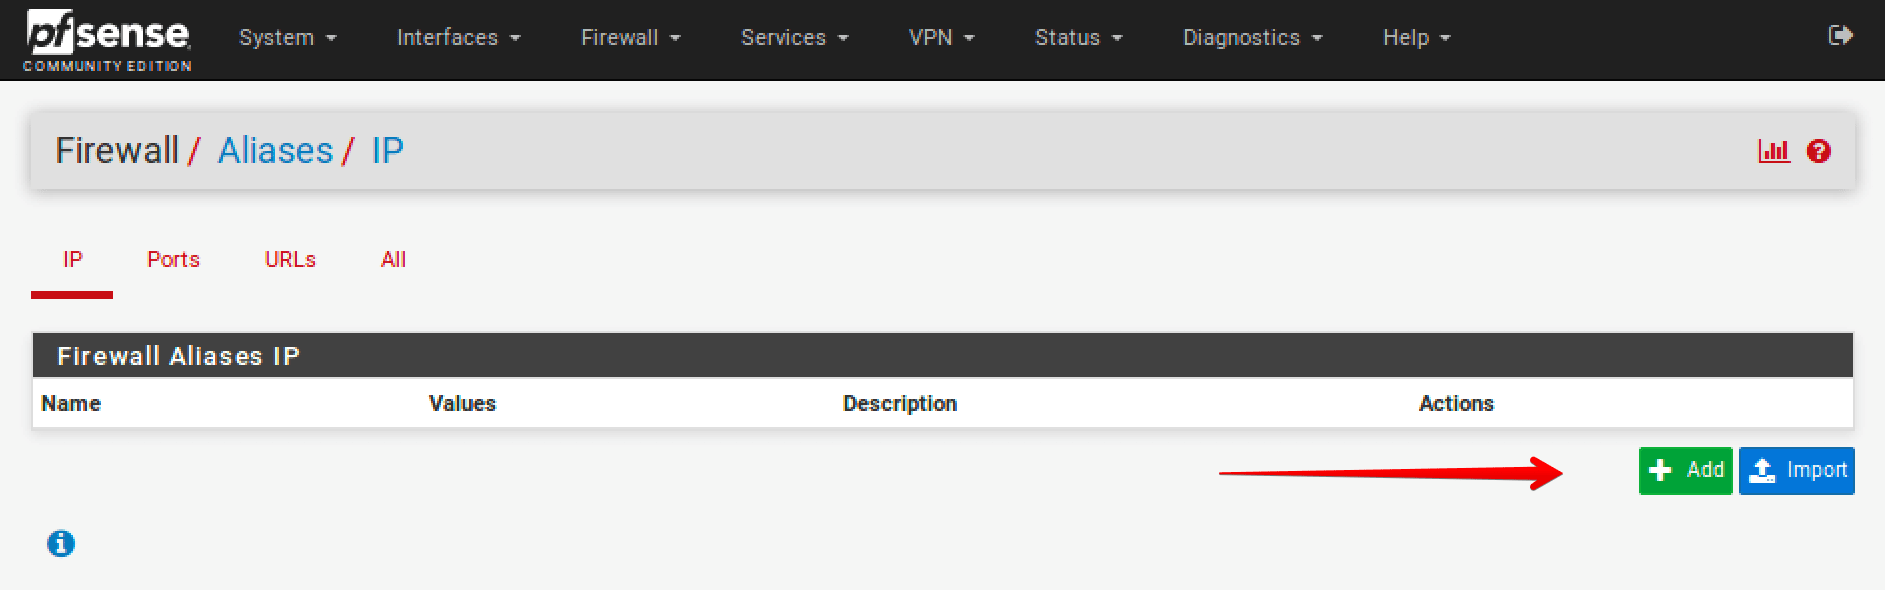
Complete the fields as shown below.

When you finish, click Save and Apply Changes.
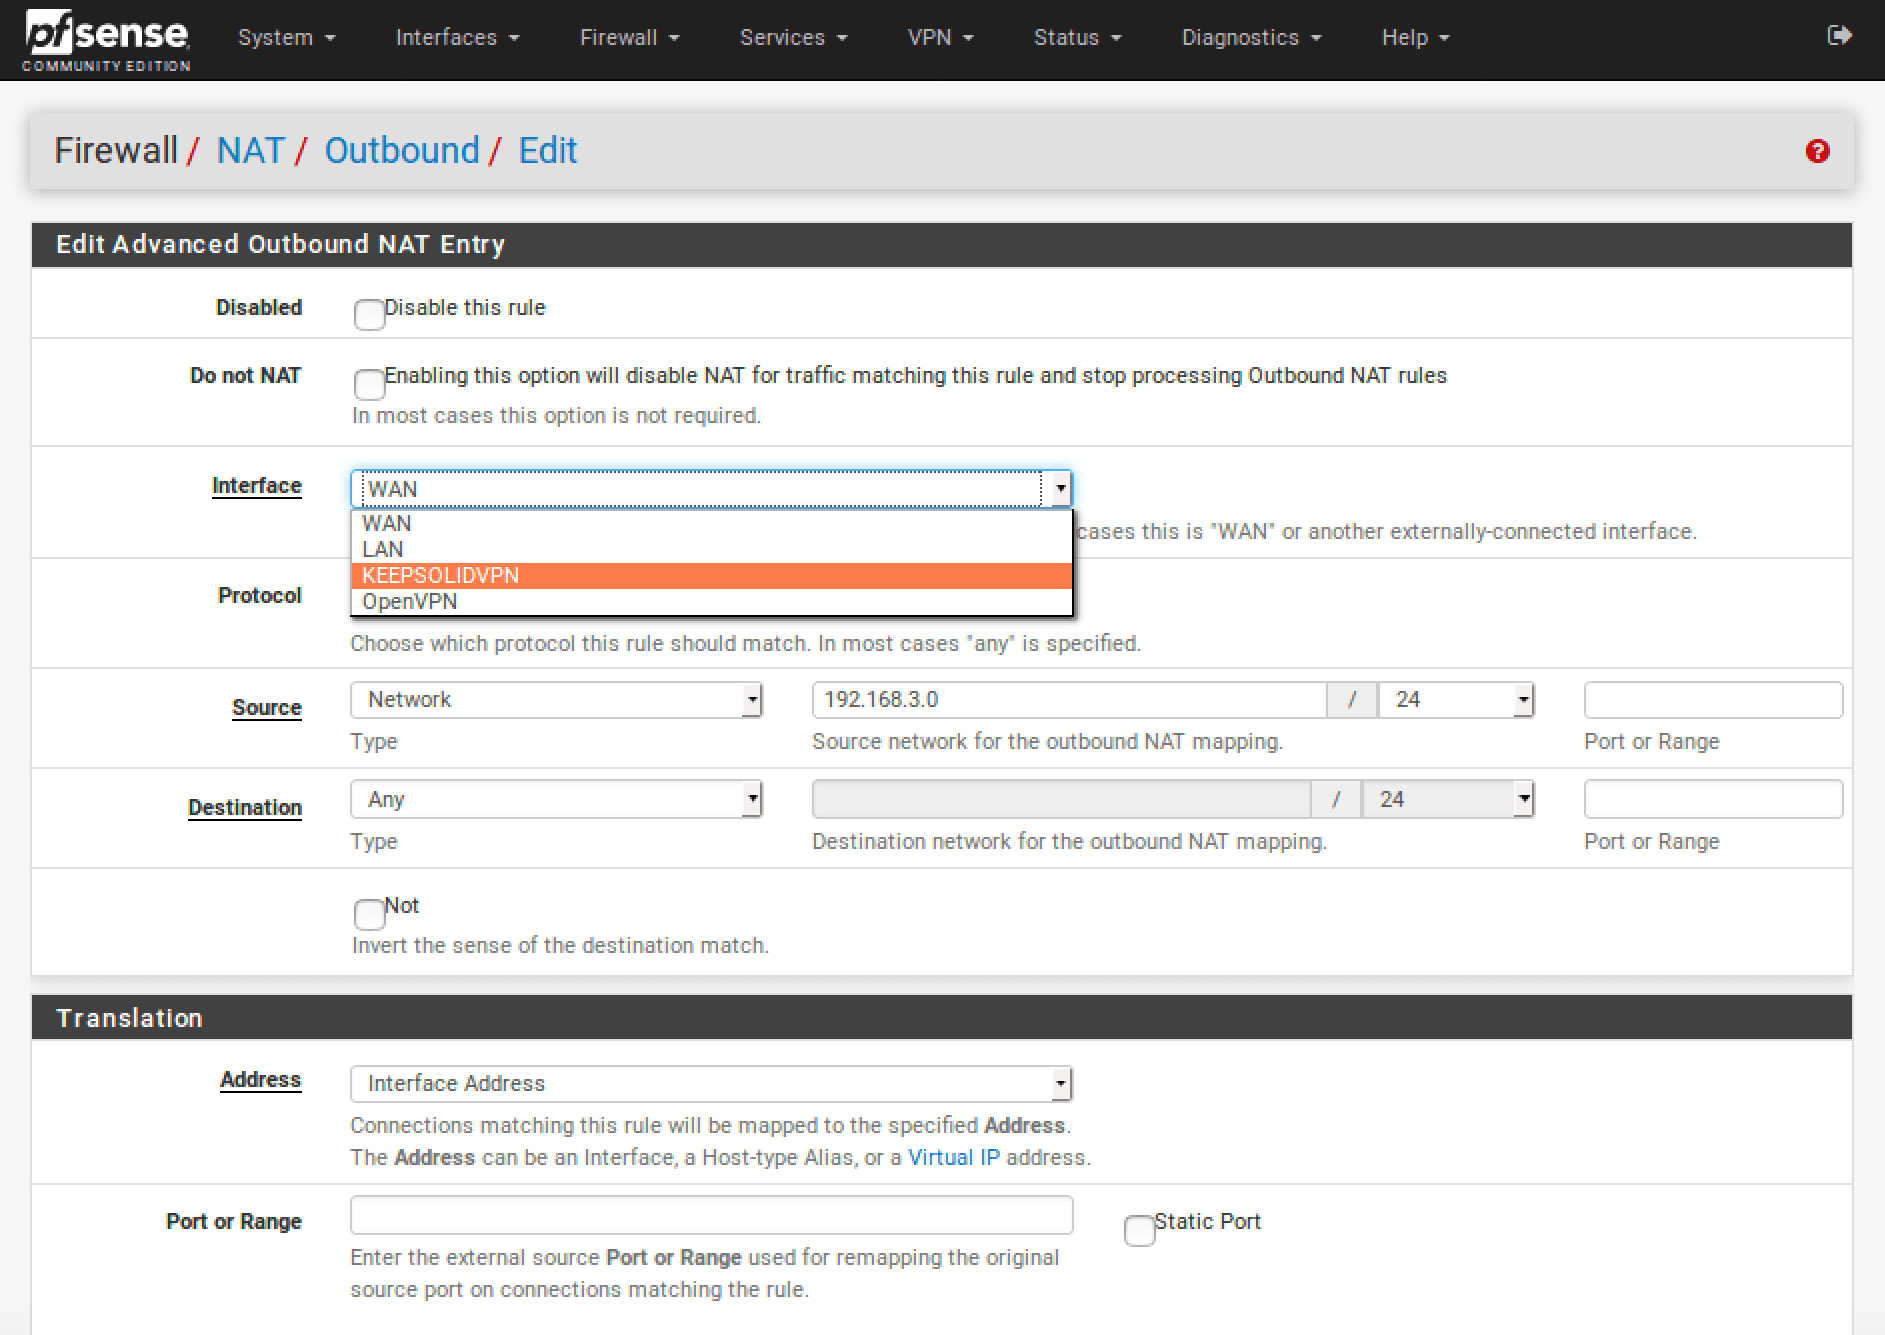
8. Go to Firewall > NAT > Outbound.
Set the Mode to Manual, then click Save and Apply Changes.
At this step, you have to make copies of your WAN connections.
Click  to make a copy and then
  to edit. All you need to change in the copy is the interface: select your new virtual interface instead of WAN. Do the same with all the WAN connections.
When you finish, click Save and Apply Changes.
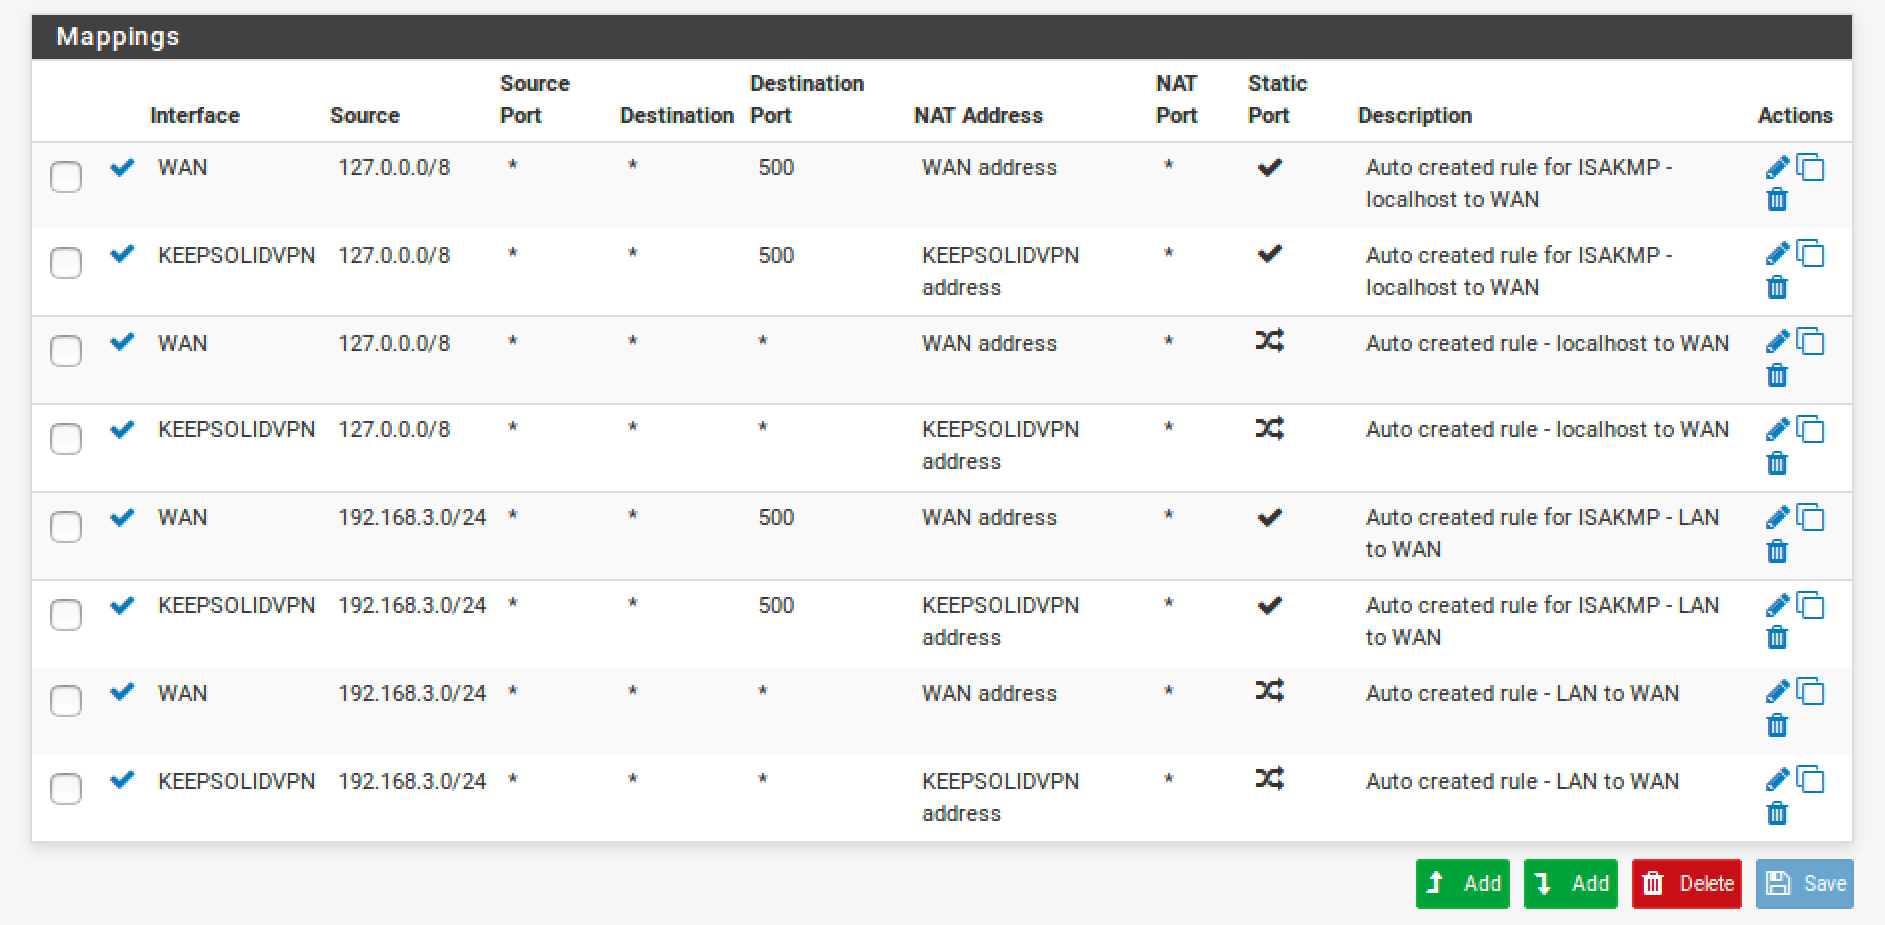
Your Mappings list should be as follows:
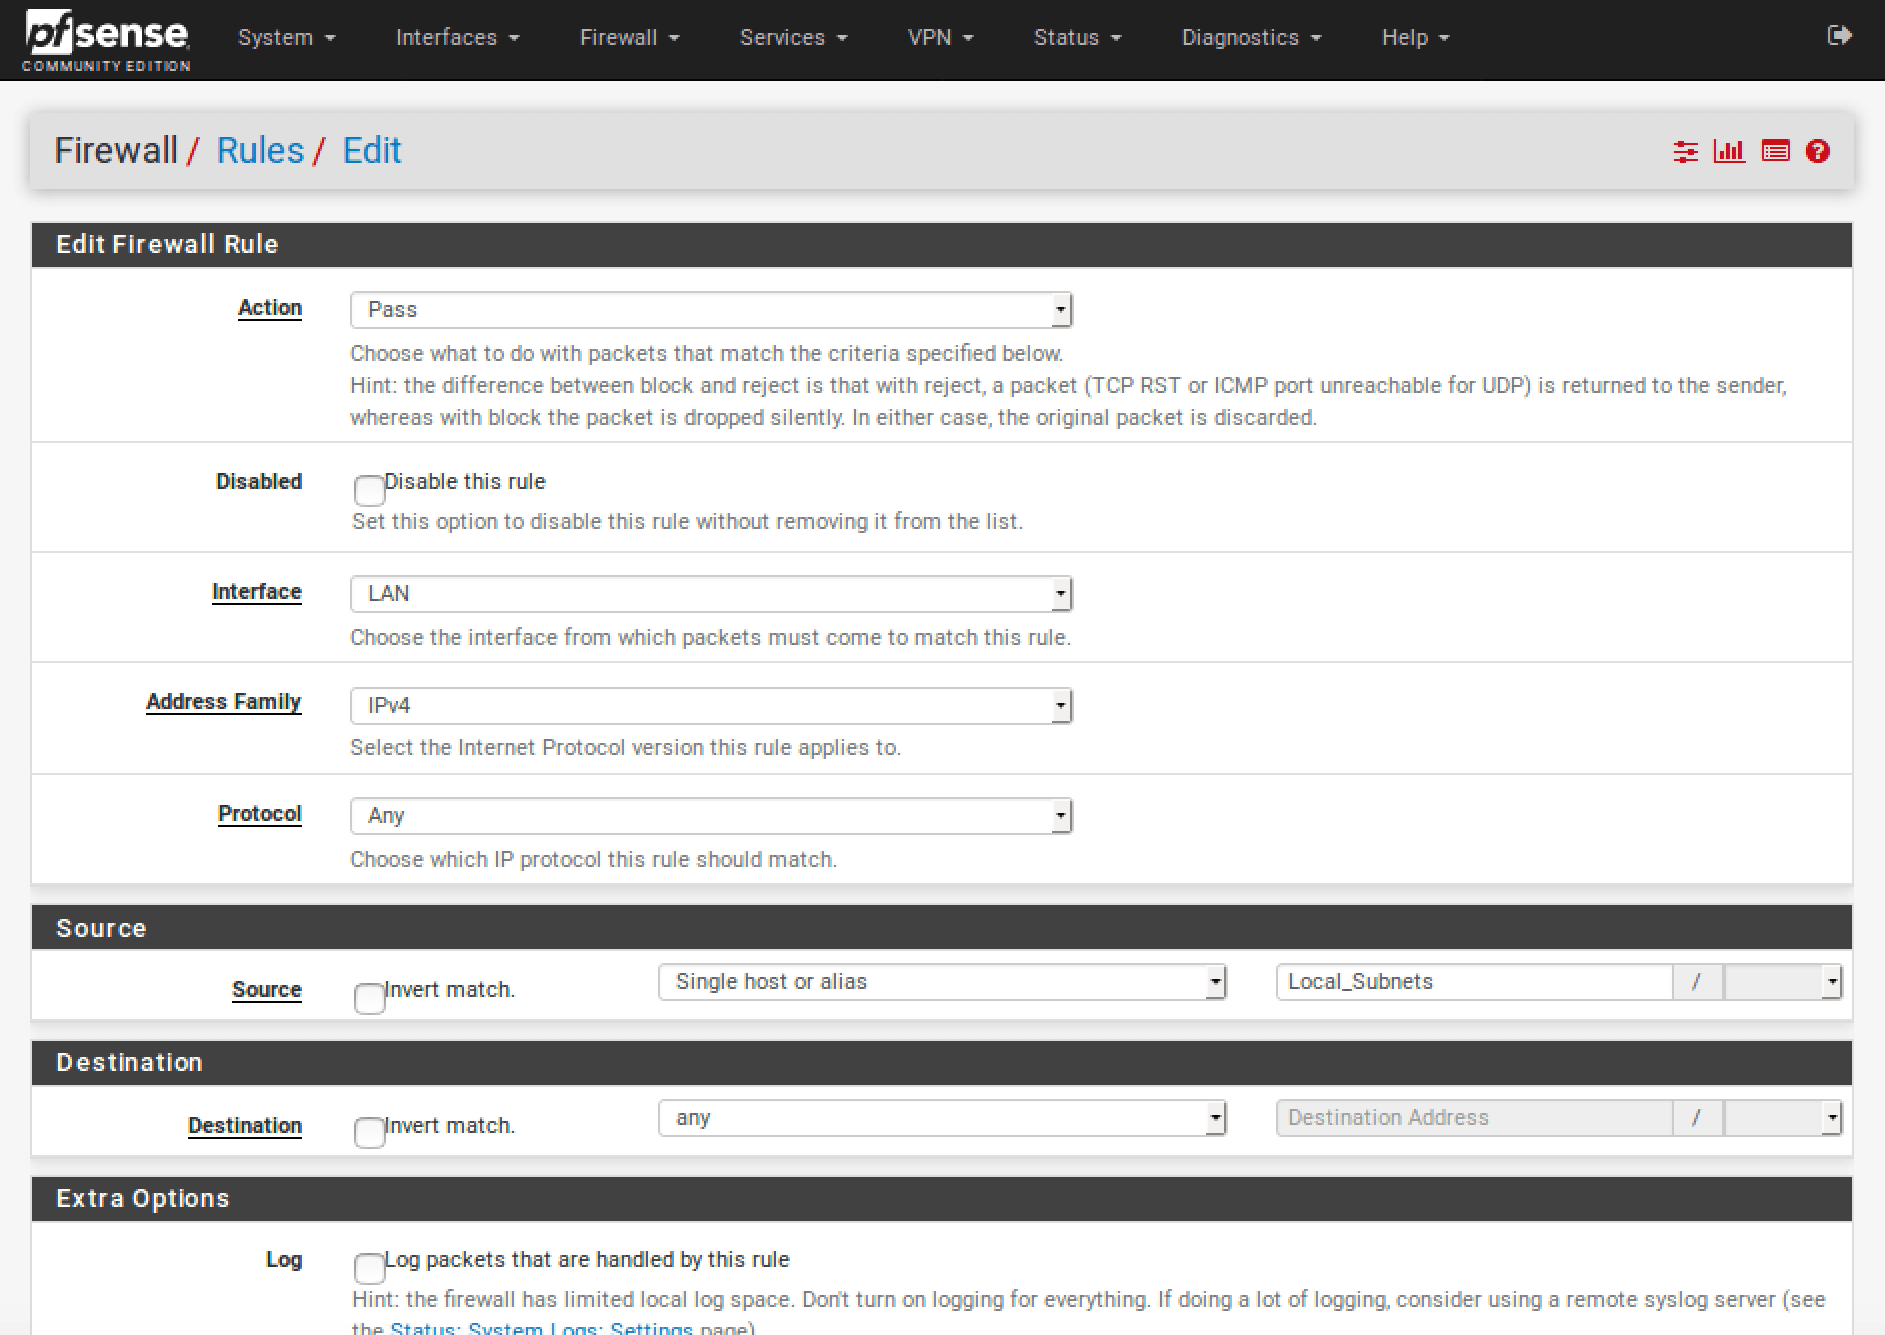
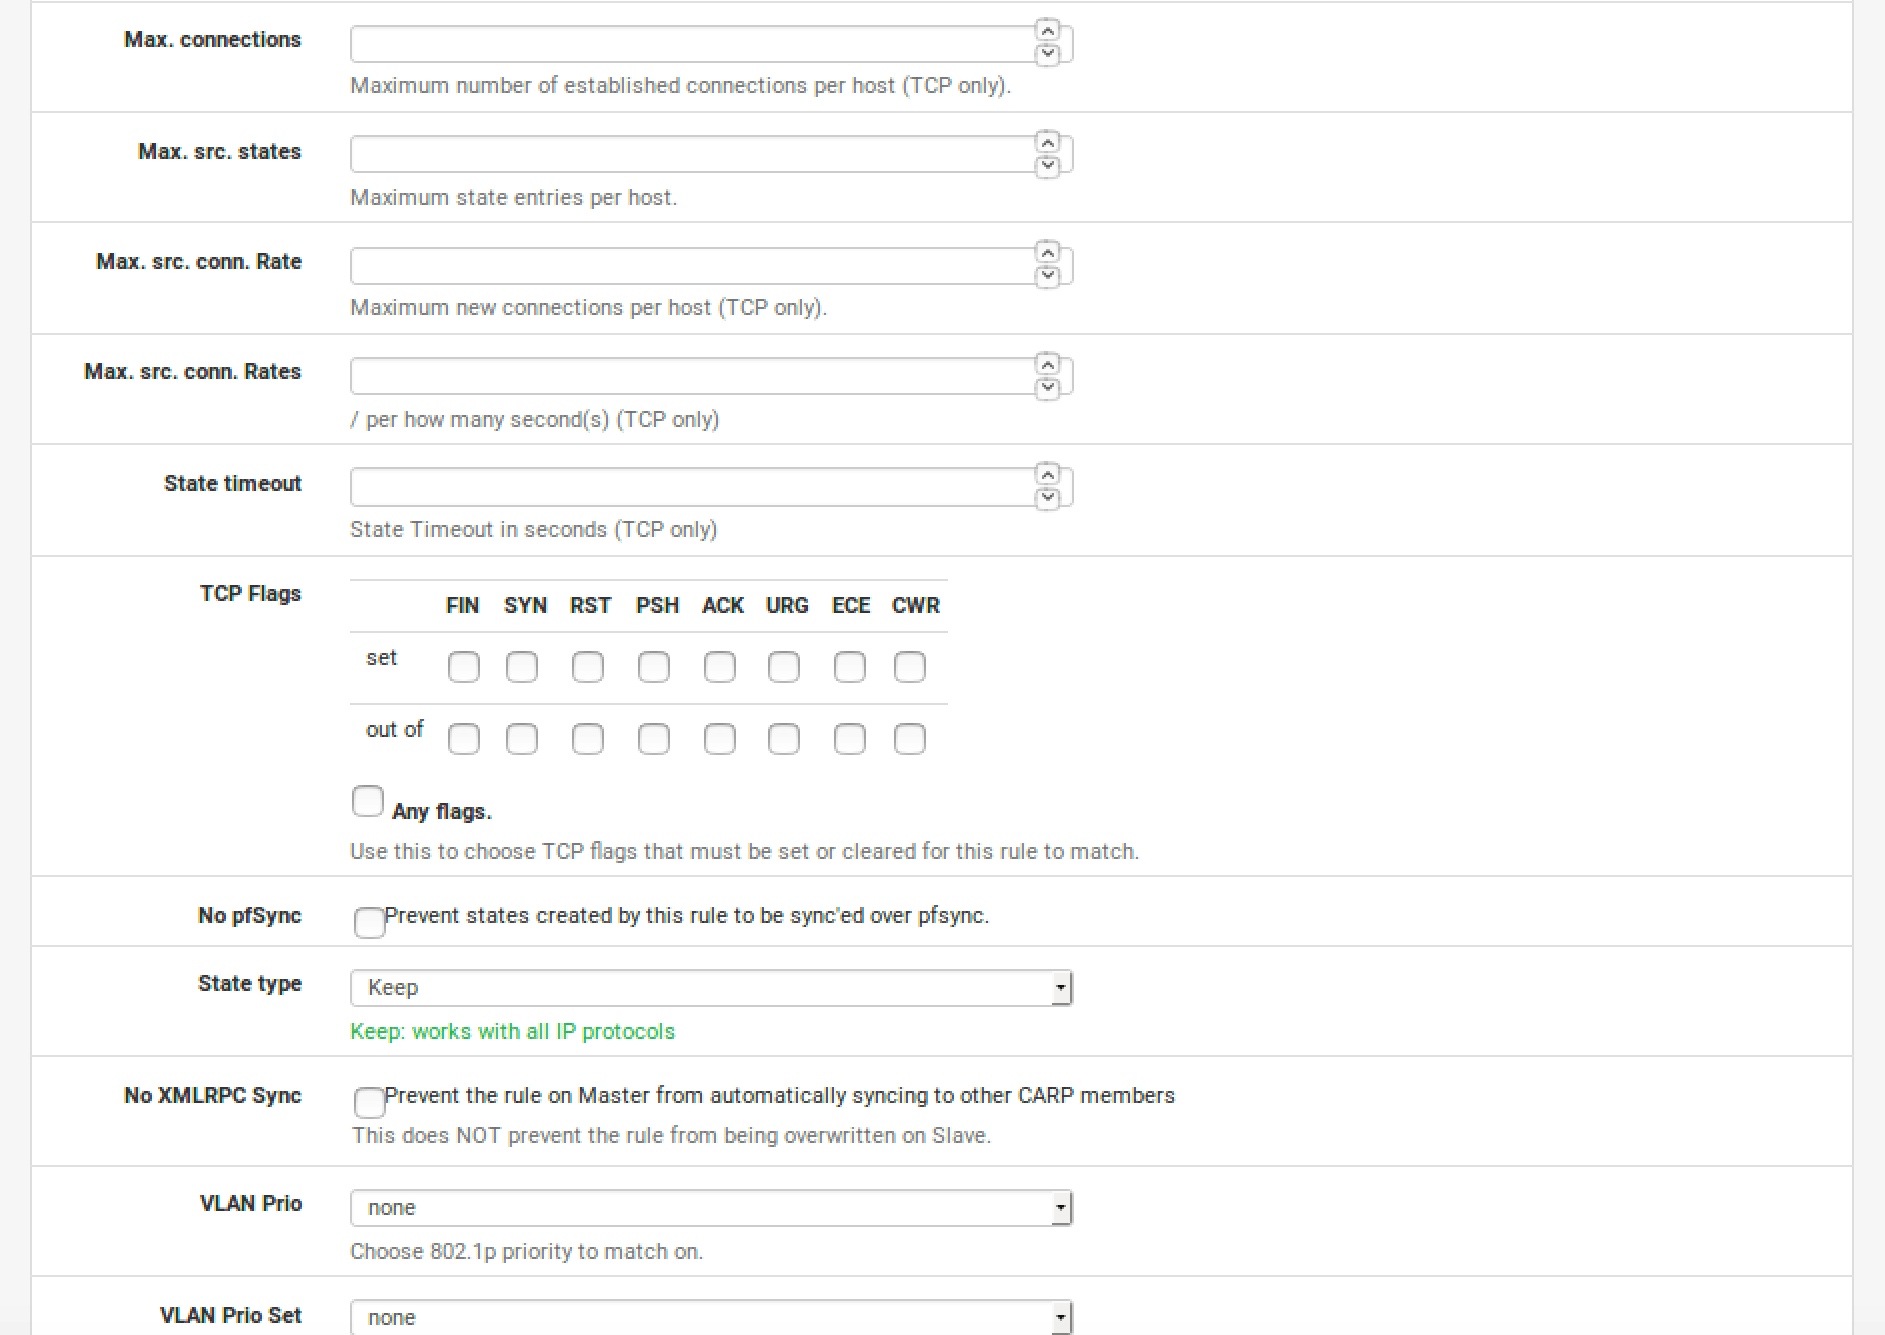
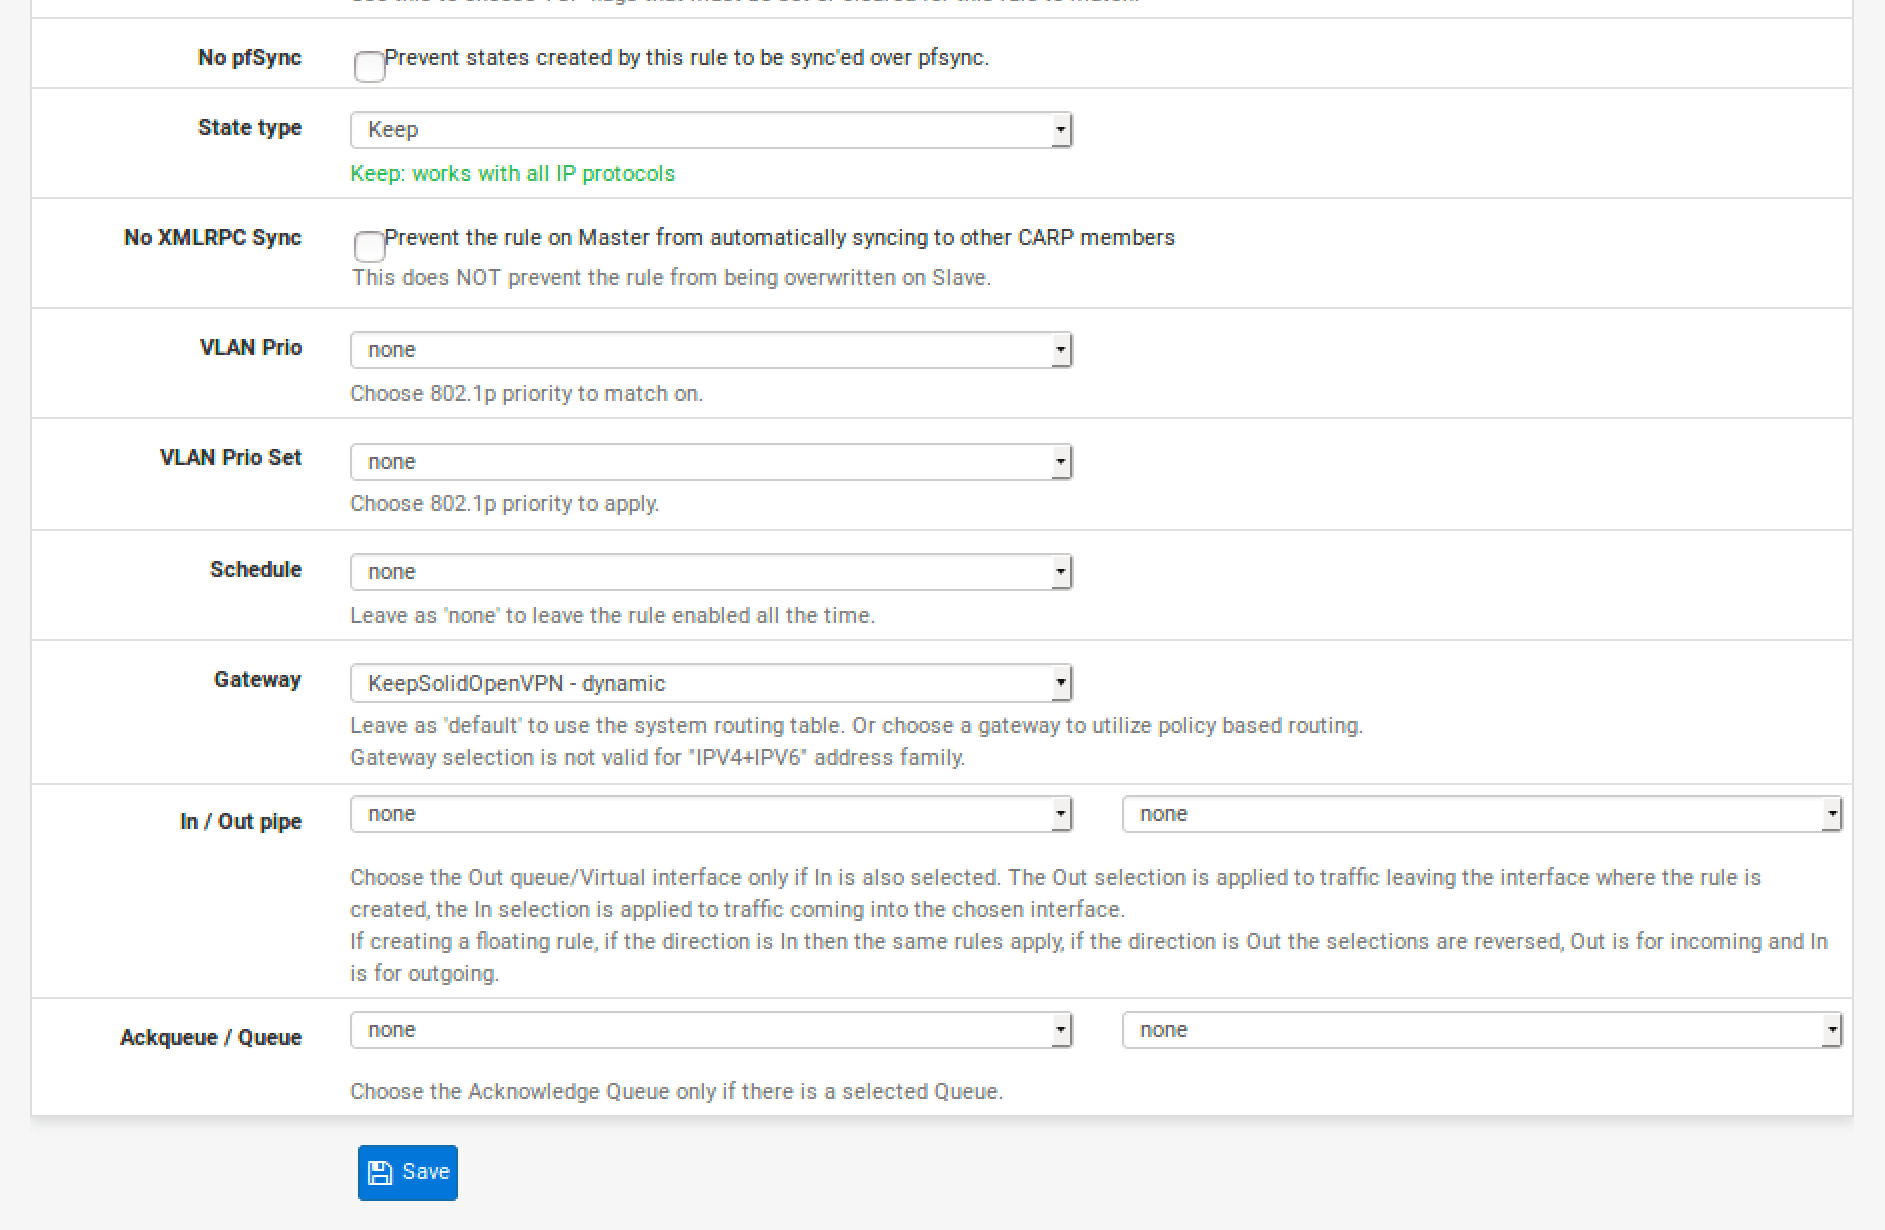
9. Go to Firewall > Rules > LAN and click Add.
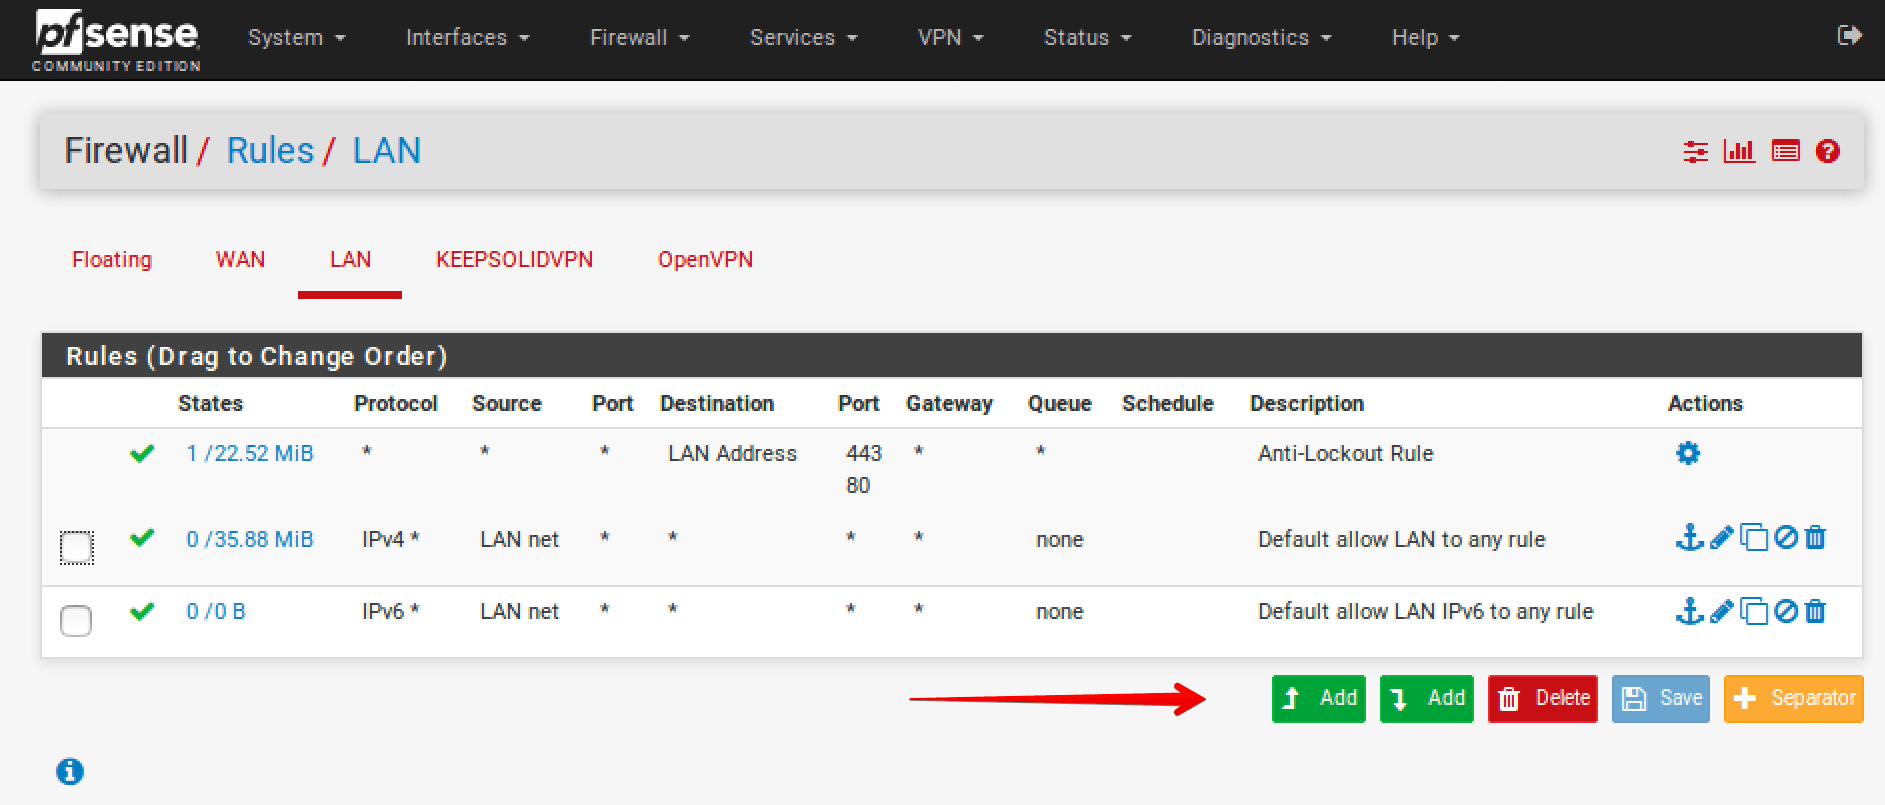
Complete the fields as shown below. As you can see, most of them are left default or empty.
When you finish, click Save.

12. Finally, go to Diagnostics > Reboot and wait a few moments for your pfSense router to restart.
That’s about it! Now you have a running OpenVPN connection on your pfSense router.