PPTP configuration
for ASUS router connected to LAN
This guide will show you how to configure a VPN connection for routers with firmwares that do not have a built-in support for VPN connections.
The very first step to take in configuring your router to work with our service is creating manual configuration files. In this regard, please follow a few simple steps described in our tutorial. When the configuration set is generated, open the web interface of your router in a browser. Input your login and password when required.
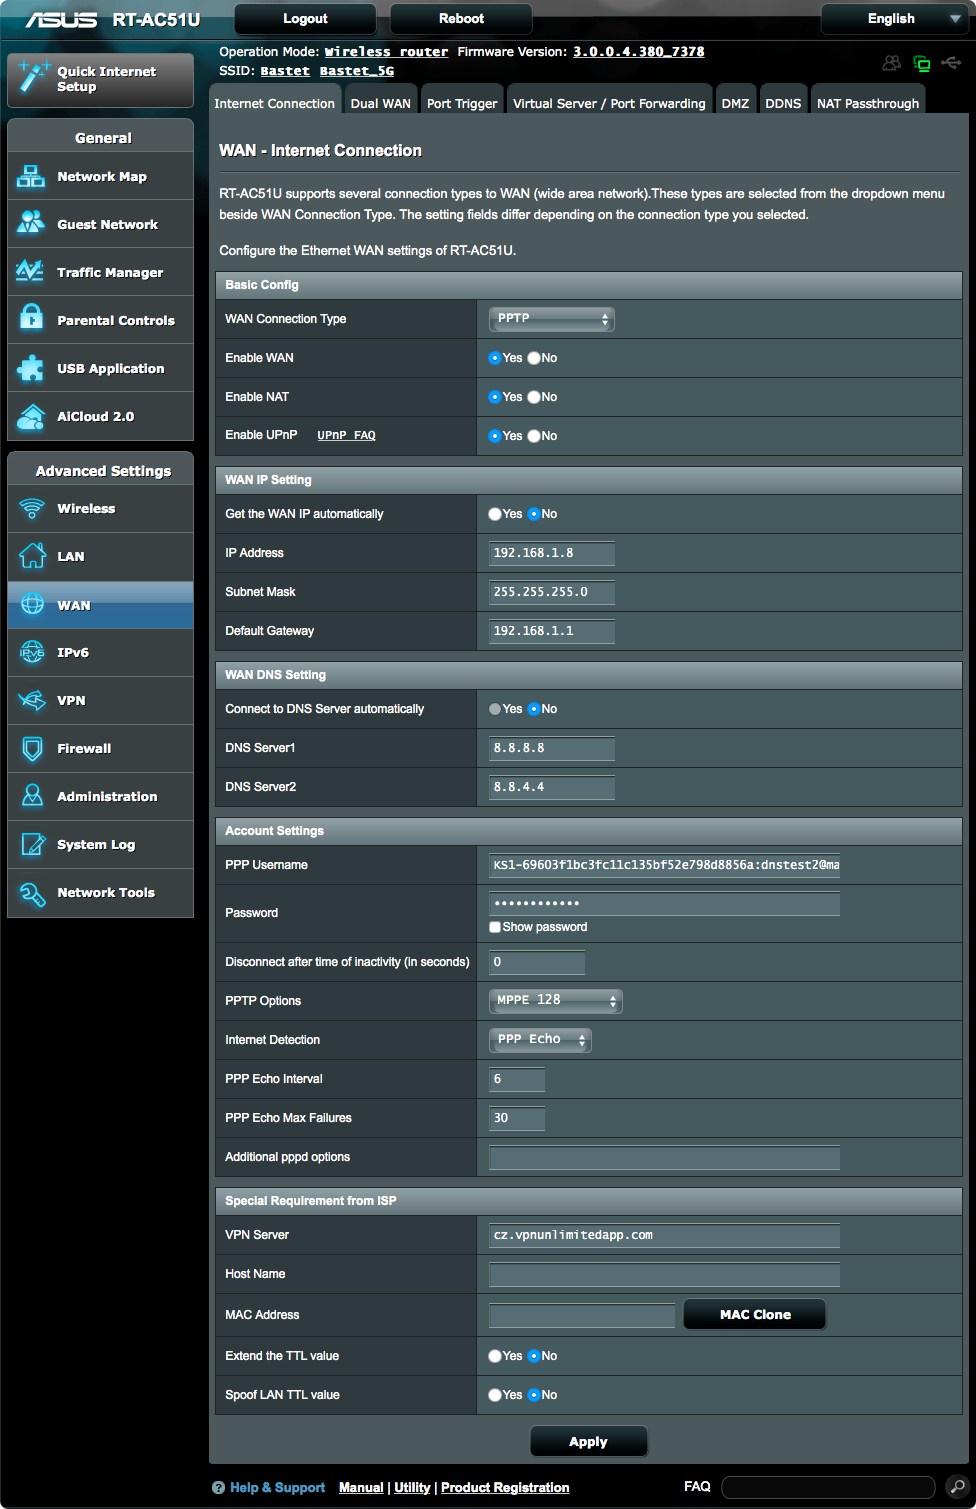
Select the WAN – Internet Connection tab.
Please consider the following network as an example:

Set the network parameters as follows:
| Basic Config | |
| WAN Connection Type | PPTP |
| Enable WAN | Yes |
| Enable NAT | Yes |
| WAN IP Setting | |
| Get the WAN IP automatically | No |
| IP Address | Specify any LAN address beyond the range of the DHCP server |
| Subnet Mask | Subnet mask (common for LAN – 255.255.255.0) |
| Default Gateway | IP address of the previous router in the LAN |
| WAN DNS Setting | |
| Connect to DNS Server automatically | No |
| DNS Server1 | 8.8.8.8 |
| DNS Server2 | 8.8.4.4 |
| Account Settings | |
| PPP Username | enter a login from the configuration set |
| Password | enter a password from the configuration set |
| Disconnect after time of inactivity (in seconds) | 0 |
| PPTP Options | MPPE 128 |
| Internet Detection | PPP Echo |
| PPP Echo Interval | 6 |
| PPP Echo Max Failures | 30 |
| Special Requirement from ISP | |
| VPN Server | enter a server name from the configuration set |
Click Apply.
For checking purposes, please go to the Network Map tab.
If the previous step is done correctly, you will see the following:
Internet status: Connected
WAN IP: A new IP address different than the LAN address

That’s it! Now you have a running VPN connection via PPTP protocol on your router.