How to install VPN Unlimited Application
on Windows 7
This guide contains detailed steps that will help you to get started with the VPN Unlimited application, and easily manage it.
1. Installation of the application
To download the application, please go to the following page and select Standalone Version.
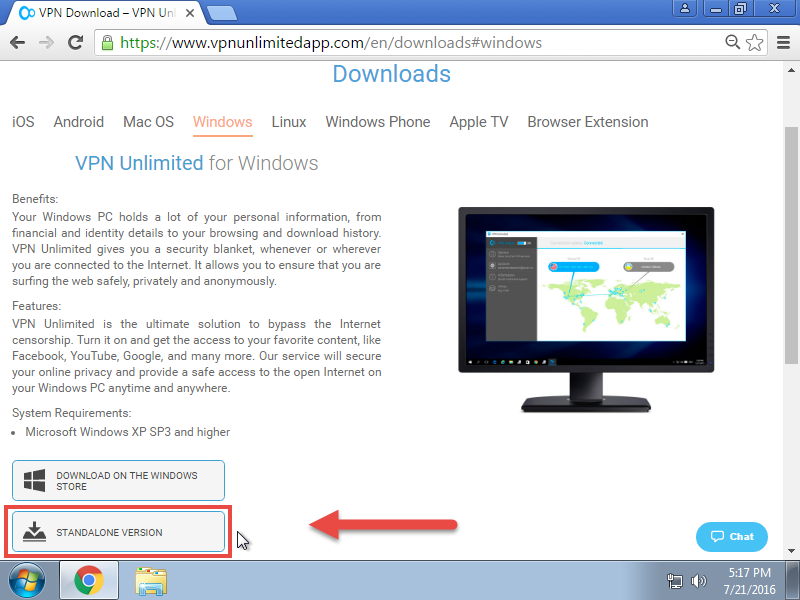
Save the file to your computer.
Then launch the downloaded installer.
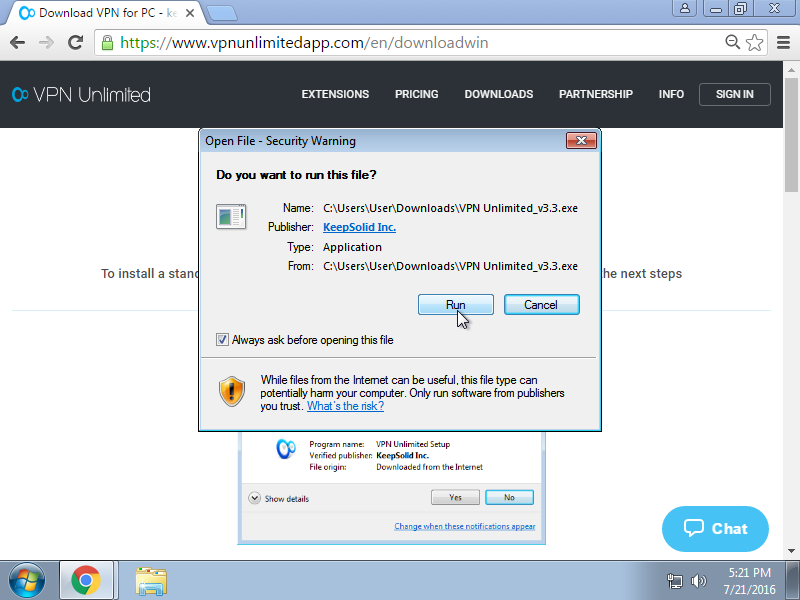
If User Account Control is enabled on your OS, you may receive the following alert:
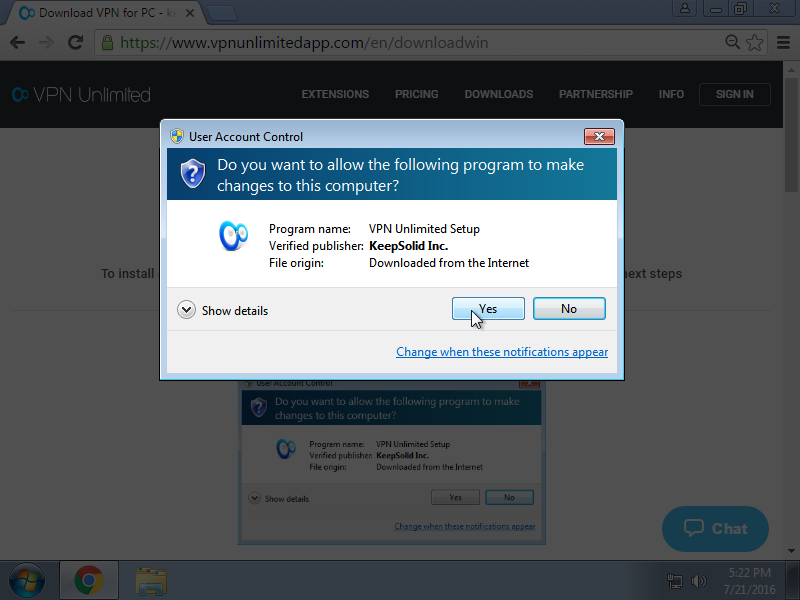
To follow the installation process, please click Yes.
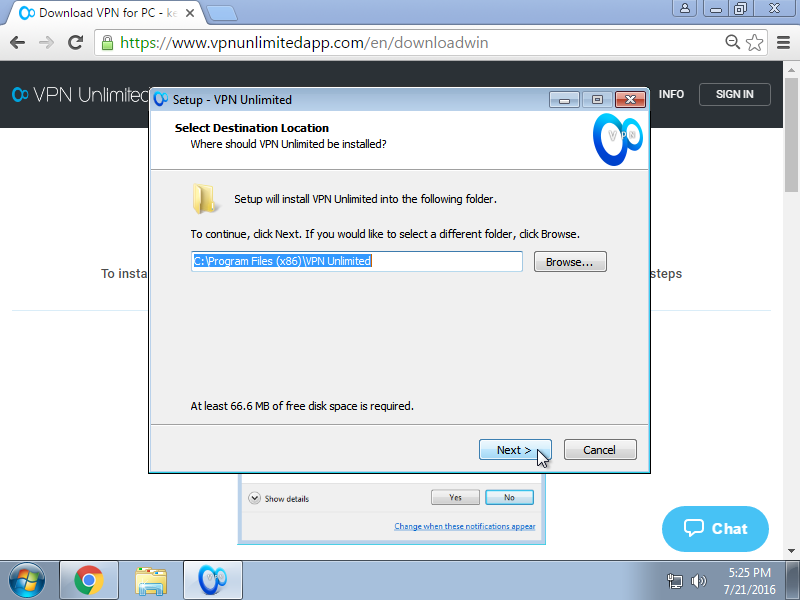
Select the path to install the program, or leave the default path and click Next.
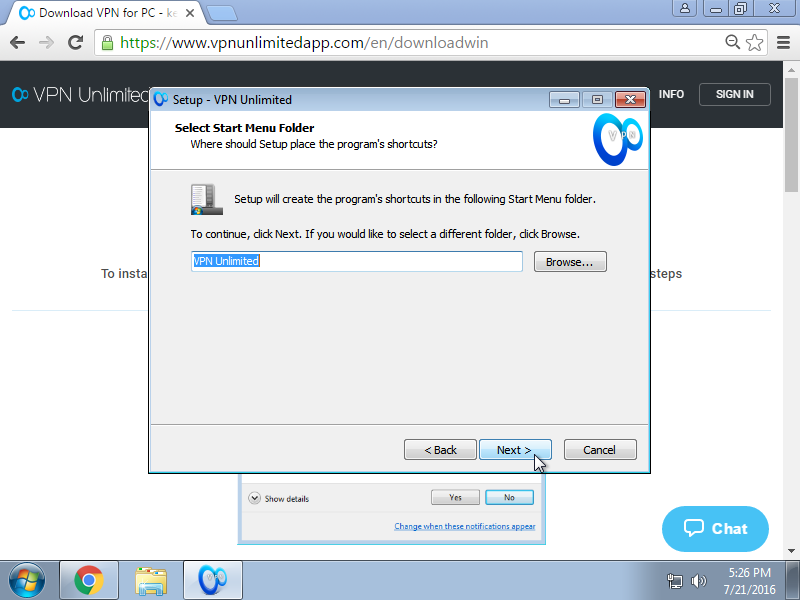
Choose a folder name in the Start menu, where shortcuts of the program will be created, or leave the default name and click Next.
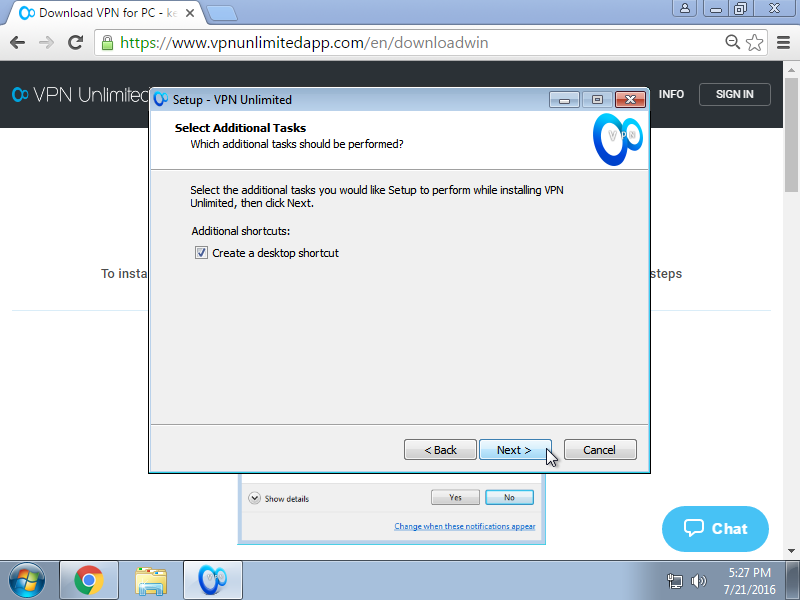
If you want to create a shortcut to launch the program from the Desktop, please leave the checkbox ticked.
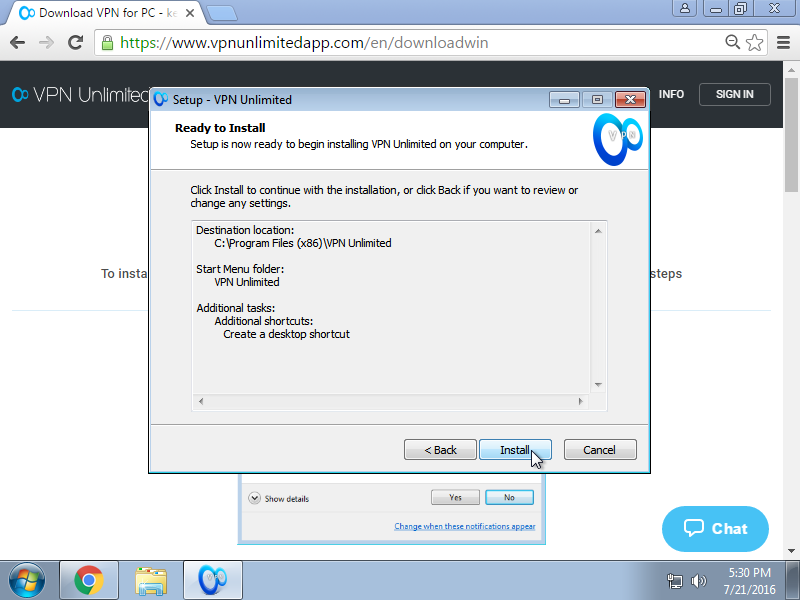
In the next window, click Install to start the installation.
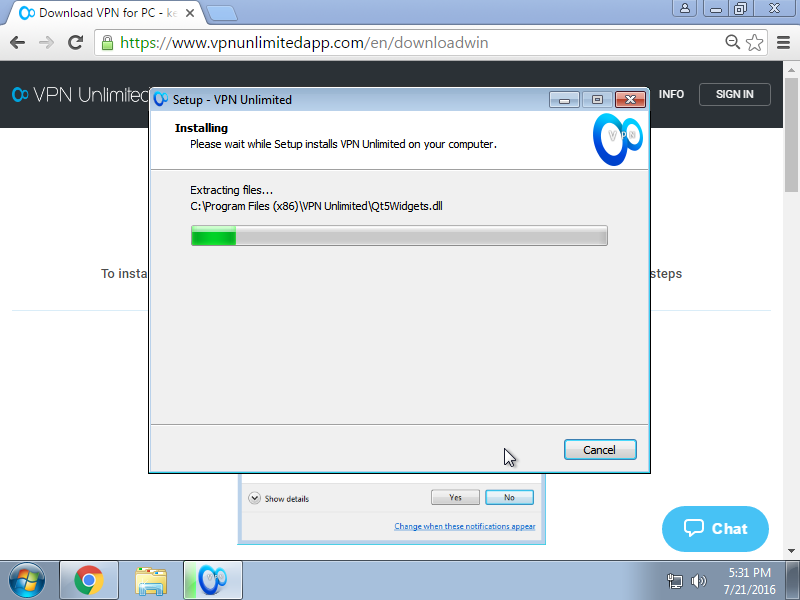
The copy process of the application files will start.
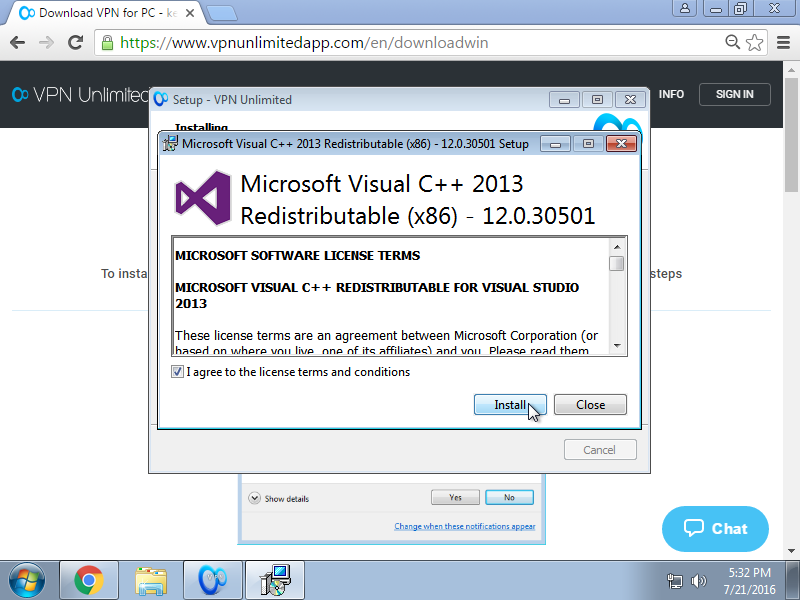
If the Microsoft Visual C++ Redistributable package, required to run the program, is not installed, the installer will offer to setup this package. To follow the process, please accept the license agreement and click Install.
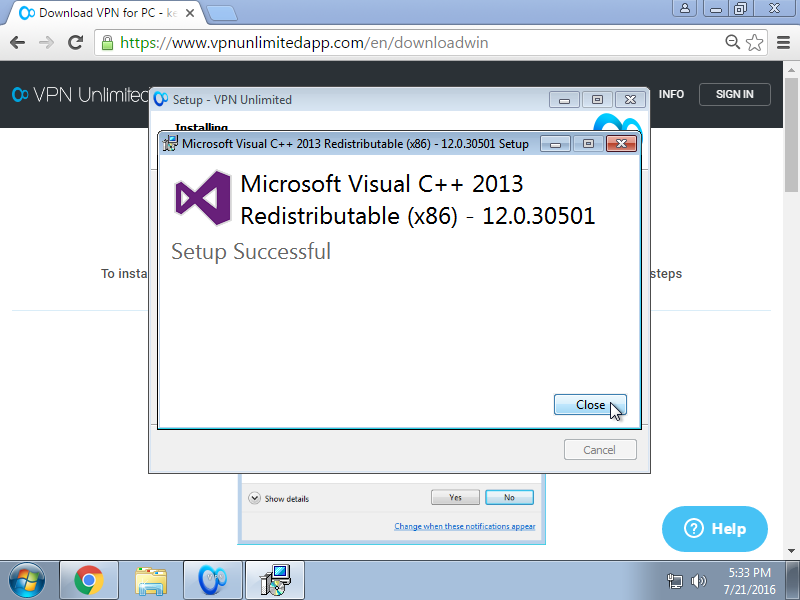
Click Close after successful installation of the Microsoft Visual C++ Redistributable package.
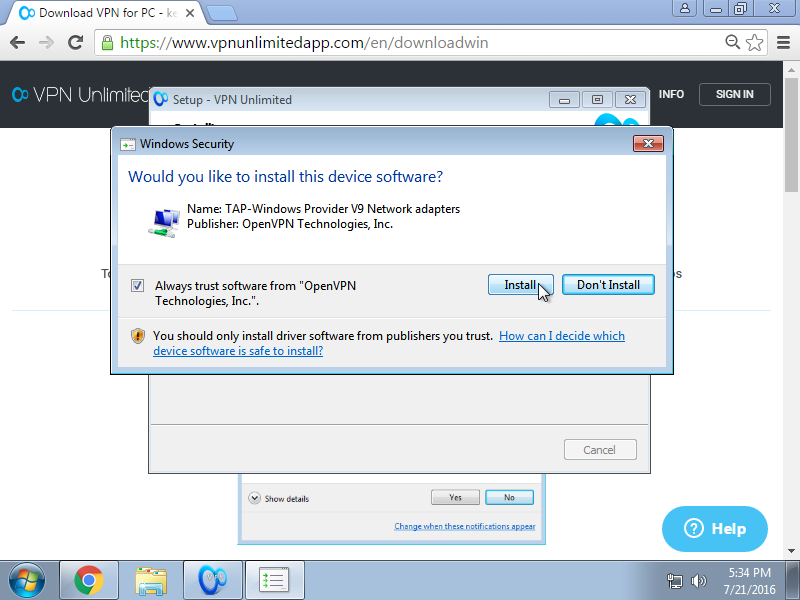
The next step is to install TAP Adapter. To do so, please select the checkbox labeled Always trust software from ”OpenVPN Technologies, Inc.” and click Install.
Click Finish after successful installation.
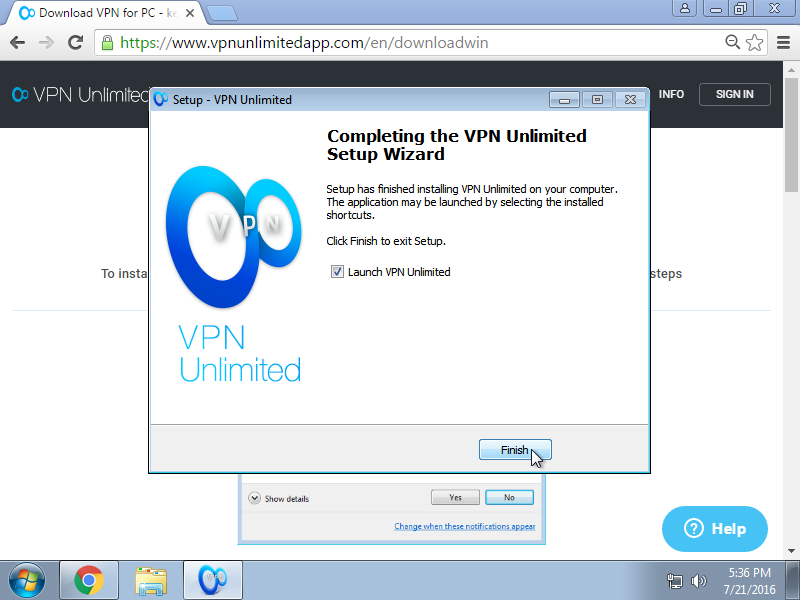
In case you leave the checkbox ticked, VPN Unlimited will launch automatically after you click Finish.
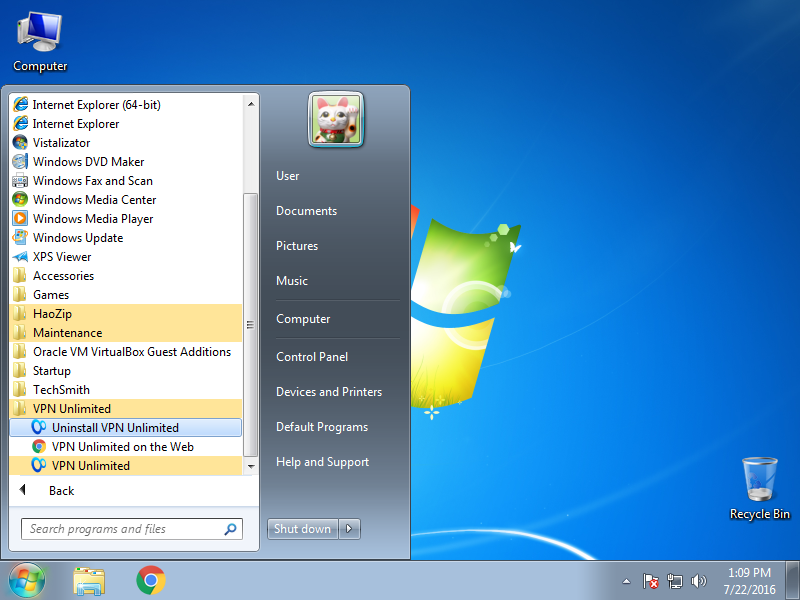
The installer will create a shortcut in the Start menu for launching the program: Start -> All Programs -> VPN Unlimited -> VPN Unlimited
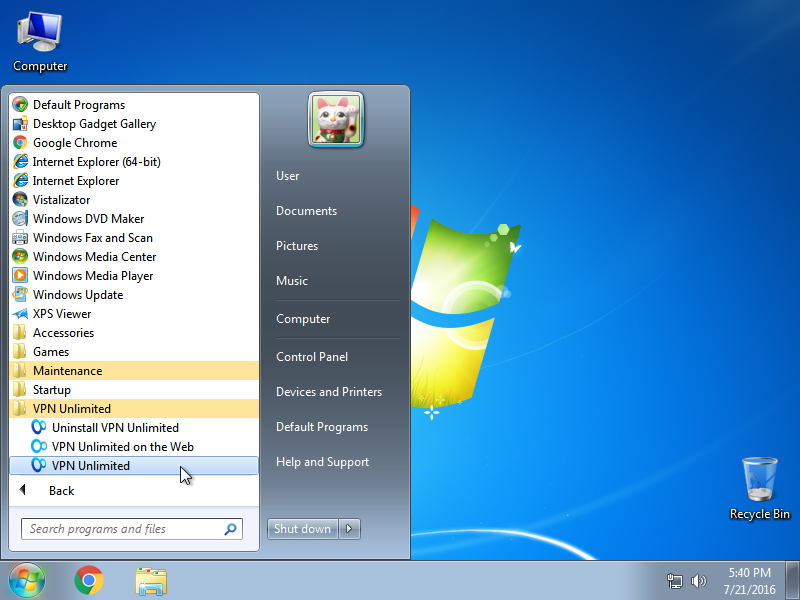
If at the start of the application, Windows Firewall or any other Firewall, installed in the system, requests permission for the open-vpn.exe and vpn-unlimited.exe files to access the network, allow the access.
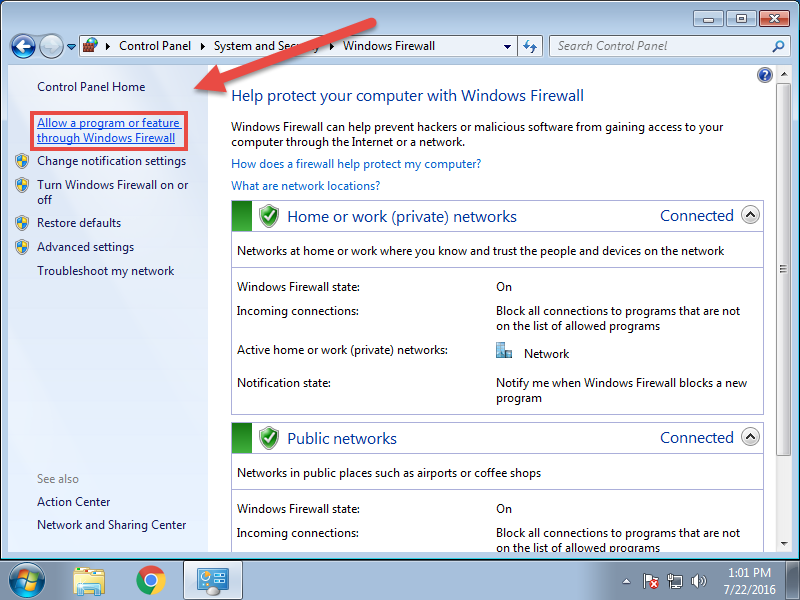
If you accidentally denied access for applications at Windows Firewall, please open Windows Firewall by going to Start -> Control Panel -> Windows Firewall.
Choose Allow a program or feature through Windows Firewall.
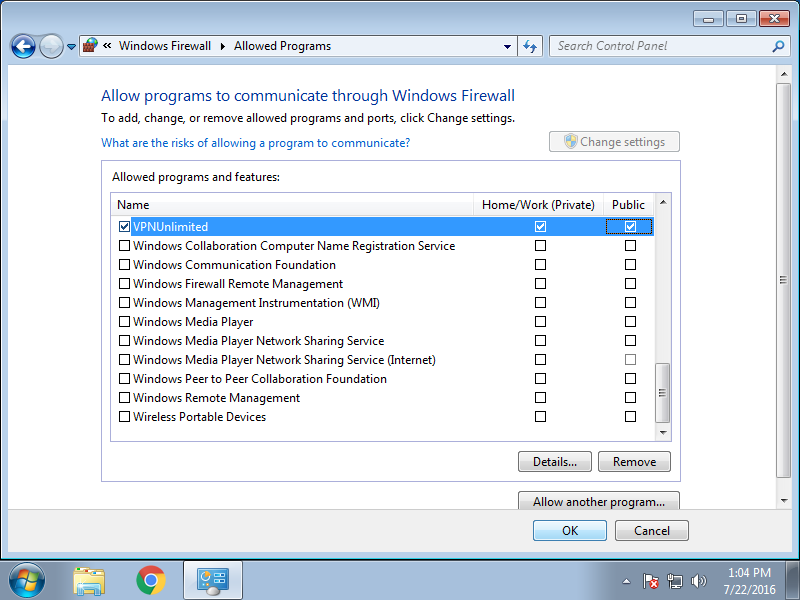
Find VPNUnlimited in the list, click Change settings and tick both checkboxes for VPN Unlimited. Then click OK.
2. Removal of the VPN Unlimited application
To remove the application, please go to Control Panel -> Programs -> Programs and Features. Select VPN Unlimited and click Uninstall.
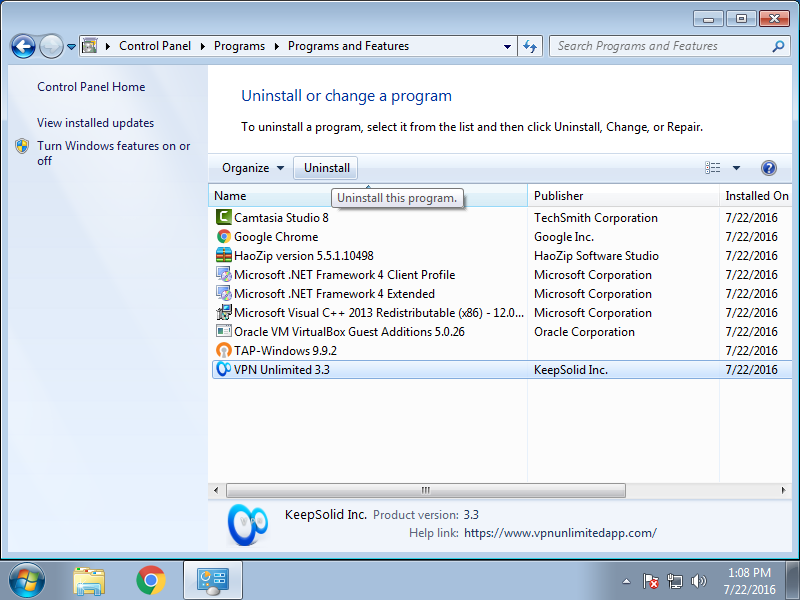
Or go to Start -> All Programs -> VPN Unlimited and choose Uninstall VPN Unlimited
3. Update to the latest version of the application
The program checks for updates automatically every time when starting. However, you can check for a new version manually: right-click on the VPN Unlimited icon in the system tray, and select Check for Update.
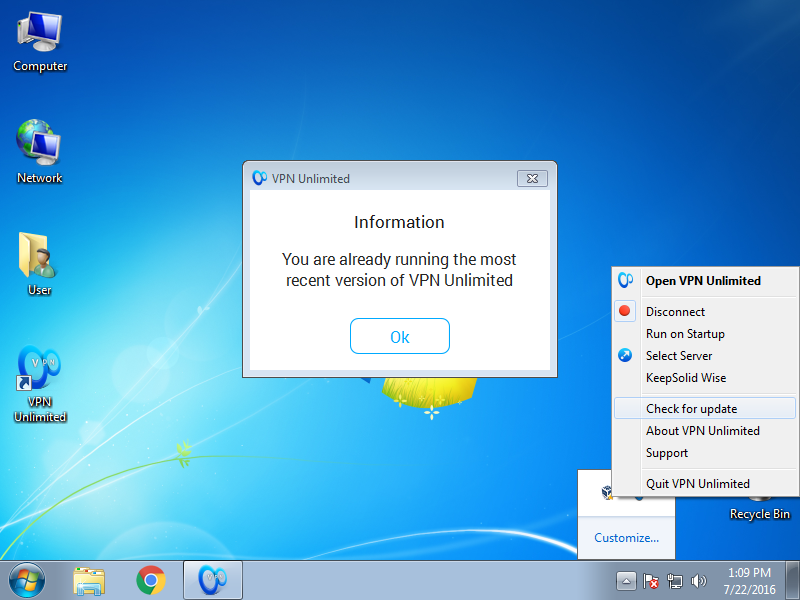
If a new version is available, you will be proposed to download and install it.
If an error occurs during the updating process, you will need to remove the old version of the application as described in section 2.
When the process is completed, install the new version of the application from the website as described in section 1.

