OpenVPN Settings
for Asus RT-N16 router with Tomato Firmware 1.28.0000 MIPSR2-3.1-132 K26 USB VPN
This tutorial guide will walk you through the steps to set up a VPN connection using the OpenVPN protocol on your router with the Tomato firmware, on the example of Asus RT-N16.
As a first step, you need to create manual configuration files. In this regard, please follow a few simple steps described in our tutorial.
In a browser, open the web interface of the router and enter login and password.
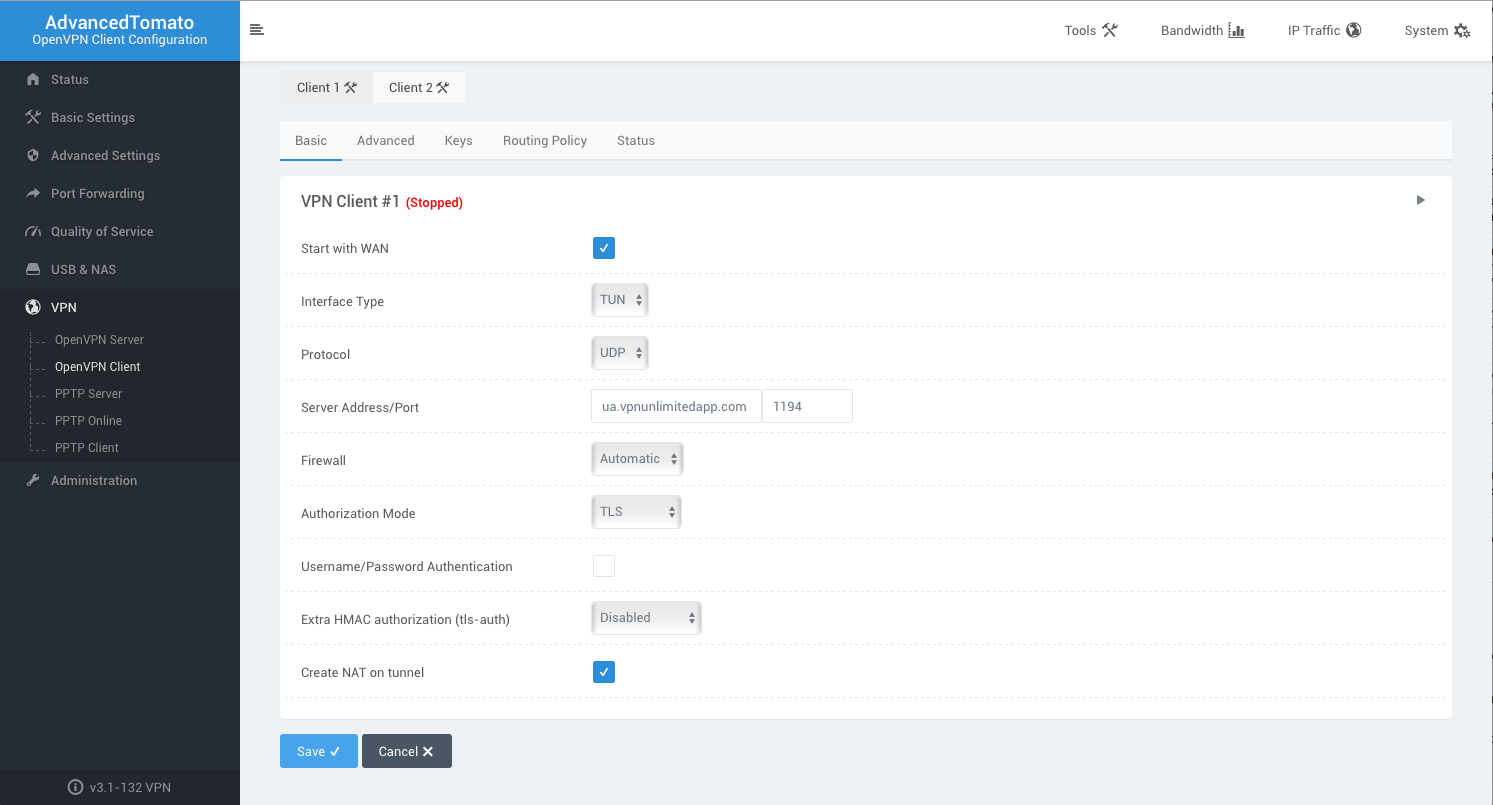
In the side menu, select VPN and go to the OpenVPN Client tab.
Now, complete the fields as follows:
Set the checkbox for Start with WAN.
Interface Type: choose TUN.
Protocol*: choose UDP.
Server Address/Port*: ua.vpnunlimitedapp.com / 1194
Note: We have chosen the Ukrainian server as an example.
Firewall: choose Automatic.
Authorization Mode: choose TLS.
The Username/Password Authentication checkbox should remain unchecked.
Extra HMAC authorization (tls-auth): choose Disabled.
Set the checkbox for Create NAT on tunnel.
In the Custom Configuration field, input the following data:
| Settings 1 | Settings 2 | |
| Server Address | Specify a server name from the created configuration set | |
| Port | 1194 | 80 |
| Protocol | UDP | TCP |
* Depending on the preferred options, enter the appropriate data in the Protocol and Server Address/Port fields.
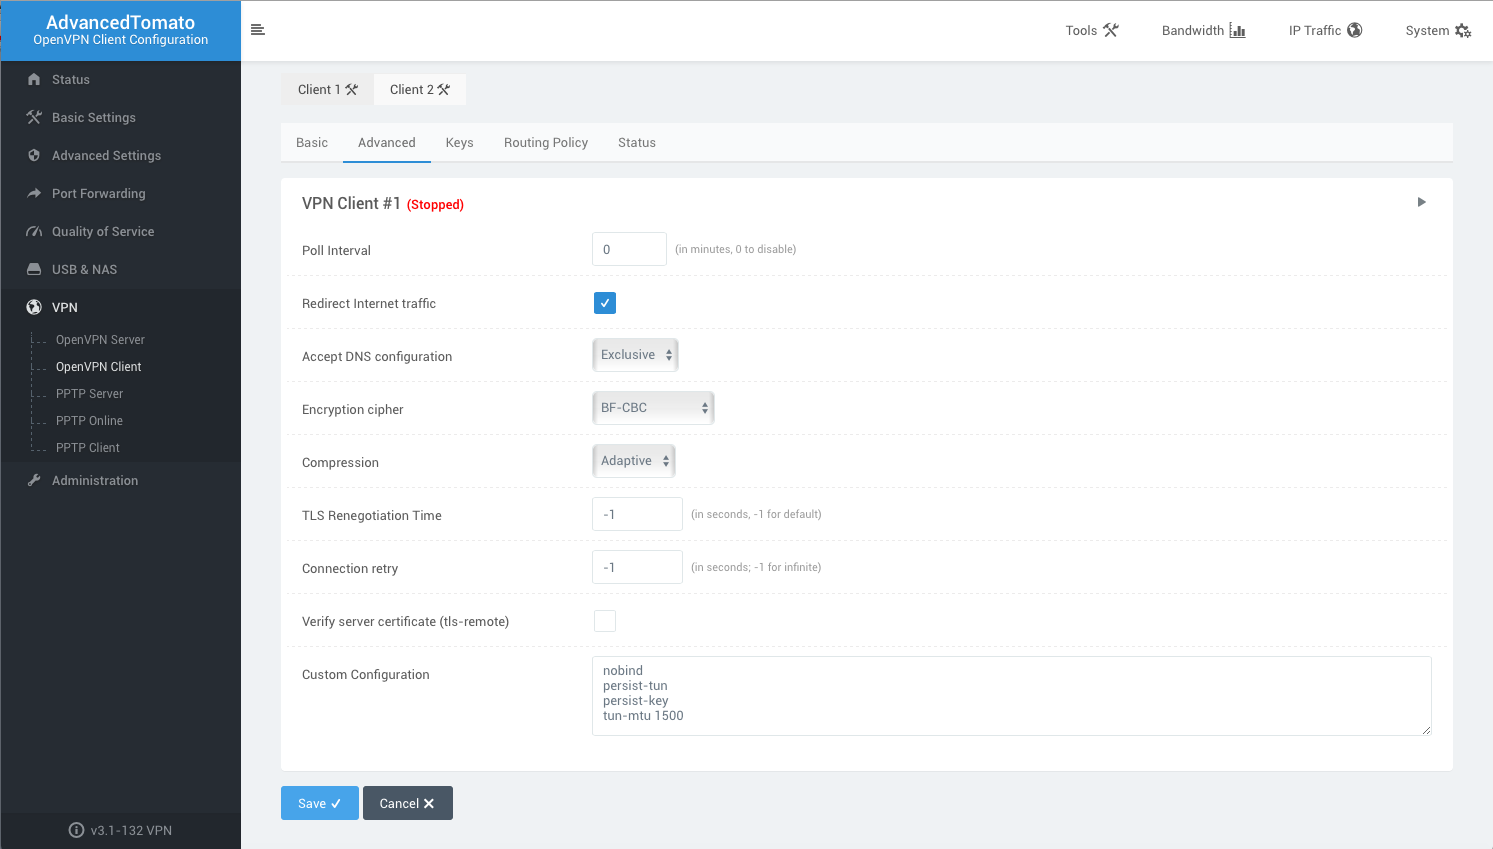
Go to the VPN Client #1 > Advanced tab
Poll Interval: enter 0
Install the Redirect internet traffic checkbox
Accept DNS configuration: choose Exclusive
Encryption cipher: choose BF-CBC
Compression: choose Adaptive
TLS Renegotiation Time: enter -1
Connection retry: enter -1
The Verify server certificate (tls-remote) checkbox should not be installed
In the Custom Configuration field, input the following data:
    nobind
    persist-tun
    persist-key
    tun-mtu 1500
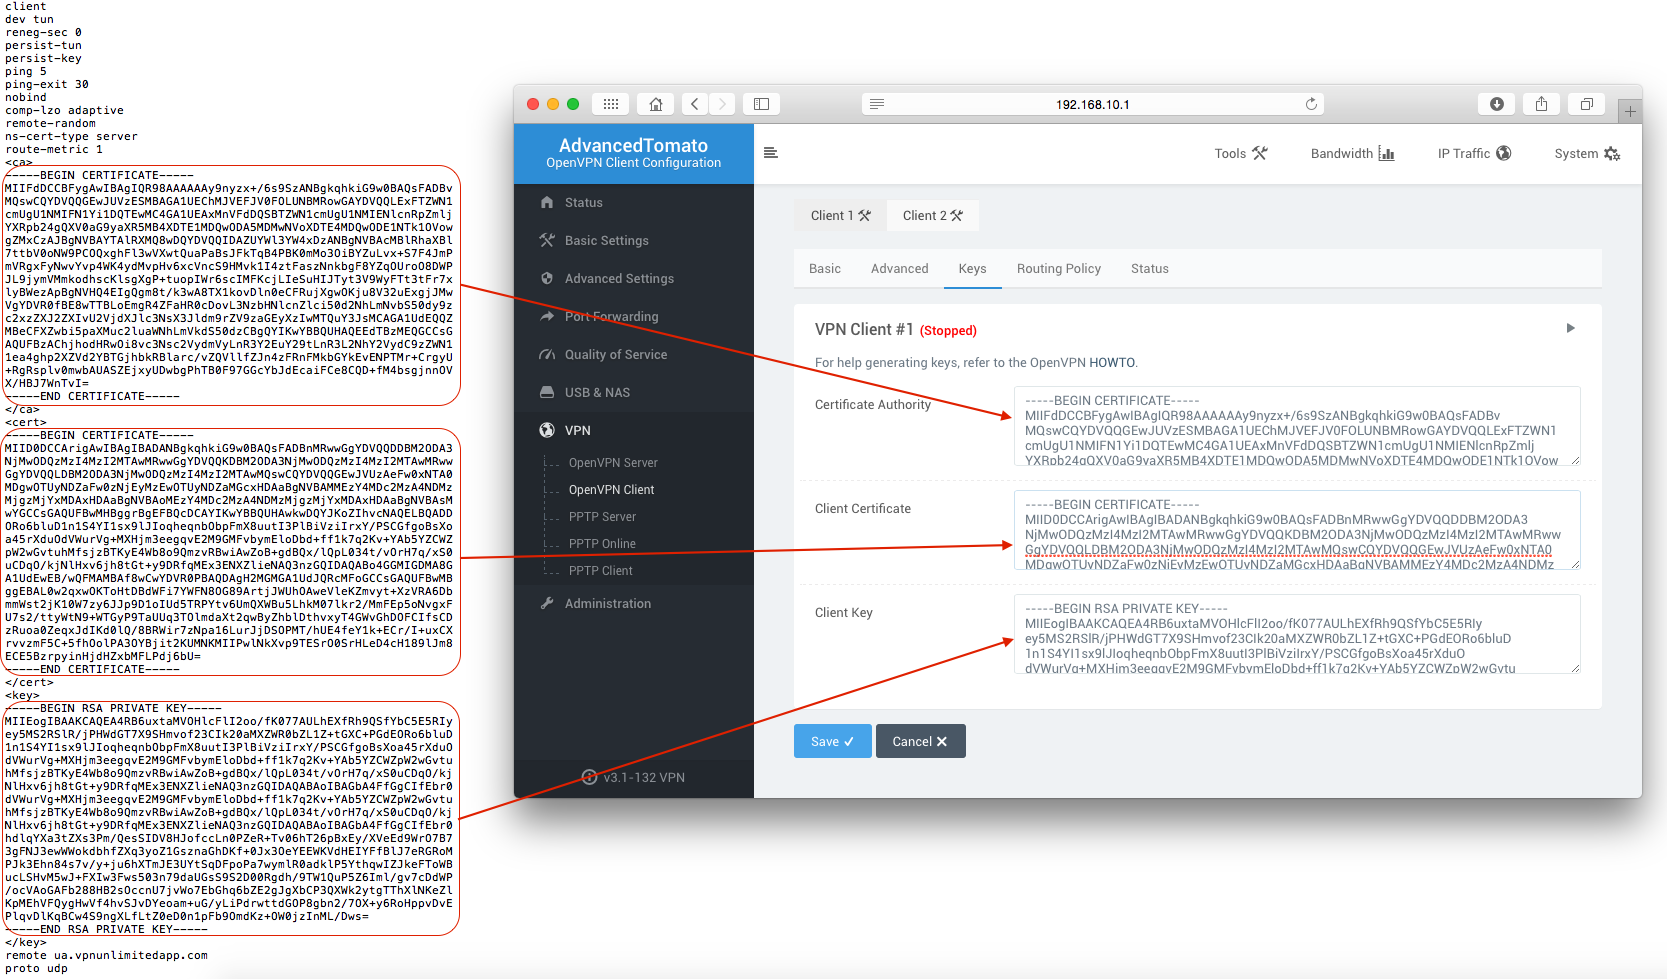
Go to the VPN Client #1 > Keys tab
Select data between <tag> and </tag> in the configuration file, and paste it to the relevant field.
Certificate Authority –<ca> text from the configuration file </ca>
Client Certificate - <cert> text from the configuration file </cert>
Client Key - <key> text from the configuration file </key>
Now click Save and then Start VPN Client 1.
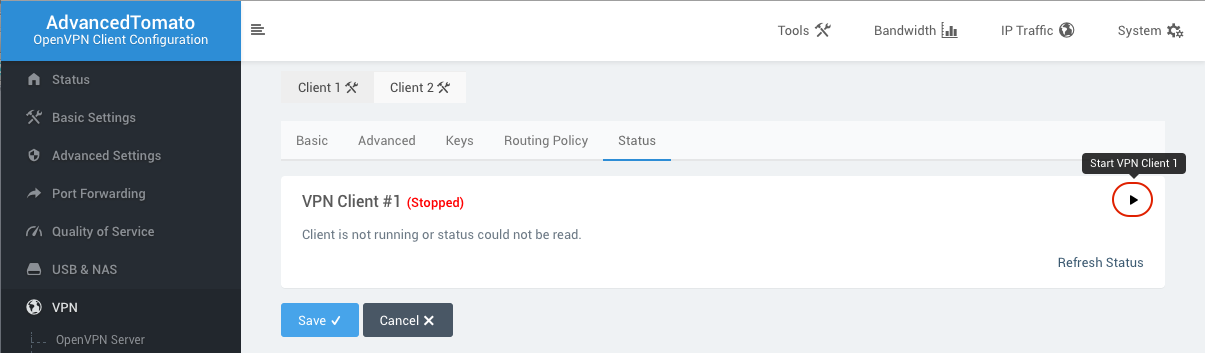
Wait for the status VPN Client #1(Running).
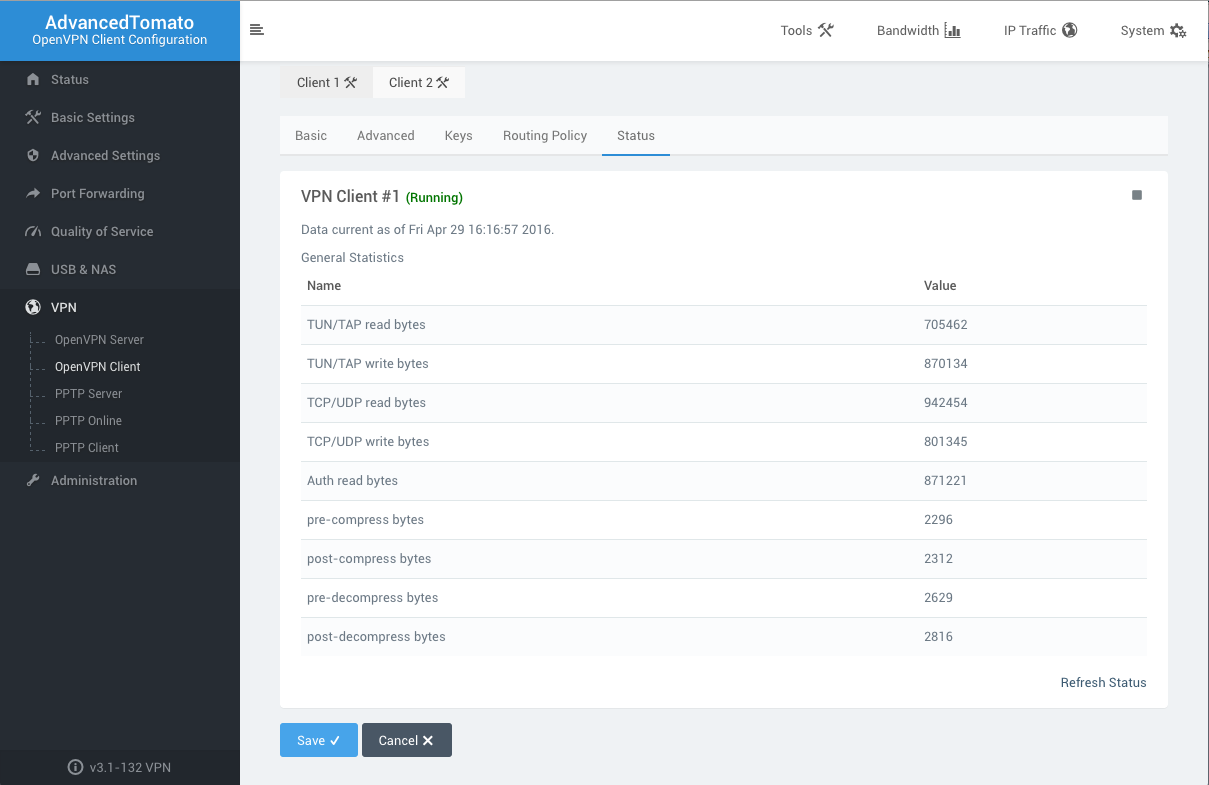
To review the connection status go to the VPN Client #1 > Status tab.
That’s it! Now you have a running VPN connection on your router.