PPTP connection in GNOME 3 environment on Linux
(Ubuntu, Fedora, Debian-gnome3, other gnome3 distributions)
The following guide relies on the fully functional Network Manager applet (proper for Ubuntu and Fedora 23+), and explains how to set-up a PPTP connection to the VPN Unlimited servers using the Network Manager bundled with the GNOME 3 desktop environment, present on many GNU Linux operating system distributions.
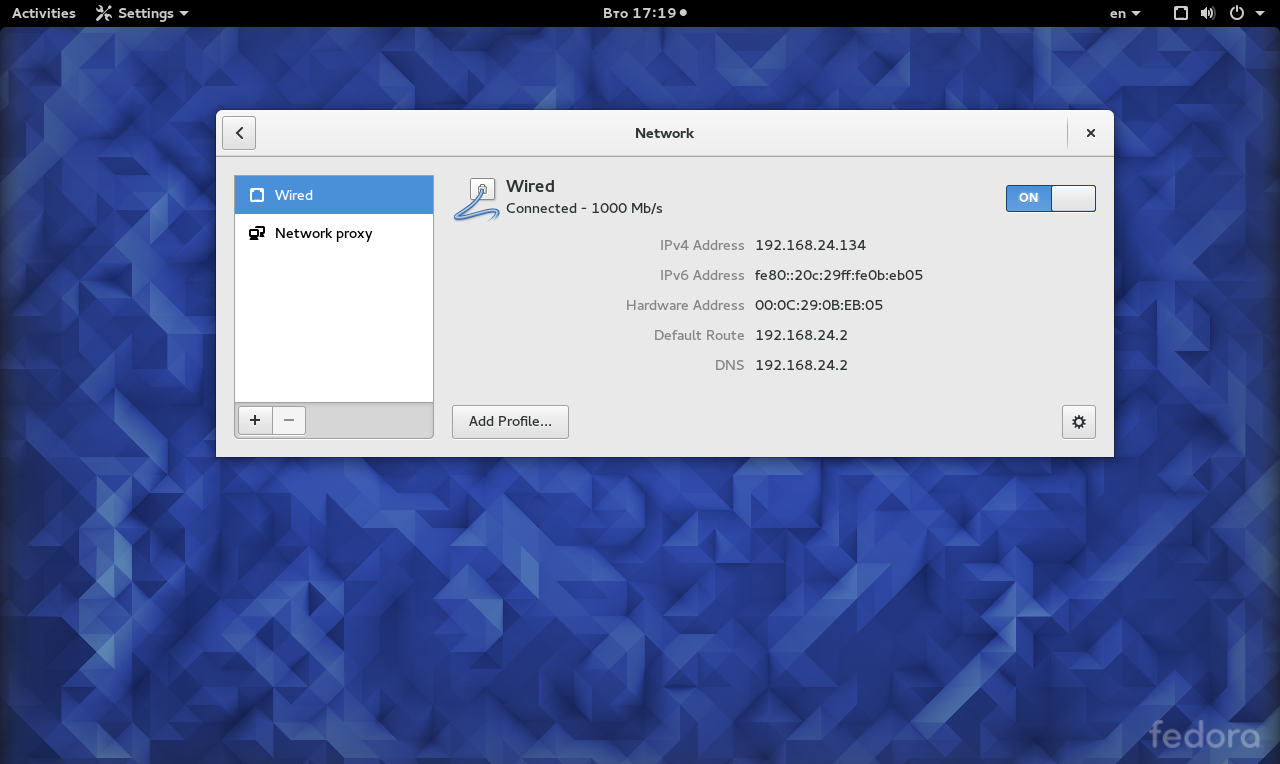
1. Open the network manager
To set-up a PPTP connection on Fedora 23, left-click the top right corner of the GNOME screen. Then, choose the network adapter name, and select “Wired settings”. Your particular Linux distribution can have a slightly different way of launching the Network Manager.
When you succeed, you will see the following window (the design may vary, depending on your Linux distribution):
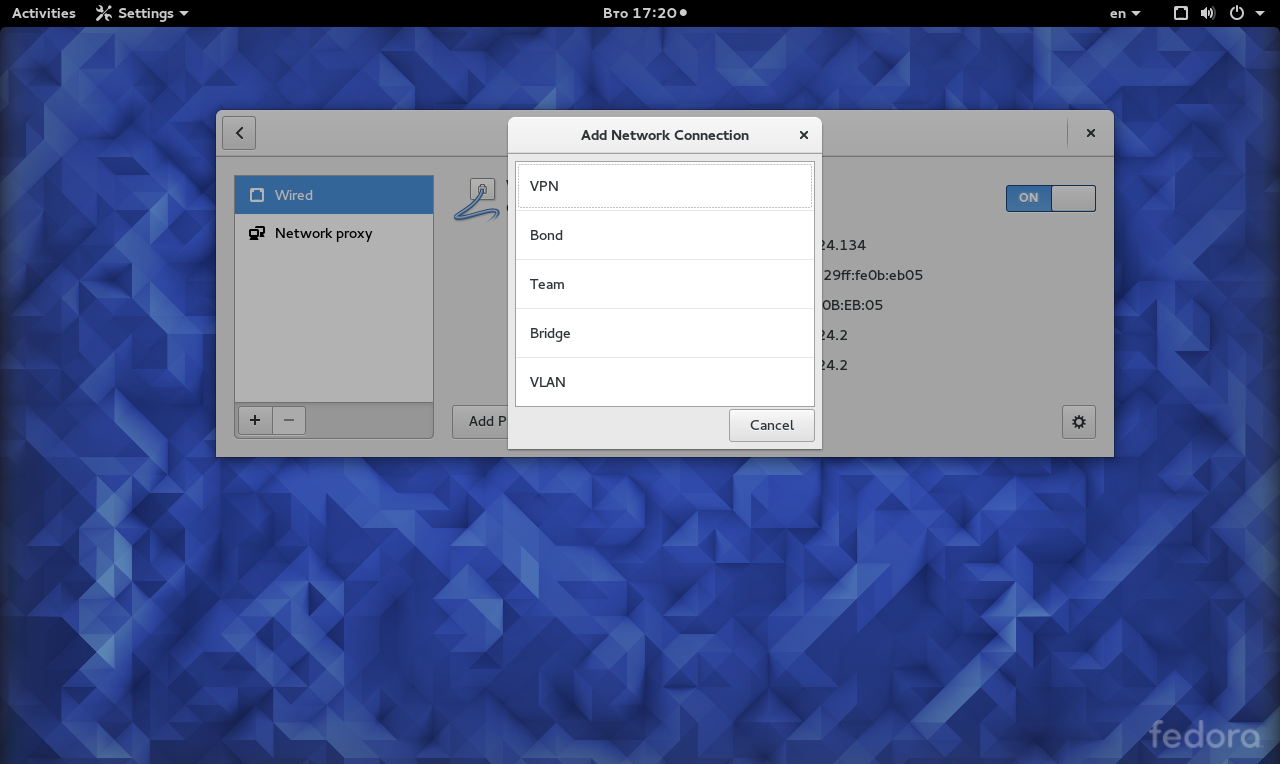
2. Click “Plus” (+) in the bottom-left corner of the window. Then, select “VPN” in the menu options as seen on the picture.
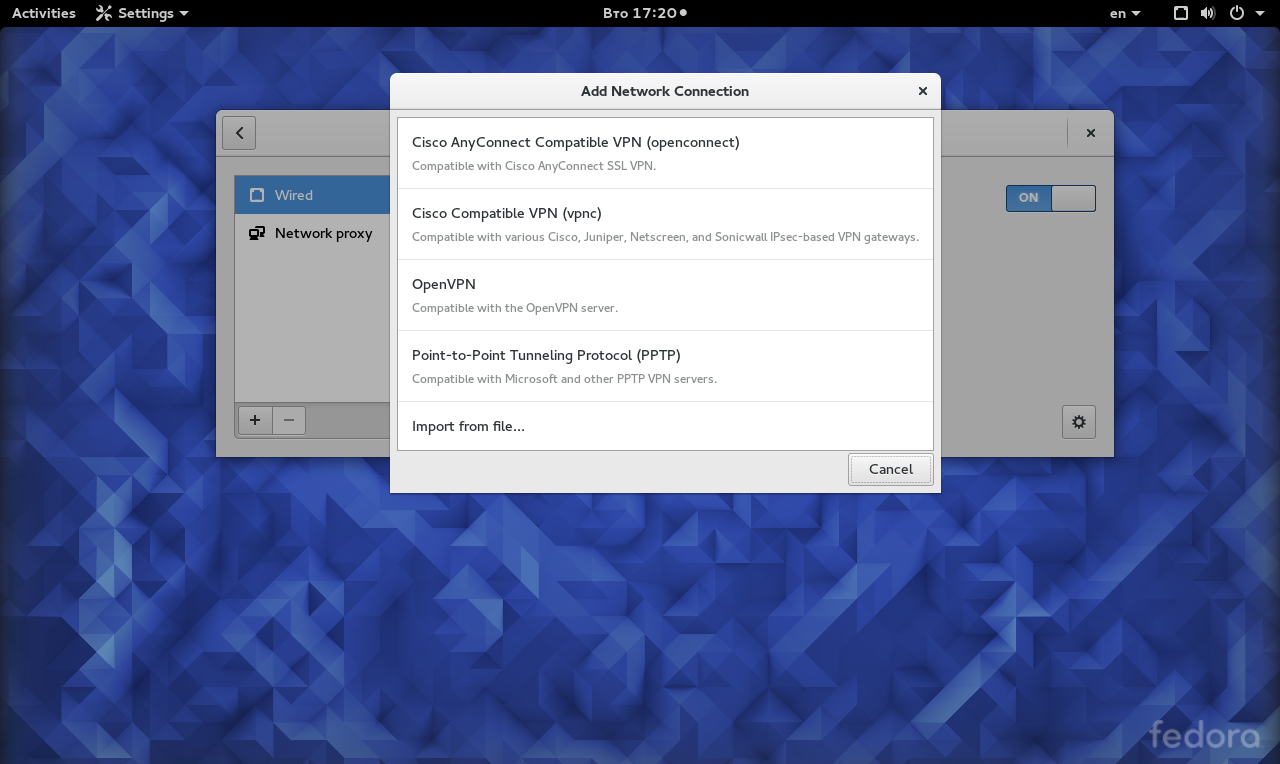
3. In the next window, choose “Point-to-Point Tunneling Protocol (PPTP)”.
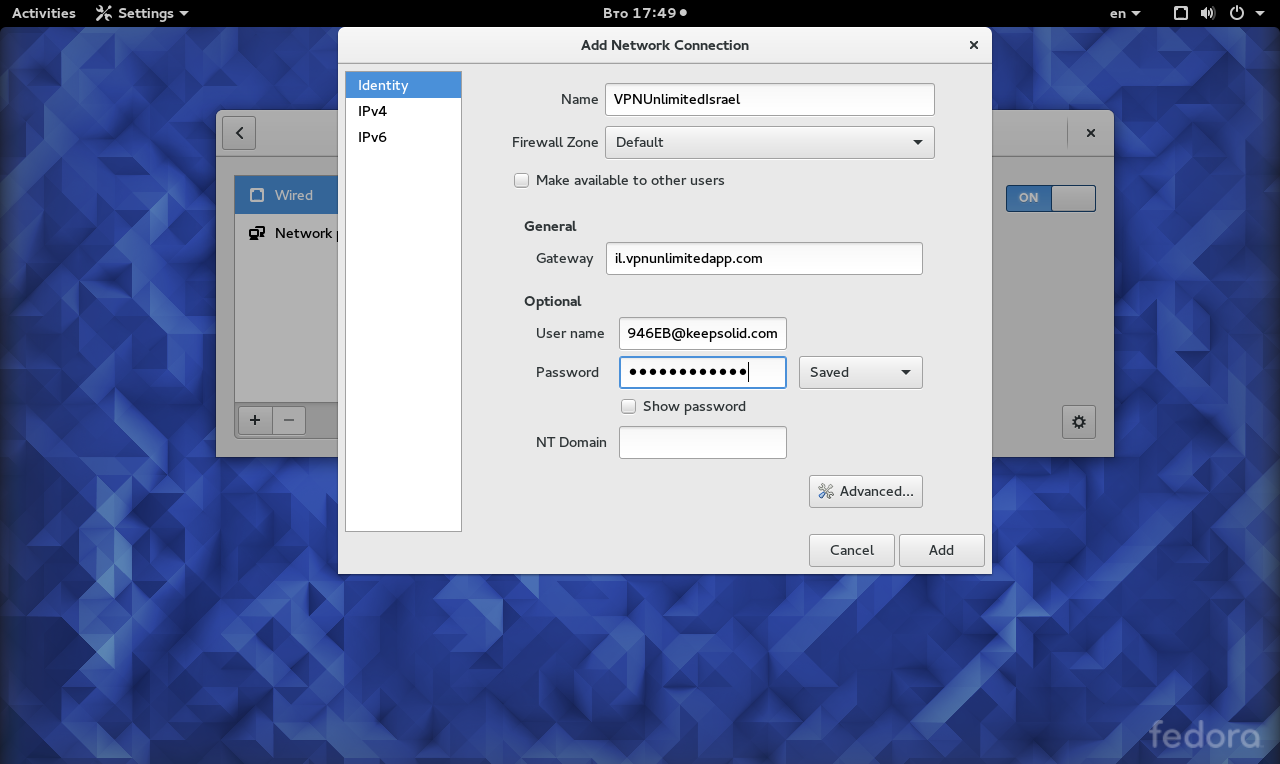
4. That menu selection will bring up the following window (see the below picture).
Here you will need to apply the VPN configuration settings that you have created. Click here to learn how to create them on your own.
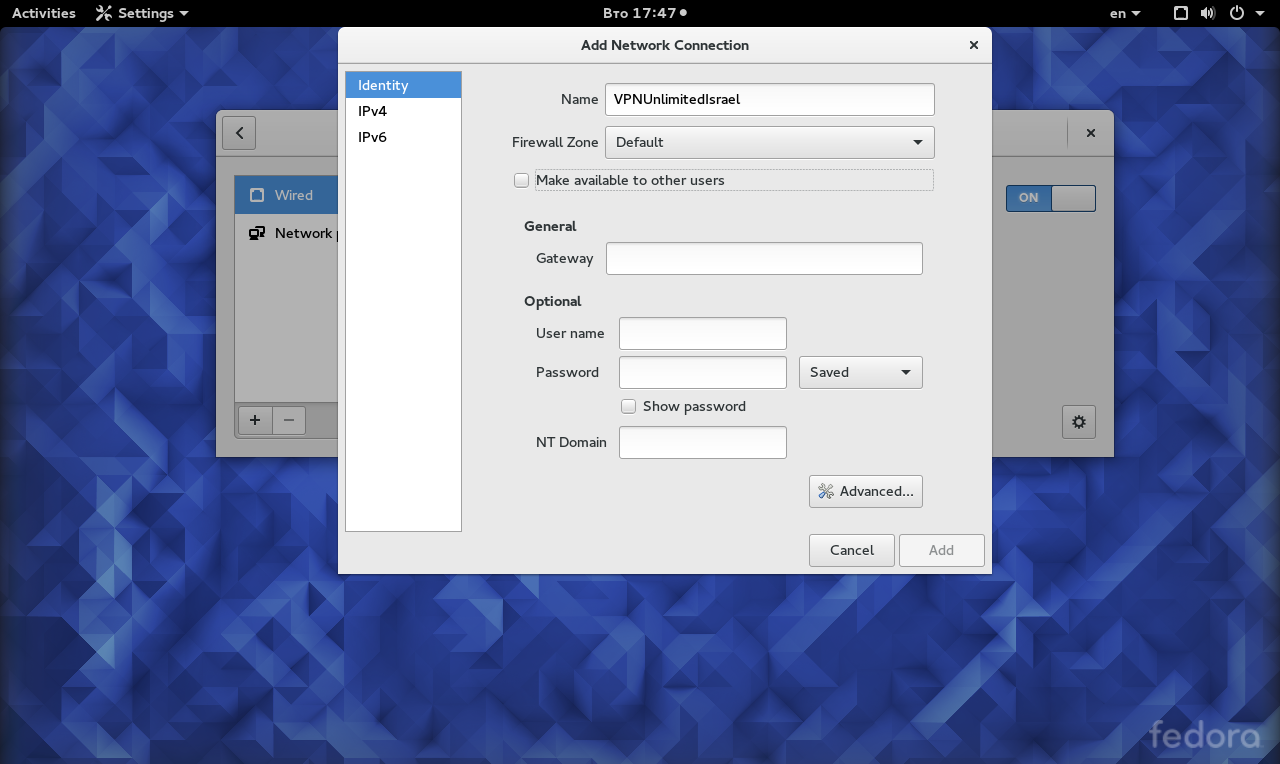
The “Name” field may contain any string you like. You can view it while turning the connection on and off. Here, it is called “VPNUnlimitedIsrael” just as an example.
The “Gateway” field should contain the server name from the Domain name line in the generated configuration settings.
In the “User name” field, you should paste the login provided in the created configuration set. A dot or a comma at the end of the login is NOT a part of it.
In the “Password” field, you should paste the password from the created configuration set.
Please, be careful while copying and pasting a login and a password. One missed digit can cause the authentication to fail.
In the drop-down menu, next to the password field, you can change the password policy. Whether you would like the Network Manager to remember your password so that you will only need to flip the switch to enable a VPN, or you would like to enhance your protection by typing-in your password every time starting the application. You always can apply the suitable settings here.
When you are done, the window should look like this.
5. After you complete to fill the main settings, please click “Advanced”. The completion of these fields is essential in order to get a PPTP VPN connection working.
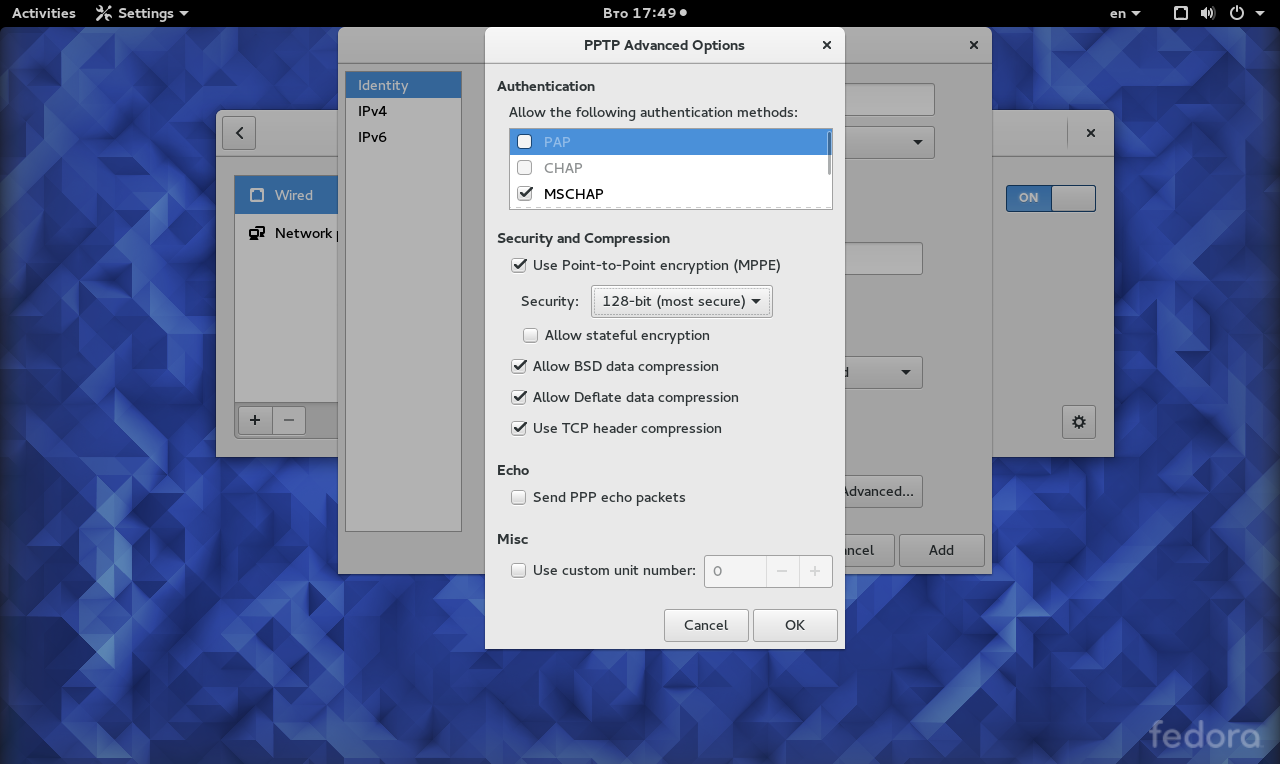
First of all, disable “PAP” and “CHAP” authentication methods.
Then, enable “Point-to-Point encryption (MPPE)”, and choose the “128-bit (most secure)” encryption.
When your configuration is done, click “OK”.
Then, click “Add”.
You should now have a configured VPN connection looking like this:
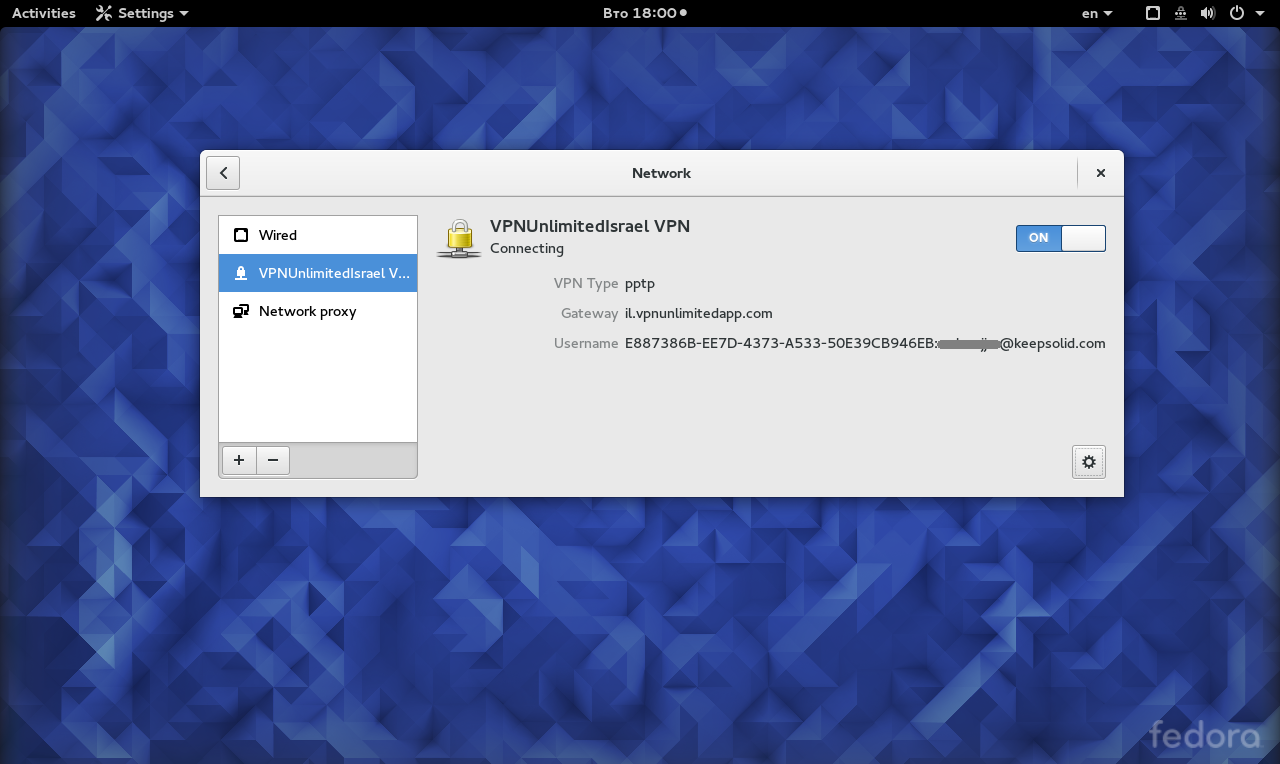
Whenever you need it, you will be able to turn it On or Off.
On many Linux distributions, you can do it from the top-right menu.