IKEv2 configuration guide for all major platforms
IKEv2 proves itself to be extremely secure while also demonstrating high stability and performance speed. Therefore, it will be no wonder if you decide to use it on your device. This guide will walk you through the IKEv2 setup on the most popular platforms, such as iOS, macOS, and Windows. So let's start!
First of all, you need to create manual configuration files. In this regard, please follow a few simple steps described in our tutorial.
Please note that this option is considered equivalent to 1 active device, therefore occupies 1 slot.
Now, choose your platform and follow a few simple steps.
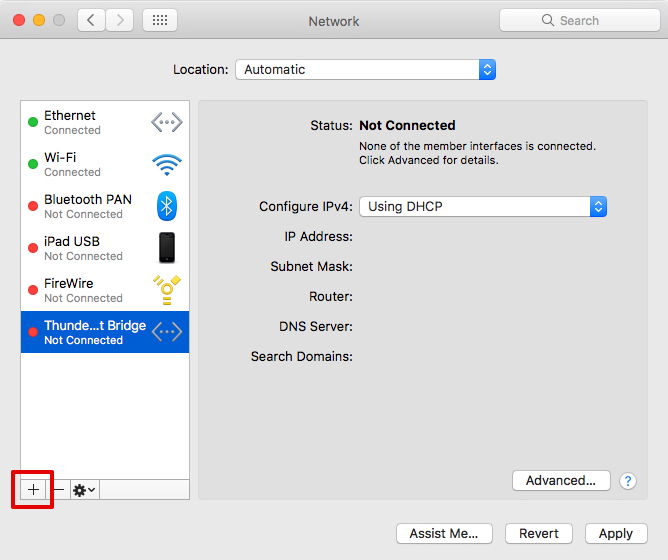
1. Go to System Preferences > Network.
2. Click  to create a new service.
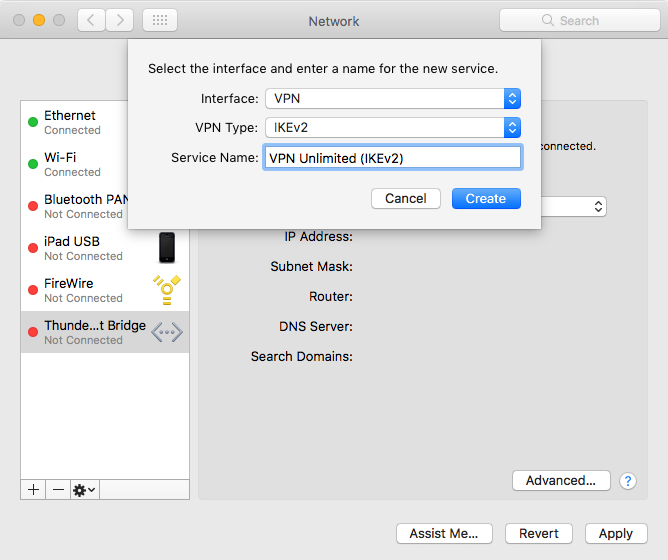
3. Set the following data:
Select VPN for Interface
Select IKEv2 for VPN Type
Enter the desired Service Name, for instance, VPN Unlimited (IKEv2)
When you finish, click Create.
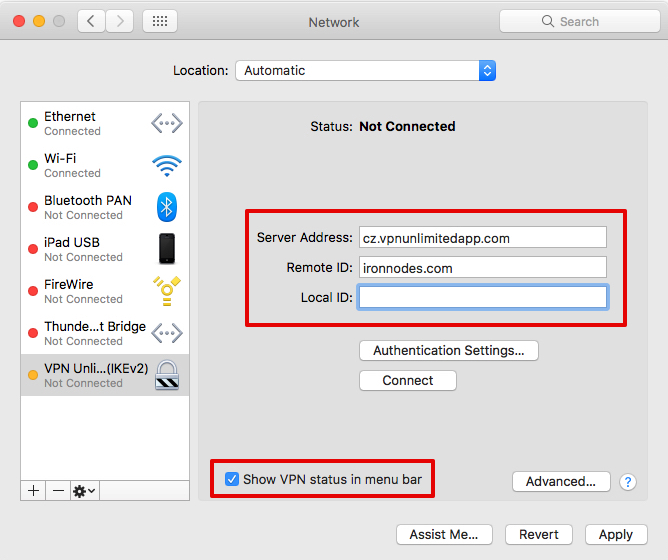
4. Input the following data:
Server Address: enter the desired server address from the provided list
Remote ID: enter ironnodes.com
Local ID: leave this field empty
Set a checkbox for Show VPN status in menu bar
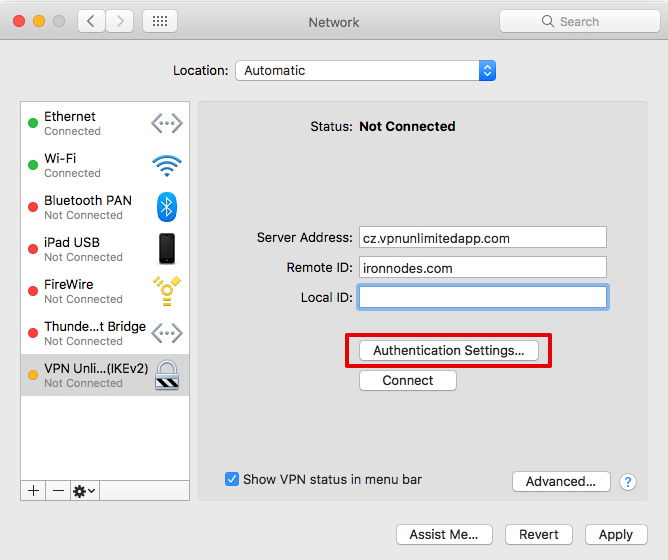
5. On the same screen, click Authentication Settings and input the following data:
Keep Username selected
Enter Username provided by VPN Unlimited
Enter Password provided by VPN Unlimited
When you finish, click OK and then Apply.
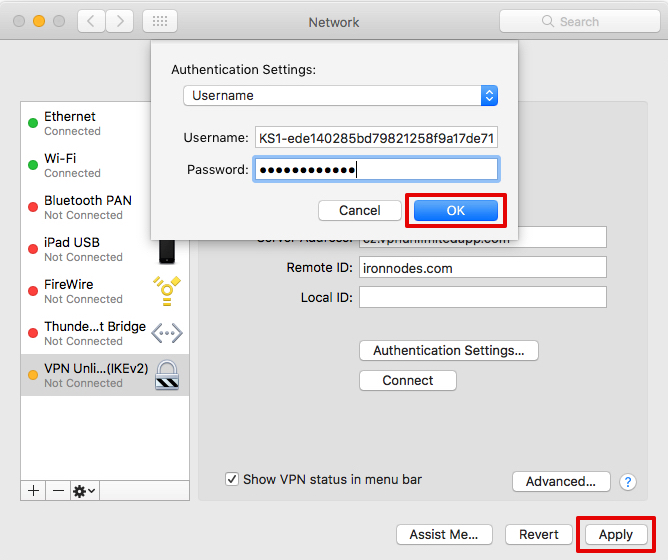
6. Click Connect and the VPN connection will be established in few seconds.
That's about it. Now you have a running VPN connection through the IKEv2 protocol.
Important! Please note that you will need to configure your device using the generated settings by yourself at your own risk.

